
taken from ctmh's blog...
Drawing Shapes in Cricut Design Space™
Each Close To My Heart Cricut® collection has hundreds of shapes that you can adapt for any project. We’ve shown you some ways you can use Design Space to cut shapes for your scrapbook pages, and today we have another tutorial to expand your creative options with your Cricut®images by changing images from cut to DRAW. This allows you to use the same fonts and shapes to draw a title, journaling, or a background!
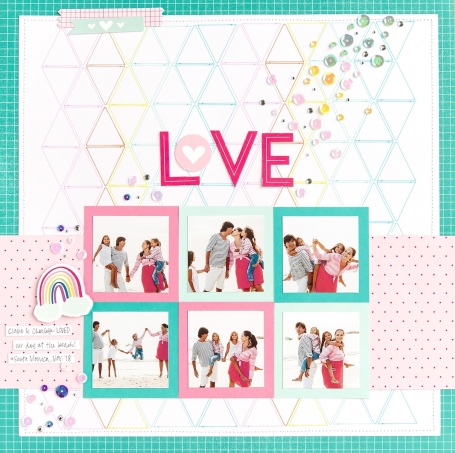
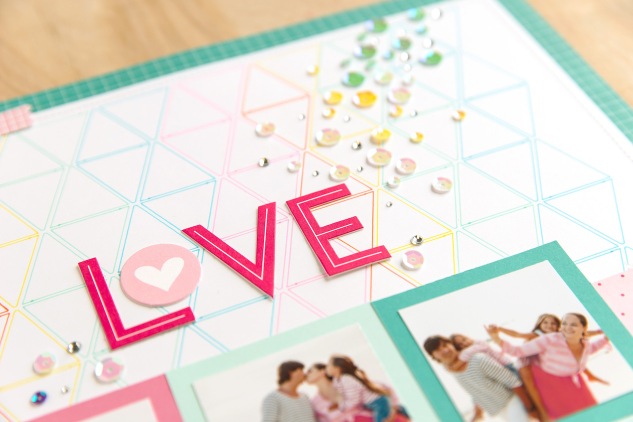
Switching an image from cut to draw in Design Space is very simple. You just click on your shape and change Cut to Draw in the Edit bar above your canvas. Today we are going to walk you through how to make the multicolor triangle background that you see in the page above by using the tools in Design Space to draw, rather than cut, this design.
Keep in mind, to use the same image we did, you must own the You Are Here Cricut® collection. You will also need a Cricut® machine that is Design Space compatible (any of the Explore or the new Maker machines) and allows you to draw with pens. The steps below show you how to work in Design Space from a desktop or laptop computer. If you use the app on a mobile device, the buttons and tools will be located in slightly different places on your screen, but the same features are available on any device.
1. Sign in to Cricut Design Space™ at design.cricut.com.
Log in with your Cricut ID and password, and then select the green New Project button in the top right corner.
2. Insert and resize a basic square shape. Then color the square.
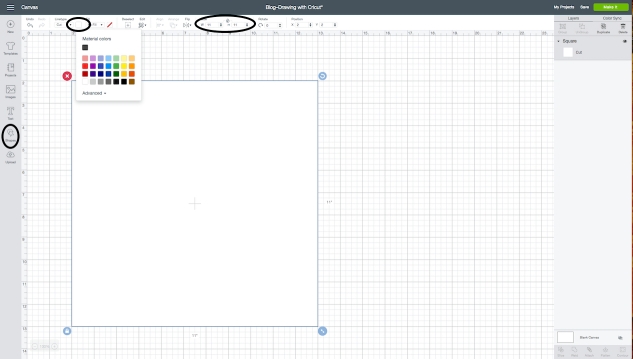
To make the base for the design, you will first insert a square by clicking on Shapes on the left side of your screen. Then add a square to your canvas. You can easily resize this square to 11 by adjusting the width. Make sure to leave the lock icon locked so that the height automatically resizes when you change the width.
In the Edit bar, next to Linetype, select the colored square and change the material color to white. We decided to work with white since we know we’re going to use White Daisy cardstock as the base for the design, and it makes the pattern easier to see as you build it on your canvas.
3. Insert and ungroup the triangle flag. Then delete the extra shape.

The background uses a triangle flag shape from the You Are Here collection. Click Images to add new image to the canvas. Search for the image using #M282C66F and add it to your canvas. Then click on the flag and select UnGroup in the Layers panel on the right. Once you have separated the shape into two images, you can delete the purple flag. We’re only going to use the triangle shape.
4. Resize, duplicate, and flip the triangle.
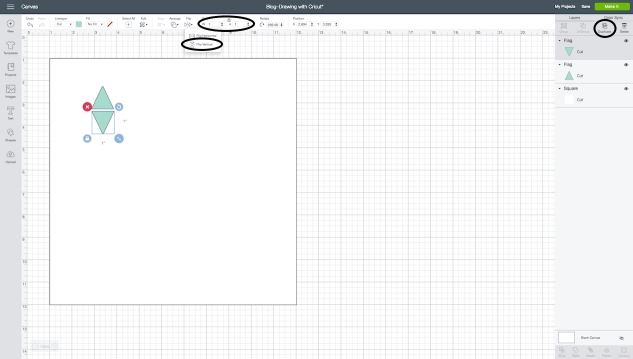
Resize both the width and height of the triangle to 1. Make sure to unlock the image size so that Design Space lets you modify both. Just click on the lock above the measurements. Then select the triangle and then click Duplicate in the Layers panel. To flip the shape, select the second triangle, and under Flip in the Edit bar, select Flip Vertically.
5. Arrange and group both triangles together.
Now that you have two triangles. Line them up vertically, with a small space in between. Then click the first triangle, hold down the shift key on your keyboard, and click the second triangle. Then select Group in the Layers panel.
6. Duplicate the triangles and arrange in a row, centering horizontally.
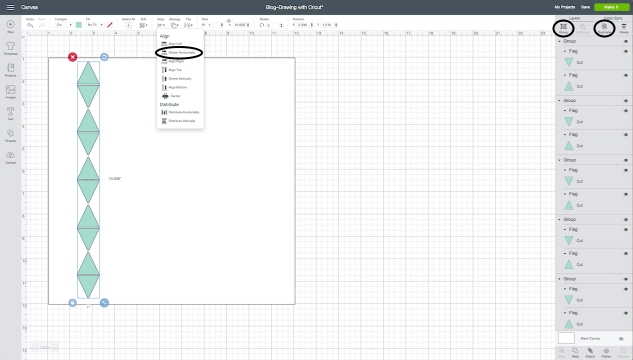
Duplicate the grouped triangles five times and arrange them in a row. You can center these shapes by first selecting all five set of triangles. Just like in step 6, you can do this by holding down the shift key on your keyboard. Then select Center Horizontally under Align in the Edit bar.
7. Duplicate the triangle row eight times.
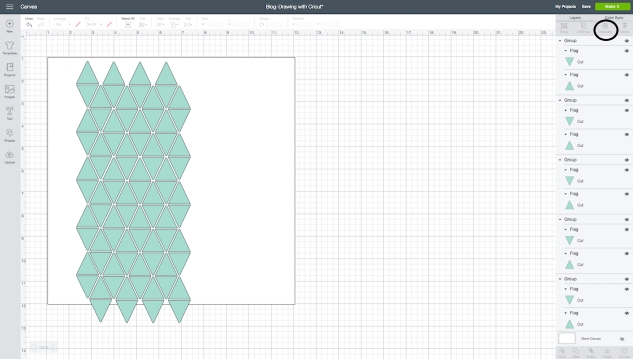
When you have one row of triangles, duplicate the row and arrange as shown above. You’ll need eight rows, with a small amount of space in between each one.
8. Even out the top and bottom rows of triangles.
Once you have your rows arranged, you might notice that part of the design isn’t going to fit on the white square. To fix this, you’ll use the UnGroup button in the Layers panel to separate the bottom set of triangles, and move the last triangle from the bottom of the design to the top. This will give you straight edges along the top and bottom, just like you see in the screenshot above.
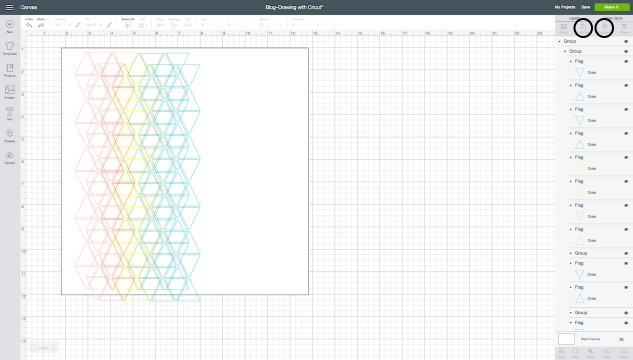
9. Change cut to draw and add pen color.


With your first set of triangles ready to go, you can now change the Linetype in the Edit bar from Cut to Draw. Then click on the box next to Draw. This is where you can choose the pen size and color.
We used the Cricut® Sorbet fine point pen set for this project. The pen color for the triangles in the first two rows is Cactus Pink. The third row is Adobe. The fourth row is Yellow. The fifth and sixth rows are Light Green, and the seventh and eighth are Light Turquoise. We’ve found that it’s easiest to use Cricut® pens since they are designed to work especially with their machines.
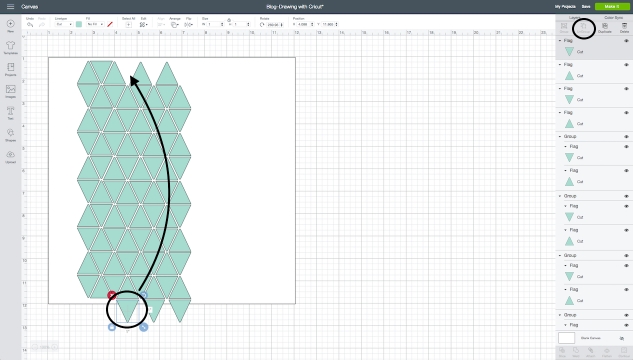
10. Group nine rows of colored triangles together and duplicate.
To make the remaining half of the background, all you have to do now is click and drag your cursor over the rows. Then group the rows together and duplicate. Just move this new group of triangles next to the first one, keeping them evenly spaced.
11. Group all rows of colored triangles together. Then align and attach to the white square.
Make sure to group all the triangles together, and then select both the grouped triangles and the white square. Under Align, click Center. This will center the triangles on the square. Then select Attach at the bottom of the Layers panel. This ensures the shapes will draw exactly as you’ve arranged them on the square.
12. Cut AND draw your project!


When you’re ready to draw the design and cut the White Daisy cardstock, click the green Make Itbutton in the top right corner and follow the prompts. You’ll need to load the correct pen color in Clamp A of your machine. Design Space will tell you which pen to use first, and then as your machine draws the design, it will prompt you to switch to the next color. When you’re done, you’ll have a bright multicolor background for your page.
Changing your Close To My Heart shapes from cut to draw will give your scrapbook pages a different look and feel then using cut shapes. You could even use this concept to draw a background or write a personalized sentiment on a card. Take some time to try this out with your favorite Close To My Heart Cricut® collections. The possibilities are endless!
No comments:
Post a Comment
Thanks for showing some {{{love}}}....