Thursday, July 27, 2017

Overwhelmed by photos...check this out!

Taken from CTMH's Blog...


How to Organize Years of Photos Without Getting Overwhelmed

How to organize years of photos without getting overwhelmed #ctmh #closetomyheart #scrapbooking #photos #organize #digital #persnicketyprints #organization
When it comes to scrapbooking, one of the biggest hold-ups for people is feeling overwhelmed with organizing their photos. If you have years of photos piled up on your computer or photos spread between multiple devices, it can be easy to put off preserving your memories. The longer you wait to organize your photos, the more overwhelming it will become—so now is the time to start!
Because we believe in the importance of memory keeping, we want to help make the task easier, so today we’re going to walk you step-by-step through how to efficiently organize your digital photos for scrapbooking. It’s a process that may take some time, but which will be well worth it when your memories are all in order!
To give you an added incentive for getting started, we’ve teamed up with Persnickety Prints to get you a discount code for printing your photos so you can catch up AND save money! Continue reading for more details. ðŸ™‚

Step One: Consolidate Your Digital Photos

Upload all of your digital photos to one location on your computer. We recommend using a photo managing system, like Google Photos or iPhotos, to easily transfer photos from your phone onto your computer. If you haven’t transferred them already, go through the photos on your phone, your camera, and upload them all to this one location.

Step Two: Eliminate Unwanted Photos

Once you have all of your photos in one place, go through and eliminate any that aren’t worth keeping: repeats, photos with a blurry finger covering half the lens, photos of your to-do lists, etc.
Tip: Moving forward, make it a habit to do a Daily Delete—every day, go through the photos on your phone (or camera if you took pictures on it that day) and delete any of these types of photos. It will take you two seconds and save you tons of time down the road. You’ll be able to skip step two entirely in the future!
Another tip: Use the time traveling home from a vacation to do your deleting. That way when you get home, you’ll have already eliminated all the photos from your trip you don’t want to keep. Plus, it’s a fun way to relive those memories again while you’re heading home.

Step Three: Organize Your Digital Photos

In your photo managing system, create folders for each month and year. Then place the corresponding photos in these folders.

Step Four: Back Up Your Digital Photos

Back up all the photos in your photo managing system onto a CD or external hard drive. You can also look into online options, such as iCloud, Dropbox, or Google Drive.

Step Five: Create To-Print Folders

Once you have organized your photos in your photo managing system, you’re ready to start thinking about scrapbooking them—woohoo! Even though all the photos you have left are photos you have deemed worth keeping, you may not want to scrapbook all of them. A great way to figure out which photos you want to scrapbook is to copy and paste a given folder onto your desktop. Then go through and delete any photos you don’t want to print. You can also edit any of the photos you’re going to print if you want to take that extra step.

Step Six: Upload & Print Photos

Once you’ve gone through all the photos on your desktop folder, you’re ready to print! We recommend creating a table, like the one below, to track each folder’s progress. When you have printed your photos, you can delete the desktop folder you created (remember, you’ve already saved these photos elsewhere!).How to organize years of photos without getting overwhelmed #ctmh #closetomyheart #scrapbooking #photos #organize #digital #persnicketyprints #organization
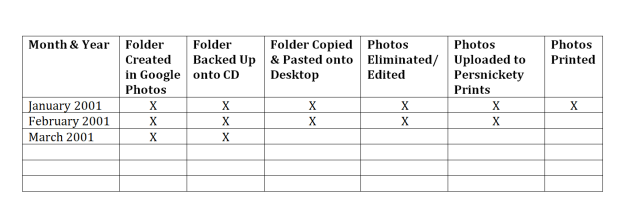
Tip: Choose one day every month to do a print run. Some months you may be able to afford printing more photos than other months, but get in the habit of printing your photos on the same day each month.
PHOTO DISCOUNT: Now is a great time to catch up on printing your photos because Persnickety Prints has been kind enough to create a discount code for our readers! Use this discount code to save 20% on your entire order: CTMH20
This code expires August 30, cannot be combined with other discount codes, and is limited to one use per customer.

Step Seven: Organize Printed Photos

How to organize years of photos without getting overwhelmed #ctmh #closetomyheart #scrapbooking #photos #organize #digital #persnicketyprints #organization
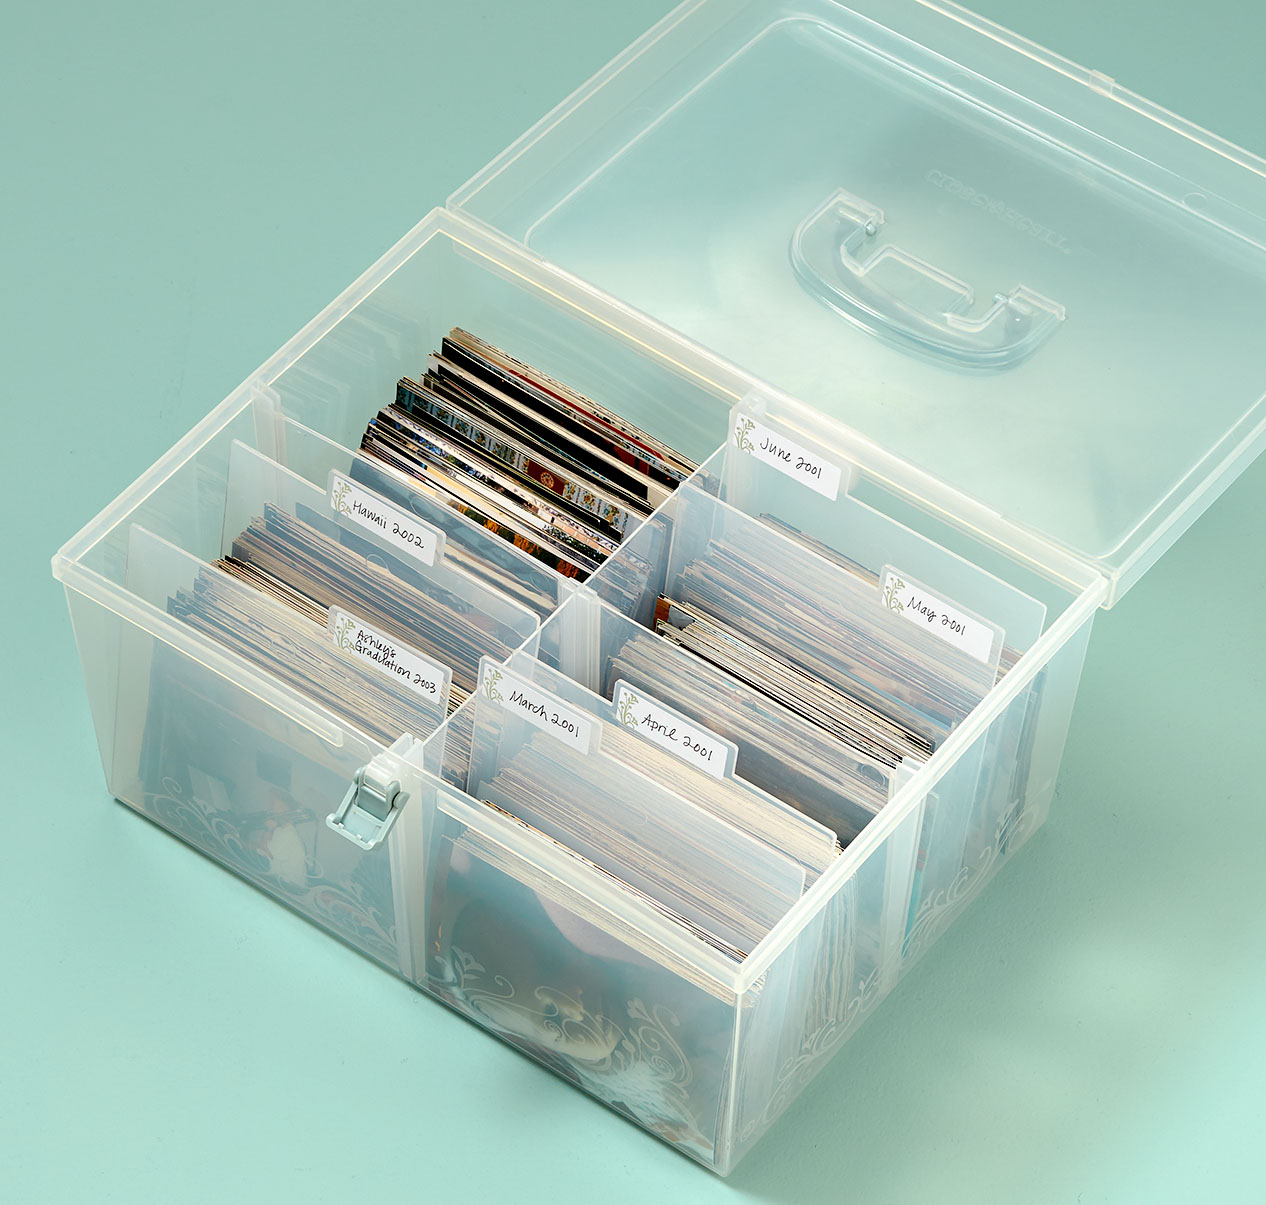
Option 1: Use our large organizers and tabbed dividers to organize your printed photos.
How to organize years of photos without getting overwhelmed #ctmh #closetomyheart #scrapbooking #photos #organize #digital #persnicketyprints #organization
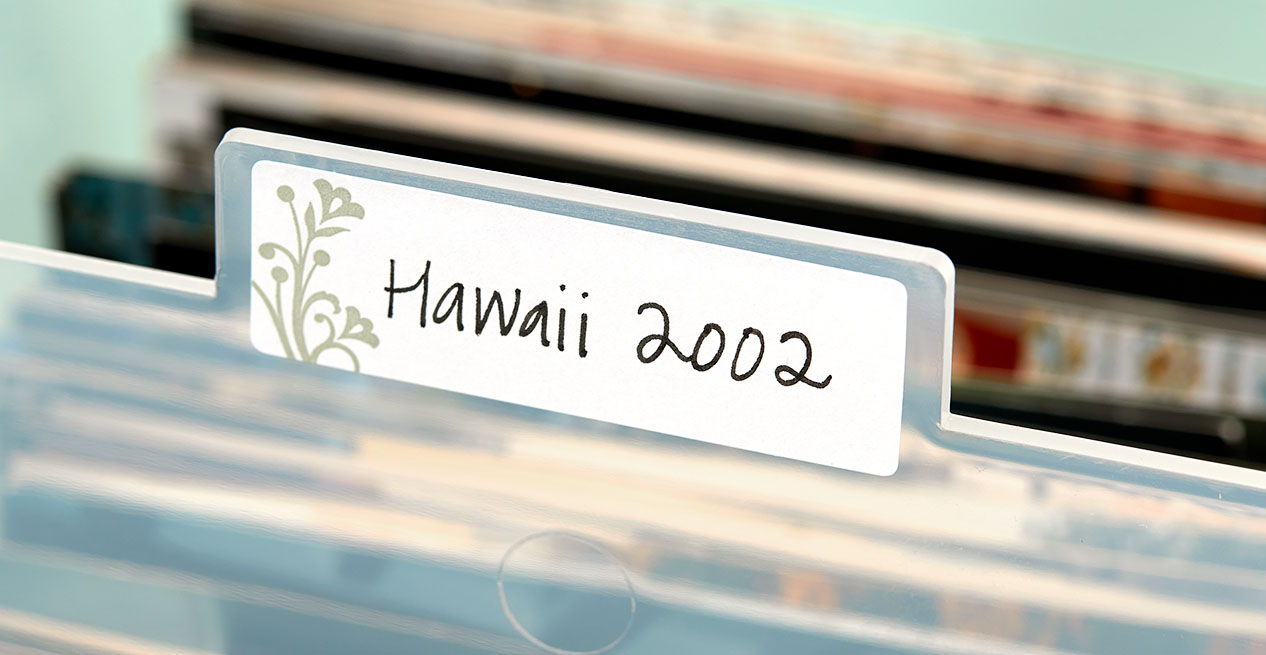
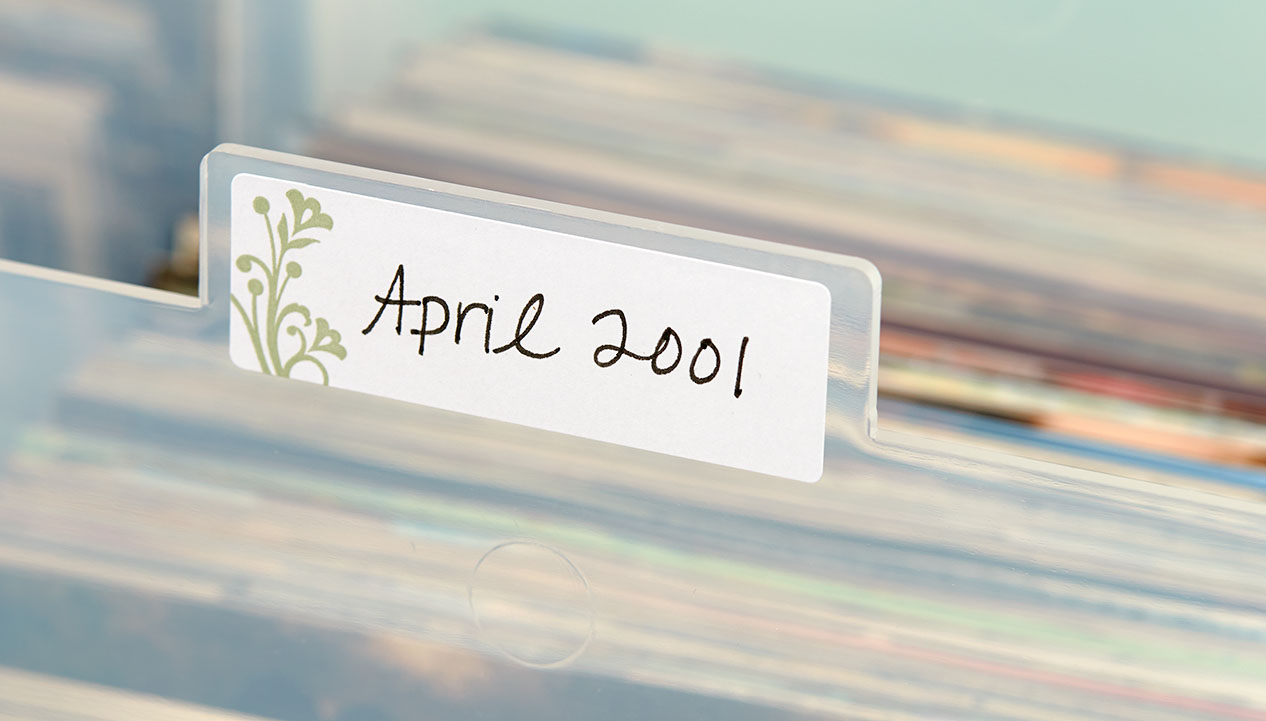
You can organize your photos by date, person, event…whatever you want! Think about the album you want to create with the photos, and organize them that way.
How to organize years of photos without getting overwhelmed #ctmh #closetomyheart #scrapbooking #photos #organize #digital #persnicketyprints #organization
Option 2: Create a work-in-progress album. Use one of our D-ring albums and divided Memory Protectors™ to separate out all the photos you’ll want for an album. You can group like photos together so you know how to plan your layouts.
And that’s it! The next step is to start scrapbooking away! If the idea of scrapbooking itself overwhelms you, a great place to start is with our Workshops Your Way® scrapbooking kits
We hope this post helped you feel empowered to start organizing your photos for scrapbooking. We know that when you take that leap of faith, you’ll find so much joy and satisfaction in preserving your family’s memories and stories.

Wednesday, July 26, 2017

19 Things You May Not Know About Our My Acrylix® Stamps...

Taken from CTMH's blog...

It’s STAMPAGANZA TIME!!! What does that mean exactly? Well, for every two stamp sets you purchase during the month of July at full retail price, you get a third stamp set of equal or lesser value for FREE! Basically it’s like Christmas in July, folks!
Since we’ve got stamps on the brain, we thought we’d revive this blog post from last year. It’s a fun way to test your knowledge about our exclusive line of clear stamps.
Think you know everything about our exclusive My Acrylix® stamps? Put your knowledge to the test by reading the list below! ðŸ™‚
19 Things You May Not Know About Our My Acrylix® Stamps! #closetomyheart #ctmh #stamping #clearstamps #crafting #scrapbooking #cardmaking #stampinghelp #myacrylix #howtostamp
2. If you see a stamp image outlined in red, that means it coordinates with one of the shapes from our Cricut® collections. If it’s outlined in blue, that means it coordinates with one of our Thin Cuts dies.
3. We put A LOT of thought and effort into making the best stamps for our customers. See the entire process in this infographic:
19 Things You May Not Know About Our My Acrylix® Stamps! #closetomyheart #ctmh #stamping #clearstamps #crafting #scrapbooking #cardmaking #stampinghelp #myacrylix #howtostamp
4. After we design each paper packet, we create two coordinating stamp sets, one for scrapbooking and one for cardmaking, to be paired with that specific paper. These two stamp sets can be found in the idea book right behind the coordinating Workshops Your Way™ scrapbooking kits. 
5. Our stamps are made right here at the Home Office, in a top-secret room.
19 Things You May Not Know About Our My Acrylix® Stamps! #closetomyheart #ctmh #stamping #clearstamps #crafting #scrapbooking #cardmaking #stampinghelp #myacrylix #howtostamp
6. It takes about one hour to make one sheet of stamps from start to finish.
7. New stamps work best when you “season” them. To do so, rub the stamp across a stamp pad, and then stamp onto scrap paper until the image is even.
19 Things You May Not Know About Our My Acrylix® Stamps! #closetomyheart #ctmh #stamping #clearstamps #crafting #scrapbooking #cardmaking #stampinghelp #myacrylix #howtostamp
8. Our stamps can be used with all sorts of inks, including dye, pigment, solvent, and alcohol inks.
9. Rather than attaching your stamps to your blocks, try using your blocks to pick up your stamps from a flat surface. This way, the stamp will hold its natural shape.
19 Things You May Not Know About Our My Acrylix® Stamps! #closetomyheart #ctmh #stamping #clearstamps #crafting #scrapbooking #cardmaking #stampinghelp #myacrylix #howtostamp
10. Our My Acrylix® blocks have a small white horizontal line on them to help you with stamp placement, which is especially helpful for keeping words and borders straight.
19 Things You May Not Know About Our My Acrylix® Stamps! #closetomyheart #ctmh #stamping #clearstamps #crafting #scrapbooking #cardmaking #stampinghelp #myacrylix #howtostamp11. Some people cut apart their stamps in order to rearrange words in a sentiment when sticking them to their blocks.
12. Our stamps are flexible! Manipulate them so they fit inside shapes and banners, or just to get a different look!
19 Things You May Not Know About Our My Acrylix® Stamps! #closetomyheart #ctmh #stamping #clearstamps #crafting #scrapbooking #cardmaking #stampinghelp #myacrylix #howtostamp13. If some of your ink doesn’t transfer when stamping, quickly breathe over the stamp to re-moisten the remaining ink and then stamp over the image again. The missing portion usually blends into the existing image if the ink isn’t too dry. This is called the Huffing or Stamp Over Technique.
14. Because our stamps and blocks are clear, you can easily stamp over the image again to get a richer, deeper image.
19 Things You May Not Know About Our My Acrylix® Stamps! #closetomyheart #ctmh #stamping #clearstamps #crafting #scrapbooking #cardmaking #stampinghelp #myacrylix #howtostamp
15. If you’re looking to remove that stubborn pigment ink, try our Spritz Cleaner and Stamp Scrubber. It makes it easy!
19 Things You May Not Know About Our My Acrylix® Stamps! #closetomyheart #ctmh #stamping #clearstamps #crafting #scrapbooking #cardmaking #stampinghelp #myacrylix #howtostamp
16. Our stamps don’t need to tan—they like being transparent, so keep them out of the sun!
19 Things You May Not Know About Our My Acrylix® Stamps! #closetomyheart #ctmh #stamping #clearstamps #crafting #scrapbooking #cardmaking #stampinghelp #myacrylix #howtostamp
17. Our stamps come in handy envelopes, which fit into our My Acrylix® organizer. You can also use our large organizer and tabs to store even more stamps. We also have a mini organizer for those mini stamp envelopes.
19 Things You May Not Know About Our My Acrylix® Stamps! #closetomyheart #ctmh #stamping #clearstamps #crafting #scrapbooking #cardmaking #stampinghelp #myacrylix #howtostamp18. If your stamps ever start to lose their stickiness, all you need to do is rinse them with warm water and soap, and the stickiness will come right back. You can also use StazOn™ cleaner on the smooth side of the stamp.
19. Some stamps make great friends, like our good ol’ friend, Sticky Boy!
19 Things You May Not Know About Our My Acrylix® Stamps! #closetomyheart #ctmh #stamping #clearstamps #crafting #scrapbooking #cardmaking #stampinghelp #myacrylix #howtostamp

Tuesday, July 18, 2017

STAMPAGANZA - Christmas in July...

Need an excuse to take advantage of this month's STAMPAGANZA?!?!?!

Here are some Christmas Stamp suggestions to get you started on your Holiday card-making early...


Shop {{{here}}}...remember STAMPAGANZA is only good 'till the end of July!

Friday, July 14, 2017

13 Tips for Becoming an INK EXPERT...

Shared on the CTMH Blog...
If you’re a stamper, then chances are you are no stranger to the wonders of inky fingers! But no matter how much exposure you’ve had, there are probably some things about working with ink that may still be a mystery to you. Today’s topic is Inks 101, and by the time you’ve read this post, you’ll be well on your way to becoming an ink expert!
1. Not sure which type of ink you should use for a project? Click on this handy infographic to figure it out!
19 Helpful Tips for Using Close To My Heart’s Stamp Pads #infographic #stamping #ink #howto #dye #pigment #coloring #stamp
2. Just like our cardstock, we offer dye and pigment stamp pads in all of our exclusive colors…meaning you’ll always have ink to match your cardstock! Easy color coordination is the name of our game. ðŸ™‚
19 Helpful Tips for Using Close To My Heart’s Stamp Pads #infographic #stamping #ink #howto #dye #pigment #coloring #stamp3. Our Exclusive Inks™ stamp pads have one of the largest surface areas on the market. Plus, they’re super easy to open, thanks to the magnetic case design!
19 Helpful Tips for Using Close To My Heart’s Stamp Pads #infographic #stamping #ink #howto #dye #pigment #coloring #stamp
4. We designed our stamp pads so that the pad is on the lid of the case. This way while your stamp pad is sitting around waiting to be used, the ink is settling on the surface of the pad so you’ll always be able to get a crisp stamped image.
5. Is your stamp pad getting dry? That happens with a lot of use over time. But the good news is that instead of buying a new one, you can buy the coordinating re-inker and use it to replenish your pad. To re-ink a stamp pad, gently squeeze the re-inker evenly over the surface of your stamp pad while moving in a zig-zag pattern, top to bottom. Repeat until your stamp pad is properly saturated again (you won’t even need to use the whole bottle!). Just be sure to give your ink some time to soak in before using the stamp pad.
19 Helpful Tips for Using Close To My Heart’s Stamp Pads #infographic #stamping #ink #howto #dye #pigment #coloring #stamp
6. Is your stamped image darker than you thought it would be? Don’t worry, that’s normal! Dye inks need a little bit of time to cure, which means that they need to fully dry before they turn the right color. This shouldn’t take too long, but a craft heater can certainly help speed up the process.
7. When using our mini pigment ink stamp pads, dab the stamp pad lightly onto the stamp rather than trying to press the stamp onto the stamp pad.
19 Helpful Tips for Using Close To My Heart’s Stamp Pads #infographic #stamping #ink #howto #dye #pigment #coloring #stamp
8. Pigment ink sits on the surface of your paper, which is why the colors are more vivid than dye inks. However, this means pigment ink takes longer to dry. Give images stamped with pigment ink time to air dry, or use a craft heater to dry them right away.
9. If you’ve got the painting bug, then you’re going to love painting with our inks! Start by squishing the lid of your closed stamp pad all over. This will transfer some ink from the pad onto the other side of the case where you can pick up the ink using a slightly damp waterbrush or paintbrush, and then paint away!
19 Helpful Tips for Using Close To My Heart’s Stamp Pads #infographic #stamping #ink #howto #dye #pigment #coloring #stamp10. If you want to create a splattered paint pattern on your artwork, then our spray pen is your friend! Simply fill your spray pen with some water and add a bit of ink from a re-inker bottle, shake, and then spritz onto your artwork. Raise the spray pen higher for a subtler splatter and closer to the paper for a more concentrated splatter. If you want the ink to dry faster, try using rubbing alcohol instead of water.
19 Helpful Tips for Using Close To My Heart’s Stamp Pads #infographic #stamping #ink #howto #dye #pigment #coloring #stamp11. Our round sponge and sponge daubers can create really cool effects with our inks. With the sponge daubers insert and small organizer, you can store a whole collection of sponge daubers, even labeling them by color so you don’t forget which dauber you used for each stamp pad.
19 Helpful Tips for Using Close To My Heart’s Stamp Pads #infographic #stamping #ink #howto #dye #pigment #coloring #stamp12. In addition to our Exclusive Inks™ stamp pads, we also offer the VersaMark™ ink pad. Use this ink pad to create watermark images, or add embossing powder over the stamped image, shake off the excess, and heat set for an entirely different look!
13. Coloring in your stamp? Make sure you use the right ink to avoid bleeding! Memento™ is the way to go if you’re using alcohol markers, and Archival Black permanent ink is best with watercolor paints or pencils.