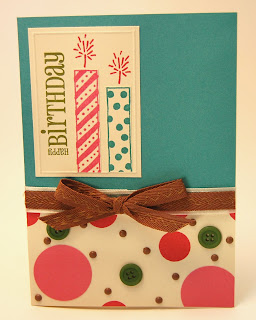
Tuesday, August 31, 2010

Thriller Blog Hop.....

Let me just start by saying....I CANNOT BELIEVE IT'S ALREADY SEPTEMBER!!!!  August got away from me and I found myself scrambling (even more so than I already do....lol) last night to find a project for this month's Blog Hop featuring September's SOTM, Thriller!!! 

We have almost 70 Consultants participating this month which means if you "hop" all the way through, you will leave with LOTS of different ideas for this stamp set.  I bet you'll find some pictures of some NEW product as well! 

Let's get the technicals out of the way first....if you've come from Terrie's Blog, you're on the right track.  If you get lost along the way, you can always go to Helen's Blog and find a complete list of "hoppers".

Here's the SUPER CUTE stamp set....THRILLER!!!


As soon as I saw this set in the NEW Idea Book, I fell in LOVE!!!!  It's fun, it's funky and kinda speaks "girly" and "Ed Hardy" to me....after sitting at my scrap table for what seemed like an eternity, I finally decided to go with this.....


I used a paper packet that is my all-time FAVORITE and is no longer available (Notebook) due to our WONDERFUL $2, $4, $6 - 8 Sale but if you have anything that resembles it, you can use that to recreate (or if you're a paper-hoarder like me, you might have stacks and stacks in your closet....lol).  There's also You Rock paper packet in there (the subdued Smokey Plum polka dot B&T)....and a NEW one....Hooligans (it has the CUTEST "hahahahaha" paper in it!!!)

-----------------------------------------
And...I had to use some NEW stuff.....Pink Sparkles, Licorice Opaques, Mocha Opaques, 4-1/4 x 5-1/2 Clear Card, Hooligans Paper Packet....Archival Black Ink (I always get a more crisp image using this ink), Desert Sand Ink (LOVE this for distressing), Sandpaper (NEW colors - not updated on my website yet), 3-D Foam Tape (LOVE that I can cut what length I want and it's super sticky but easy to peel the backing off), Designer Ribbon Rounds - Black

-----------------------------------
Here's the inside....on clear cards, I'm very careful to hide all the inside front cover with coordinating B&T so you don't see any adhesive.  Also....I haven't quite decided what I want this card to be...birthday??? congratulations??? probably NOT a "happy halloween" though...


-----------------------------------
Don't forget to hop on over to Jen's Blog and see what creative masterpiece she has to share!

Remember...you can only get Thriller during the month of September....you can purchase it at retail price or you can earn it at a discount and maybe even FREE!!!  Ask your local Consultant about our fabulous SOTM program or e-mail me to find out more!

Thanks for stopping by....have FUN!!!

Monday, August 23, 2010

Extravaganza Artwork....Countdown 3

Where did the time go?!?!  I meant to get these posted a week or so ago...I guess "back 2 school season" got in the way...lol

These are some more examples of what I taught at Convention....using COLOR, where to find inspiration, how to combine paper packets, etc.  This particular board was using three colors in a triangle on the color wheel...here are some tips and hints:

Triadic Color Schemes use colors that are evenly spaced around the color wheel and are in a triangle pattern.


 Holiday Red, Pear & Crystal Blue with two neutrals, White Daisy and Desert Sand - again I let the Crystal Blue color in my photos play its part and only used the color minimally elsewhere.


 Don’t be afraid to mix your Paper Packets to get just the right color scheme. Remember that you can use the back side as well and many times this is the side I use when mixing things up.


 For masculine cards, let your neutral color dominate and use the other triad of colors minimally to create a dramatic feel without all the frill.


 White space is HOT, HOT, HOT right now and as much as I enjoy distressing, sometimes Simpler is better. . . white space creates the illusion of being simple and often eloquent.


 When using clear cards, have some of your elements on the front and some on the inside. . .just make sure to cover up all your top elements by cutting an identical piece to hide all the glue and 3-D Foam Tape.
-----------------------------------
On this layout, I let the blue in the photos act as the majority of my Crystal Blue in the color scheme (only adding it again in the title bar)...
-----------------
Close-up of my CUTIE and the buttons sewn on the side (LOVE these Clear Craft Buttons and they're on the discontinued list so you better get them while you can!!!)
----------------------
Clear Card....the clouds and buttons are on the front and the rainbow is on the inside....
--------------------------
Same color combo (Holiday Red, Pear (*NEW*) and Crystal Blue)....anyone recognize the stamp used for the petals????  Check this set out and see if you can figure it out!!!

-------------------------
Here's a close-up.....
--------------------------
A Posey stamp set (can you believe you can get this CUTE stamp set for only $7.95) with window cut out in the bottom right....more clear buttons over the centers of the flowers.  I also mixed paper packets....Magic Moments (was a $2, $4, $6 - 8 paper packet so they're all gone :(... and Sweet Home...Colors are Sweet Leaf, Indian Corn Blue and Smoothie (*NEW*)....White Daisy as my neutral...
------------------------
Side view of the "window".....
------------------------
same colors and same stamp set....clean, simple card!!!
--------------------------
Dimensional Elements On Target (small circles) stamped and adhered for dimension....
-------------------------
Masculine card with one of the NEW stamp sets I was given to play with....Colors are Garden Green, Outdoor Denim and Cranberry (my neutral is Bamboo)....
--------------------------
Inside.....
---------------------
Another card...same stamp set...same color combo...

Tuesday, August 17, 2010

Celebrate Stamping with a TRIPLE PLAY....

Celebrate your love of stamping by using stamps to embellish the three mini albums in our exclusive National Stamping Month Kit, Triple Play. 


In honor of National Stamping Month, starting August 15th through the end of September, you can get HUGE discounts on the Triple Play Kit when you purchase My Acrylix stamps from your wish list, or get it FREE when you host a qualifying Girls' Night Out!

Here are five ways to get this outstanding Kit:
  • Buy the Triple Play Kit for $29.95
  • Purchase $25 in My Acrylix stamps and get the Kit for just $15
  • Spend $40 on My Acrylix stamps and get the Kit for only $5
  • Host a Girls' Night Out with sales of $300 or more and get the Kit FREE!!!
  • Join my CTMH team and get the Kit FREE!!!
If you're looking for an alternative to making mini-albums with the Kit, try your hand at these cute cards (inspired by fellow Consultant, Gloria)...all made with the Kit and its contents!


Contact me to get yours TODAY!!!  If you're attending the Mistletoe All-Day Crop on September 11th, you can get your crop fee discounted by getting your hands ordering the Triple Play Kit...we'll also have a FREE class to put these cute projects together!

Sunday, August 15, 2010

Extravaganza Artwork....Countdown 2

Welcome to the 2nd installment of me sharing my Extravaganza Art as well as sneak peeks into some NEW product (won't have links to view but I will let you know when you see something NEW and FABULOUS!!)!

We're still using four or more colors (for some tips, click here) and on these, be sure to:
  • Use a more subdued basic color to tone down bright colors (i.e. Grey Wool and Colonial White)
  • If you're using warmer colors, throw in some White Daisy to liven things up a bit
  • If you're using bright colors and want them to be BRIGHT, pair them with White Daisy to keep the mood CHEERY!!
Here are some things I made using the above concepts....

Bright Colors (Sunflower, Gypsy (*NEW*), Pacifica (*NEW*) and a little bit of Cranberry) paired with Grey Wool...check out those JUMBO Shimmer Brads (*NEW*) and Gypsy Sparkles (*NEW*)... WOWZERS!!!  These colors were perfect for Robot Power stamp set...

------------------------
Same colors...have you noticed that some of the colors are just small punches (Cranberry, Grey Wool and Gypsy)...this keeps the eyes from popping out with sensory overload...lol

-------------------
Close-up....I was trying to show you that I cut one of our Clear Cards (*NEW*) and layered over the striped Dutch Blue B&T for a little something 'extra'...I also tried to crinkle our White Daisy Organdy Ribbon by heating it with a Craft Heater...it worked but didn't hold too well after shipping these from Texas to Utah and then from Utah to DC and then from DC back to Texas...lol
----------------------------
This was one of my FAVORITES!!!!  Colors are Hollyhock, Cotton Candy (*NEW*), Topiary, Chocolate, Lagoon (*NEW*) and Colonial White to add that vintage look.  The roses were EASY to make and you can find TONS of YouTube videos telling you how...the card base is stamped with Noted Backgrounds and sponged with Chocolate Ink...the ribbon comes from Colonial White Ribbon Rounds (lace), Twill and Colonial White Grosgrain

------------------------
Look at those pink sparkles (*NEW*)

------------------------
Close-up of flowers made from Cotton Candy Cardstock (*NEW*)...

----------------------------
Same colors......

--------------------
Close-up of the polka dots at the bottom...the Cotton Candy circles are using CTMH's 1-1/4" punch...the Hollyhock circles are stamped, the Topiary circles are buttons from Summer Craft Buttons and the Chocolate circles are brads from Brads Basic Assortment....Chocolate ribbon is from the Ribbon Rounds.
-------------------
Close-up of focal image....I dry embossed a frame around the candles (Candlelight Stamp Set)

Friday, August 13, 2010

Extravaganza Artwork....Countdown

I cannot believe that we're to the middle of August already!!!!  That means that in a couple of short weeks, you'll be able to see the NEW Autumn/Winter Idea Book (available September 1st).

Over the next couple of weeks, I'm going to start sharing the artwork I created for Convention using some of the NEW products....I was going to wait but since most blogs are already "leaking" peaks at this awesome product, I thought I'd start enticing you to contact your consultant or ask ME how to get your hands on this NEW Idea Book!

This first mouth-watering sample comes from my board using color pallets of four or more colors....here were my board notes:

  • When you want to use four or more colors, it's important to let one color be the dominant color.

  • Choose your colors in a square or rectangular pattern on the color wheel, making sure there is a balance between your cool (greens, blues and purples) and warm (reds, oranges and yellows) colors.

  • If I'm using four or more colors, I tend to use less cardstock/B&T colors and break out the Mini-Medley's, ribbon and accents to bring the colors into play.

  • Don't be afraid to sew on our Clear Cards!!! I did mine by hand and it was simple to do and makes a perfect pocket card!
Now on to the artwork....Colors: Black, White, Tulip, Baby Pink, Twilight & Garden Green

-------------------------
Layout of my baby blowing dandelions...
------------------------
Close up of the "flowers" with Tulip B&T (many patterns), Baby Pink Buttons (Spring Craft Buttons - on the "retired list" so get them NOW!!!) and the clear card (NEW styles and sizes come September 1st) inked with Black StazOn Ink and a Sponge Dauber..."wish" is Color-Ready Alphabet Hodge Podge
--------------------
Another NEW style and size of our Clear Cards...punched 1-1/4" circles out of Cardstock and B&T, used a whole LOT of embellishments (ALL CTMH) from various packages.
-------------------
You can see the card open here and see that the bottom right Baby Pink circle is actually adhered to the inside of the card and the NEW Baby Pink Sparkles are adhered to the outside...just that extra little something that makes Clear Cards so FUN to work with!!!
-----------------
Another Clear Card...this time sewn as a pocket to a postcard-type card that has a gift card in the back....
---------------------
Card slid out of pocket....as you can see, the Tulip Buttons (Tulip Mini-Medley Accents) are sewn to the clear card (before I sewed it shut)
--------------------
Backside view of the card with the Target gift card inserted into the back pocket....
---------------
Backside view of the card slid out...since you could see the thread of the Tulip Buttons that were sewn on the front, I covered the stitching with some Tulip B&T (it just makes for a tidier card...I think).

Thursday, August 12, 2010

H2H Sketch Challenge....

This week over at the H2H Blog, they're challenging everyone with a sketch!!!

Here's the sketch....


Here's my take on it...


My niece is having a birthday next month and my sister wants me to make the invites...my sister wanted it to be Mary Engelbreit themed since this is probably the last year that my sister will be able to decide since my niece is getting to the age where she has "demands"....lol

The flowers were done with punches...even the yellow flower...I punched an 1-1/4" circle then I cut little triangles out leaving the "petals"...I created the shading with our CTMH Blending Pen and White Daisy Ink...the gingham pattern is Black Cardstock cut into tiny 1/2" squares (really wished I stocked up on Black Gingham B&T before we retired it...)...all the centers of the flowers are Dimensional Elements - On Target covered with Cardstock.

The "sentiment" is from one of the NEW stamp sets coming out September 1st....the "to a" is handwritten with a My Legacy Writer (LOVE these things).

Don't forget to go over to the H2H Blog and play along!!!

Sunday, August 8, 2010

Tag....you're it!!!!

This is my first week participating in the H2H Challenge as a non-DT member!!!  The challenge is to use a tag on a card, layout or just as a tag...

I chose to do it as a tag and a gift bag using Zippidee Paper Packet (LOVE this paper because I have all boys and it's so bright and CUTE)...


-------------------------------
The bracket under the "good times" sign is a dimensional element bracket from the Irresistibles Pizzazz, sponged with Cranberry Ink and cut so that it will be a little longer (don't worry, the sign hides the cut part)...
------------------------
The shaker-box is made using a lid from one of CTMH's Craft Jars...
Step 1: Lay down your items you want to "shake"...

 
-----------------------
Step 2: put Liquid Glass all around the edge of the Craft Jar lid....

----------------------
Step 3: Lay down lid and gently press down to create a bond...be careful not to get it on any of the items so they don't end up sticking to the paper.