Showing posts with label Flower Market. Show all posts

Thursday, February 6, 2020

Creative Design Team YouTube Hop - Elephant Treat Holder...

The Creative Design Team is at it again...this month we are bringing you TREAT HOLDERS and, boy, are there some CUTE ones!!!

Please head on over to my YouTube Channel to watch the video and hop through the other Design Team Members! Don't forget to SUBSCRIBE and sign up for notifications so you never miss a thing!


Here is a link to my Design Space Project File - free to use if you own the CTMH Cartridges used in the project!

If you do NOT own the Cricut Cartridges used, please feel free to purchase them from my affiliate link {{{here}}}. You will need:

Artiste Cricut Collection
Flower Market Cricut Collection
Art Philosophy Cricut Collection

Tuesday, January 14, 2020

Paper Flower Unicorn template with CTMH...

shared from ctmh's blog...

Make Your Very Own Paper Flower Unicorn Wall Décor!

Floral Unicorn Wall #ctmh #closetomyheart #nationalpapercraftingmonth #unicorn #diydecor #cricut #flowermarker #paperflower #paperunicorn #girlsroom #youaregorgeous
If you haven’t gotten down and crafty yet this year, now is the perfect time to start. For our second week celebrating National Papercrafting Month, we created this beautiful, large scale, floral wall décor and are giving you our Design Space fileFREE, to recreate this very same project at home!
Floral Unicorn Wall #ctmh #closetomyheart #nationalpapercraftingmonth #unicorn #diydecor #cricut #flowermarker #paperflower #paperunicorn #girlsroom #youaregorgeous
(Click on the individual images for a closer look!)
In order to keep things simple, we manipulated shapes from just one of our Cricut® collections while designing our arrangement. If you don’t own the Cricut® Flower Market Collection, get one HERE.
We don’t want any of our readers to feel left out. For those of you who do not use Cricut®, a few months ago, our very own Jill Broadbent visited Studio5 and shared how to make similar large paper flowers without a cutting machine.
Download the PDF below for a template to make large paper flowers without a cutting machine.
Every little (and grownup) girl deserves to know just how gorgeous she is! Happy crafting!
Make sure to stop by next week to see what we’ve got in store for a boy’s space using our Urban collection!

Wednesday, March 13, 2019

CTMH Cards with Cricut Design Space...

SHARED FROM THE CTMH BLOG...

Back to the Basics with Cricut Design Space™—Card Edition!

Often the tools we show you in Design Space are illustrated with a scrapbook page or layout, but not today! In this next back to the basics post, we want to remind you that these tools can be used for many, many projects, including custom cards and envelopes. As we continue our review of basic tools in Design Space, you’ll see that it’s easy to create cards and envelopes that are both beautiful, unique, and most importantly, easy!
Design Space™ Basics #ctmh #closetomyheart #ctmhcricut #designspace #cardmaking #cards #diy #ctmhsomuchhappy
On the cards above, all of the shapes we used, including the sentiments, flowers, and even the envelopes, come from the Flower Market Cricut® collection. Flower Market has both flat and 3-D shapes, and you can see we’ve used both types on these cards. This makes it a truly versatile collection, useful for an entire year’s worth of seasons, celebrations, and creativity!
The steps below show you how to work in Design Space from a desktop or laptop computer. If you use the app on a mobile device, the buttons and tools will be located in slightly different places on your screen, but the same features are available on any device.
Basic Shapes
Design Space has a “basic shapes” feature in the Design Panel. The shapes in this section are available to you for free, and it’s an easy way to add simple shapes like circles, rectangles, hearts, or diamonds and also use them as a base for other projects. For example, you could insert a square and then size it for a variety of things, and this is exactly what we did to create our cards.
Basic Shapes Screenshot
To create a card front in Design Space, insert a square shape from the Shapes section. Adjust the size to 4.25″ x 5.5″. If you wanted to cut an entire card base, insert a square shape and size it to 8.5″ x 5.5″. In the next section, we’ll tell you how to add a score line to the card base.
Cut Lines and Score Lines
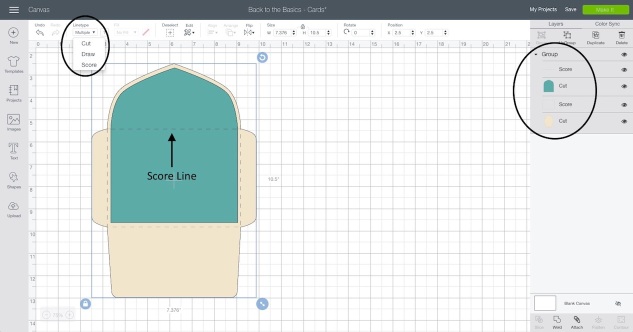
When you insert a shape on your canvas, the line of that shape is typically a solid cut line, but you’ll notice when you add an image, like the envelope from the Flower Market collection (#MD38C82) ←MAKE SURE YOU INCLUDE THE "#" WHEN TYPING THE TAG INTO THE SEARCH BAR IN DESIGN SPACE, there is a dash line as well.
Score Screenshot
This is a score line. Your Cricut® machine will both cut and score the envelope for you. You just need a scoring tool or scoring wheel, depending on the type of machine you have. You can change lines to cut, score, or even draw. If you aren’t sure what type of lines you have on your shape. You can always look in the Layers panel. It will tell you which ones will score or cut, and you can change the line type in the Edit bar.
Card Base Screenshot
To complete your card base, insert a score line. Score lines can also be added from the same Shapessection of the Design panel. Resize the score line to 5.5″, move it over your card base, and select both images. Then under Align in the Edit bar, select Center. Once the score line is centered, keeping both the line and the card base selected, click Attach in the Layers panel. Using Attachkeeps your score line exactly where you want it, even if you move the shape on the canvas.
Using the Slice Tool
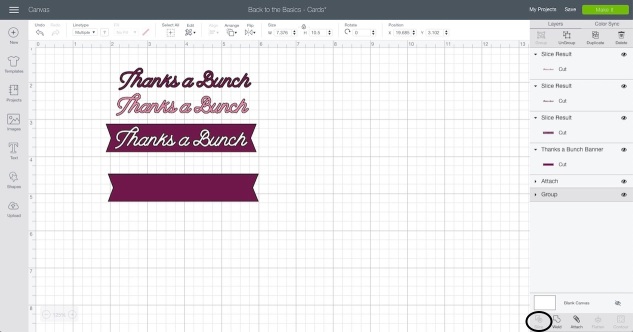
We used the Slice tool to create the sentiments for our cards. The Slice tool is one of the functions at the bottom of the Layers Panel, next to others like Weld and Contour. With Slice, you can cut an image or text out of another shape. Simply place your word or image over the one you want to cut it from. Select both shapes, and click Slice in the Layers Panel.
Slice Screenshot
Initially, it might not look like anything happened, but if you click on your images, you’ll have two of whatever you cut. One is the shape itself, and the other is the shape you cut from the background.
Image 2
There are a few important things to keep in mind. First, you can see in the “Thanks a Bunch” banner on this card, we sliced the sentiment from Lagoon paper and attached that to a solid White Daisy banner. For something like this, before you slice in Design Space, make sure you ungroup the image. Images that have multiple layers can’t be sliced. If your sentiment image has multiple pieces grouped together as one shape, like this one does, you’ll need to ungroup them and slice using just one image.
Another thing to remember is to duplicate the solid shape that goes behind whatever you’re slicing, if applicable. If you are slicing into the card base, you wouldn’t need a duplicate piece, but if you’re slicing into another shape, like the banner on this card, you’ll want to have a solid shape to layer behind it.
The last important tip we have for you is that you want to make sure when cutting your project that you keep small pieces that go inside letters or other shapes. With this card, that means you want to set aside the inside of each “a” and the “B” to attach to the banner.
Image 3
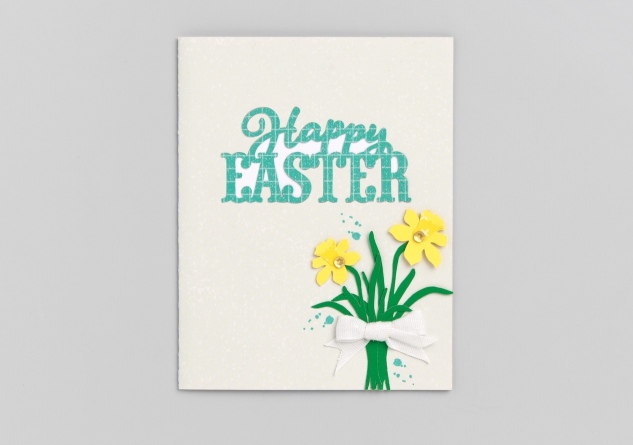
If you look closely, you’ll notice a similar thing happening on the Happy Easter card, but it’s also a little bit different. We sliced the sentiment from the card base, but instead of saving the inside pieces, we cut the sentiment separately and layered a solid piece of White Daisy cardstock on the back, behind the sliced shape.
 Put It Together (Basic Shapes, Score, and Slice)
Image 4
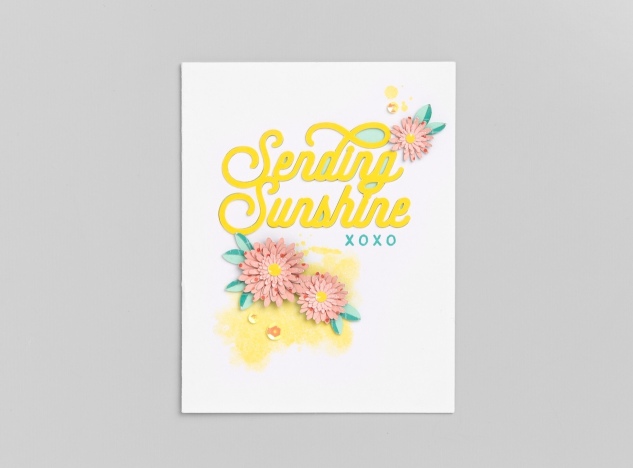
All of the cards in our post today use the tools we’ve talked about including a basic rectangle shape, inserting a score line, and slicing a sentiment. Follow the steps below to put it all together and make the Sending Sunshine card!
  1. First, search for the sentiment, #MD38CC3 (include the "#" when searching), and insert it on your canvas.
  2. Ungroup the sentiment, and delete only the “Sunshine” image. Then resize the sentiment to a height of 1.75″, leaving the width locked.
  3. For the card base, insert a square shape from the Shapes. Adjust the size to 8.5″ x 5.5″. Don’t insert a score line yet. You have to use the slice tool first, before attaching a score line.
  4. Slice the sentiment from right side of the card base. This is your card front. Place the sentiment where you want it, select both images, and click Slice in the Layers panel.
  5. Keep both extra sentiments. You’ll cut them from Lemon cardstock and layer the two in another step.
  6. Now insert a score line, also from the Shapes section of the Design Panel. Size it to 5.5″. Place it over the card base, and select both images. Then, under Align in the Edit bar, select Center, and then select Attach in the Layers panel.
  7. Insert other flowers and leaves on the canvas as desired. For our card, we used the Daisy image (#MFADCF2) cut in three different sizes, and we paired it with the Rhododendron leaf (#MD37FB).
  8. Color your project pieces to make it easy to cut on the right color of paper or cardstock. Then select Make It in the top right corner and cut your project pieces.
  9. Attach one 4″ x 5¼” piece of Mint cardstock behind the sliced portion of your card (on the inside of the card). Then layer the two Lemon sentiments and attach inside the sliced section.
  10. Embellish with stamped images, 3-D flowers, sequins, and more!
**Bonus Tip!
Are you unsure how to add a Close To My Heart digital collection to your Cricut® account? Simply visit www.cricut.com/CTMH and sign in to your account (or create one if you haven’t already). In the list of options in the menu on the left, you’ll see the last one is Redeem Promotion. Select that option. Then enter the code, click Redeem, and you’ll be on your way. Not sure if you’ve already linked your physical cartridges? In that same menu, you can select Linked Cartridges. This will show you the ones you’ve already linked to your account.
Next month, we’ll look at ways to manipulate text in the Edit bar on the canvas with the shapes and unique font from the You Are Here collection. Check back in April for more Design Space fun!

Tuesday, November 27, 2018

Craft with Heart with Jana Eubank...

Taken directly from Jana Eubank's Blog...

Scrapbook Process: CTMH Craft with Heart November Kit

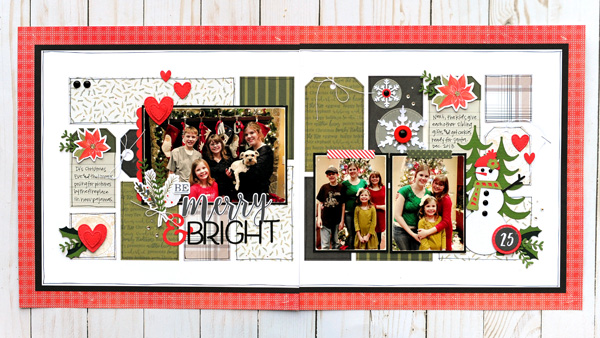
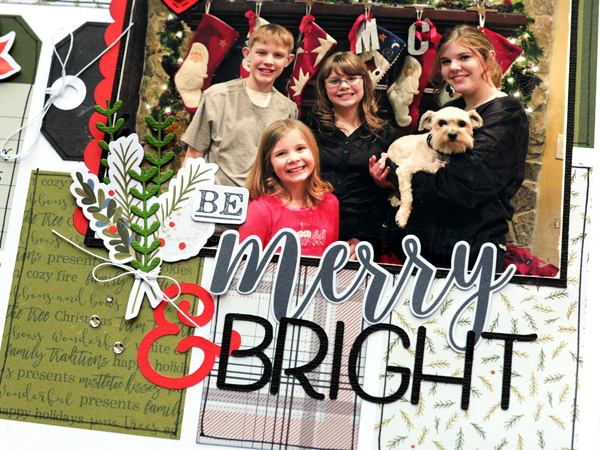
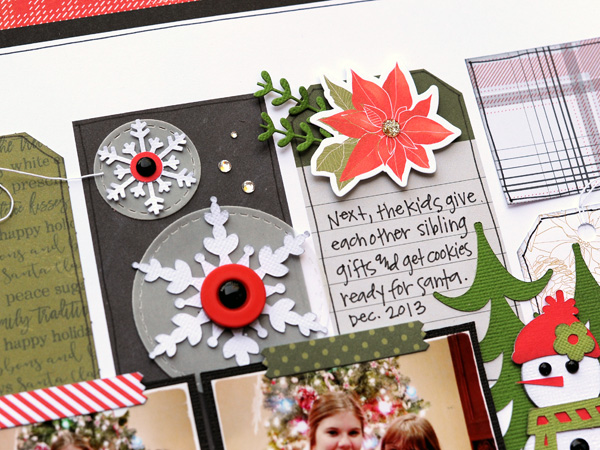
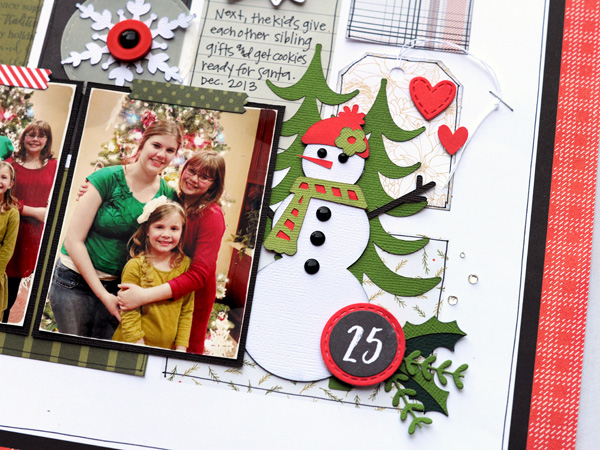
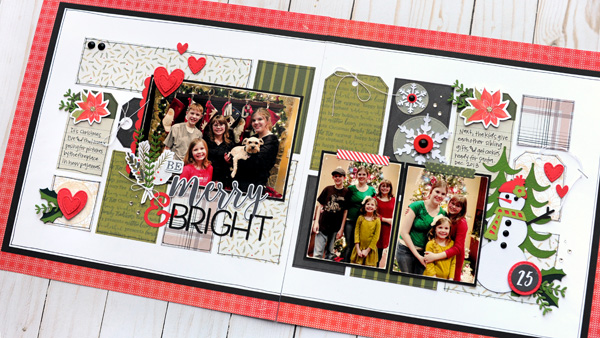
I am back with the second two-page layout using the November 2018 Craft with Heart “Be Merry” kit by Close to My Heart. I used the exclusive CTMH You Are Here and Flower Market Cricut cartridges for additional details. Watch the video below!
.
BE MERRY & BRIGHT
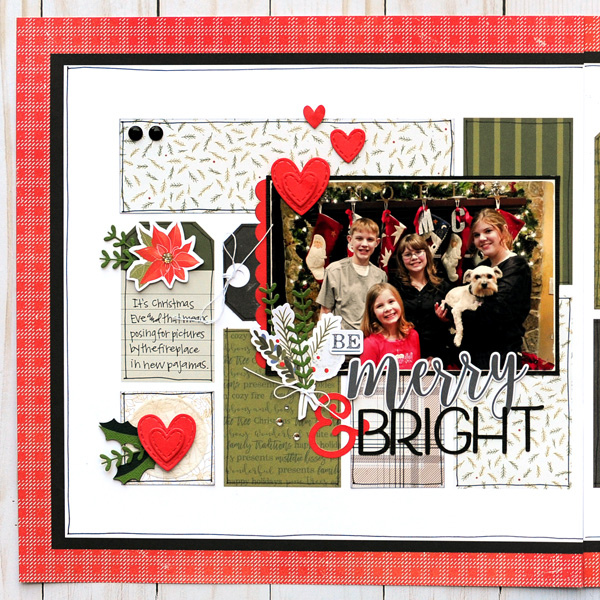
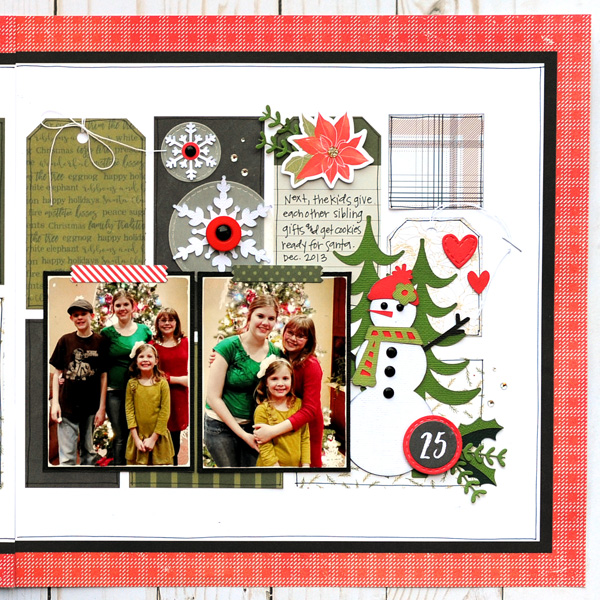
Jana Eubank Close to My Heart November Craft with Heart Be Merry 1 600Jana Eubank Close to My Heart November Craft with Heart Be Merry 2 600Jana Eubank Close to My Heart November Craft with Heart Be Merry 3 600
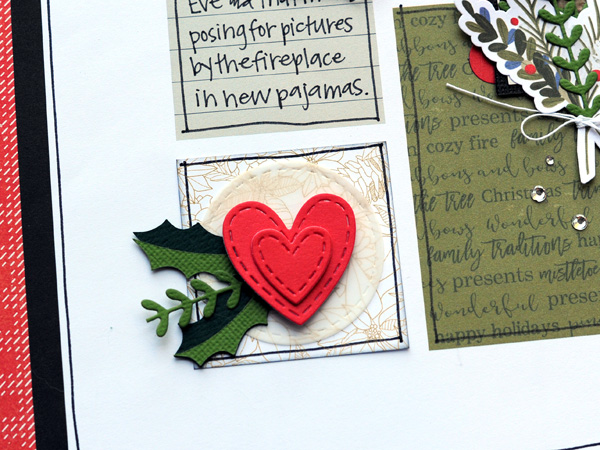
I used lots of CTMH dies to add additional details on this page. Here you can see the Stitched Hearts, as well as the leaf sprigs I created with the Decorative Borders Dies.
Jana Eubank Close to My Heart November Craft with Heart Be Merry 4 600
These adorable holly leaves were created with the CTMH Flower Market Cricut cartridge.
Jana Eubank Close to My Heart November Craft with Heart Be Merry 5 600
I also used the Flower Market cartridge for the ampersand and letters in the title.
Jana Eubank Close to My Heart November Craft with Heart Be Merry 6 600
Vellum circles cut with the Stitched Circles dies anchor these two snowflakes.
Jana Eubank Close to My Heart November Craft with Heart Be Merry 7 600
And this adorable snowman and pine trees were cut using the CTMH You Are Here Cricut cartridge.
Jana Eubank Close to My Heart November Craft with Heart Be Merry 8 600Jana Eubank Close to My Heart November Craft with Heart Be Merry 9 600

Thursday, November 9, 2017

DIY Photo Cards with CTMH...

TAKEN FROM CTMH'S BLOG

DIY Photo Cards!

By this time of year most of us have already taken new family photos (or have them planned for the very near future) in anticipation of turning them into beautiful Christmas cards to share (and show off ☺).
This year, instead of having someone else print and make your holiday cards, make them yourself! We’ve prepared some tips to show you how to personalize your cards even more using your creativity rather than someone else’s ready-made template.
Check out the tips below as you’re thinking of all the people you plan to send a little holiday cheer to.
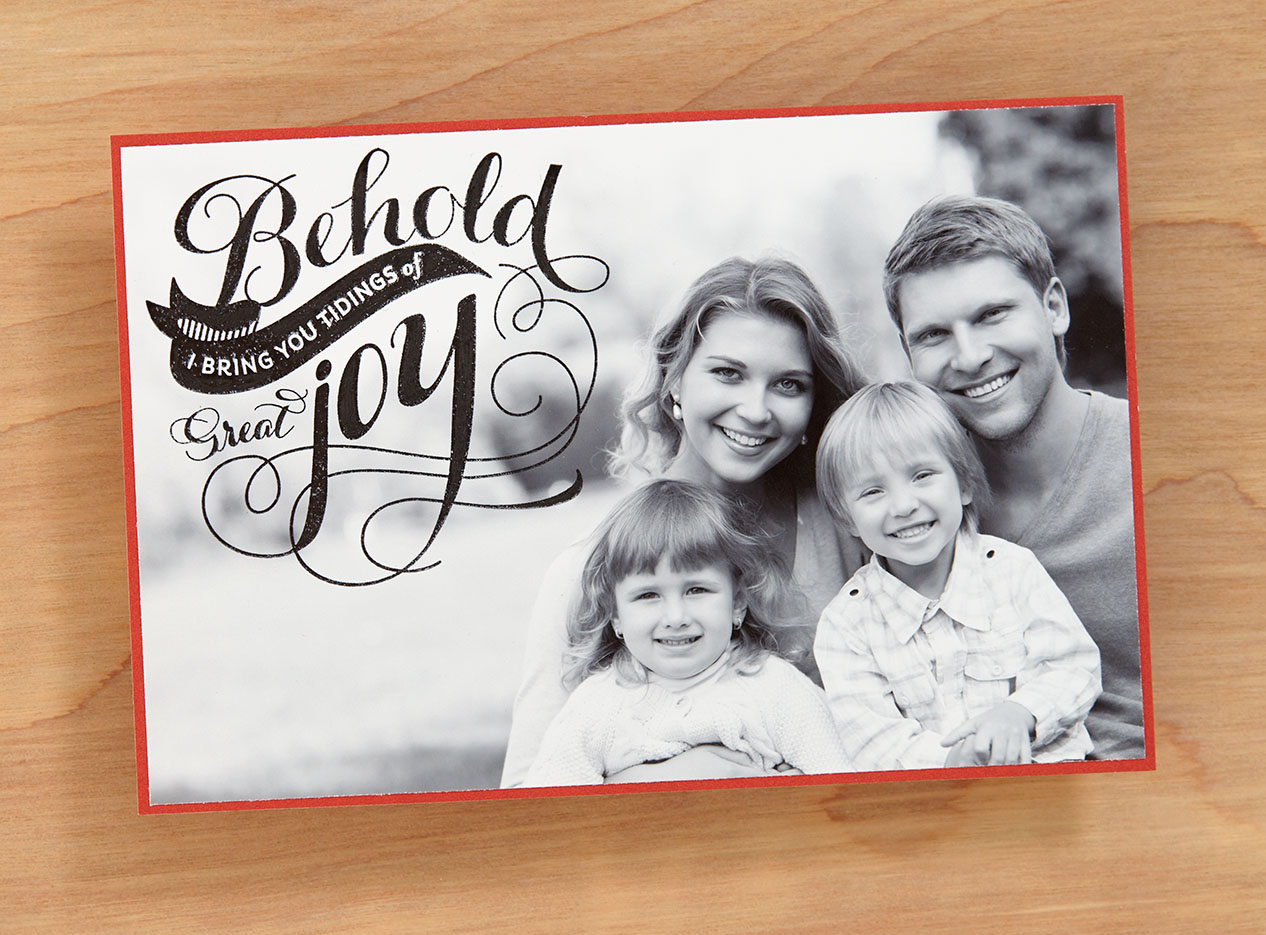
DIY Photo Cards #ctmh #closetomyheart #diy #photo #cards #holidays #Christmas #tidings #Joy #family
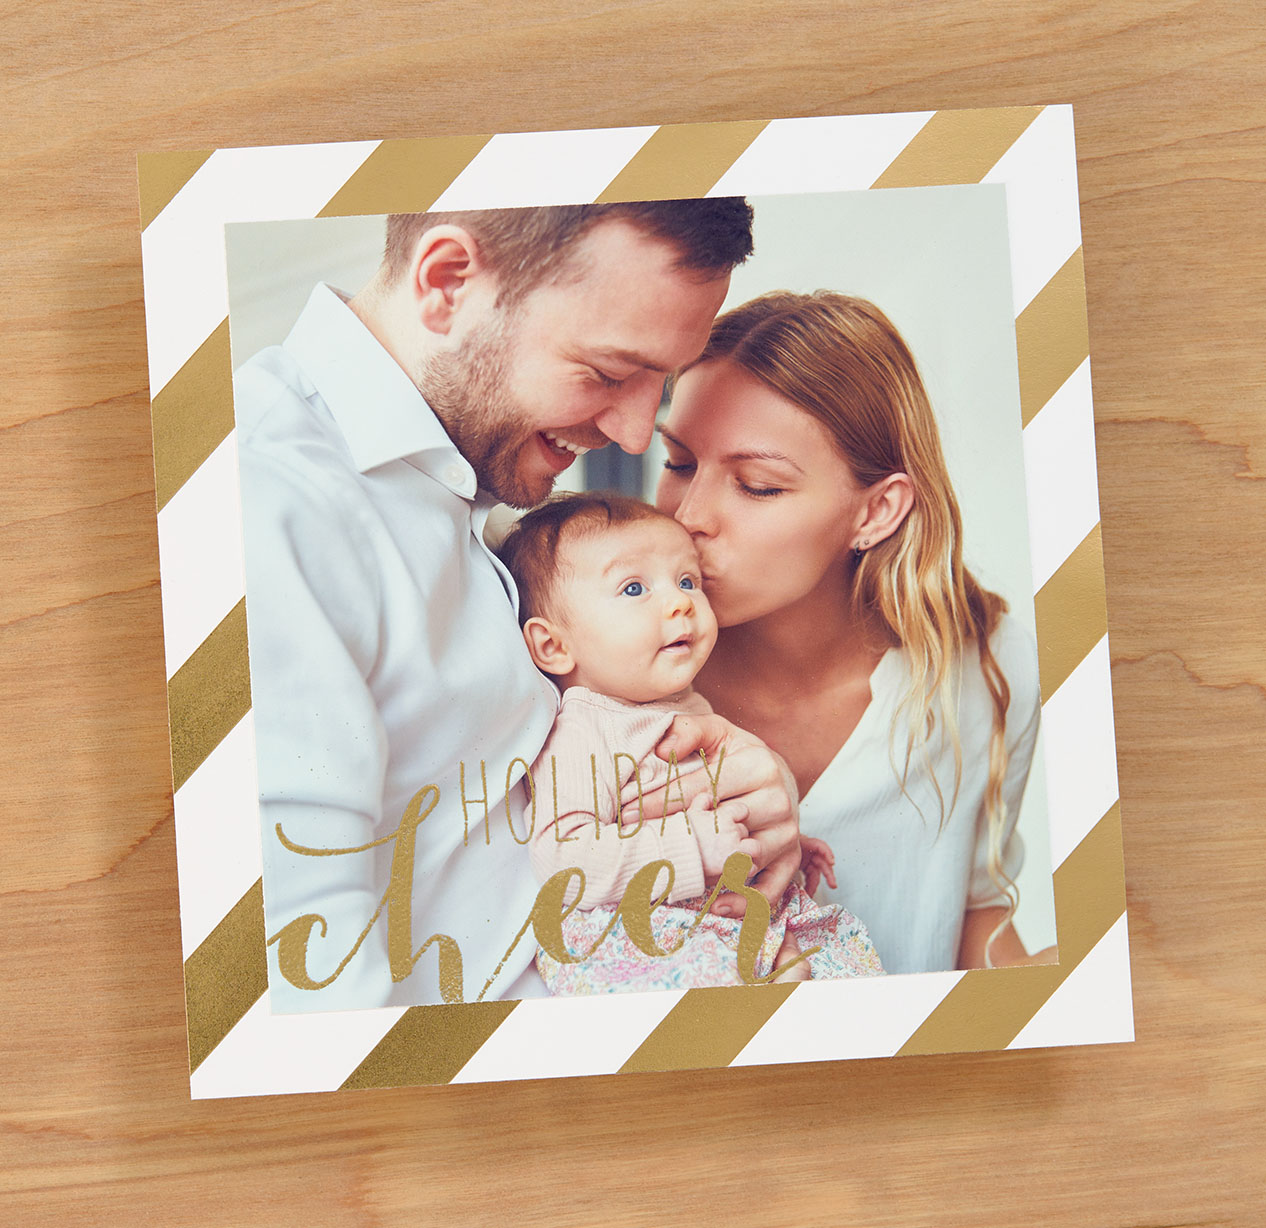
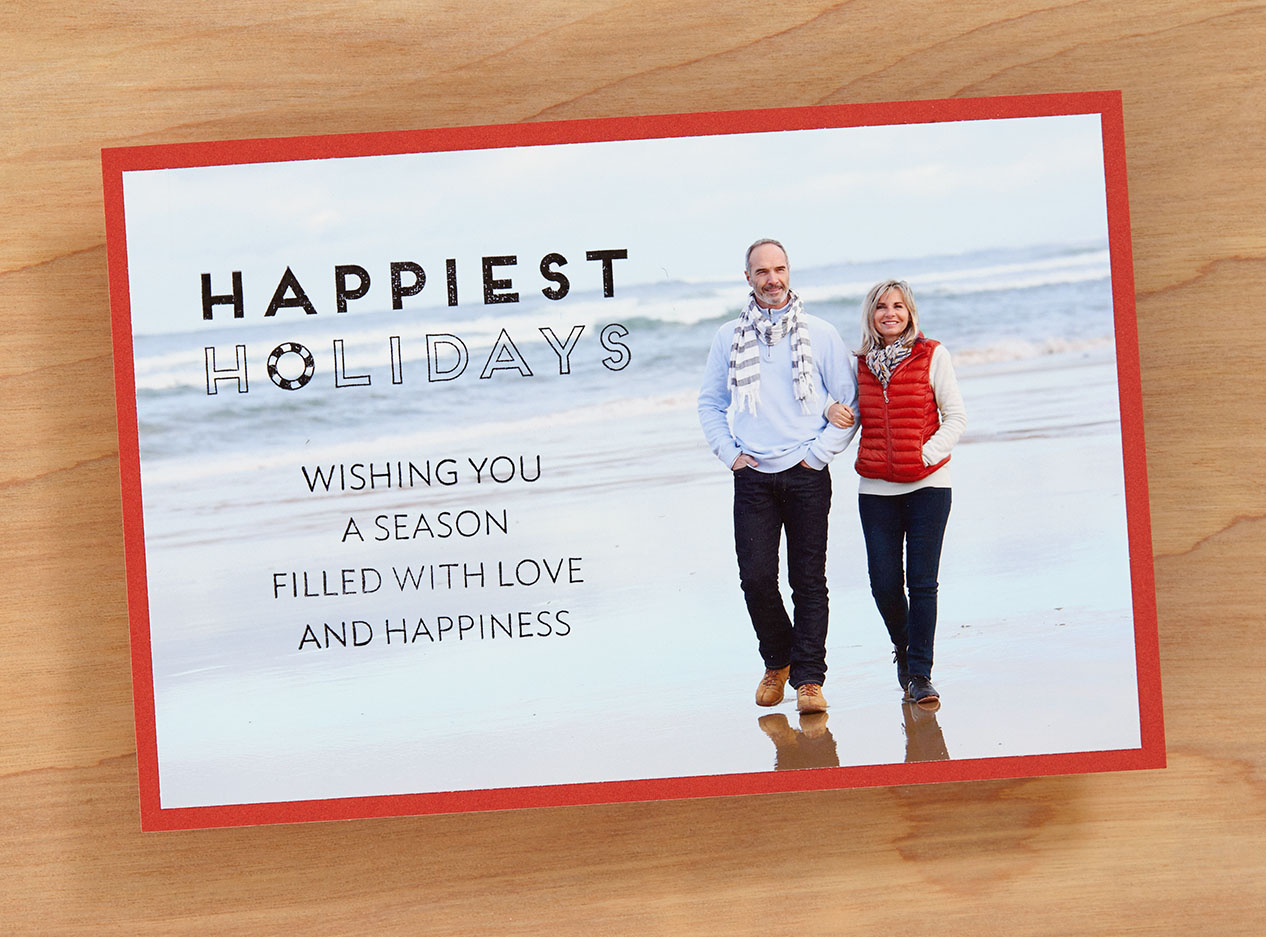
Tip #1: When stamping on your photo, use one with lots of negative space.
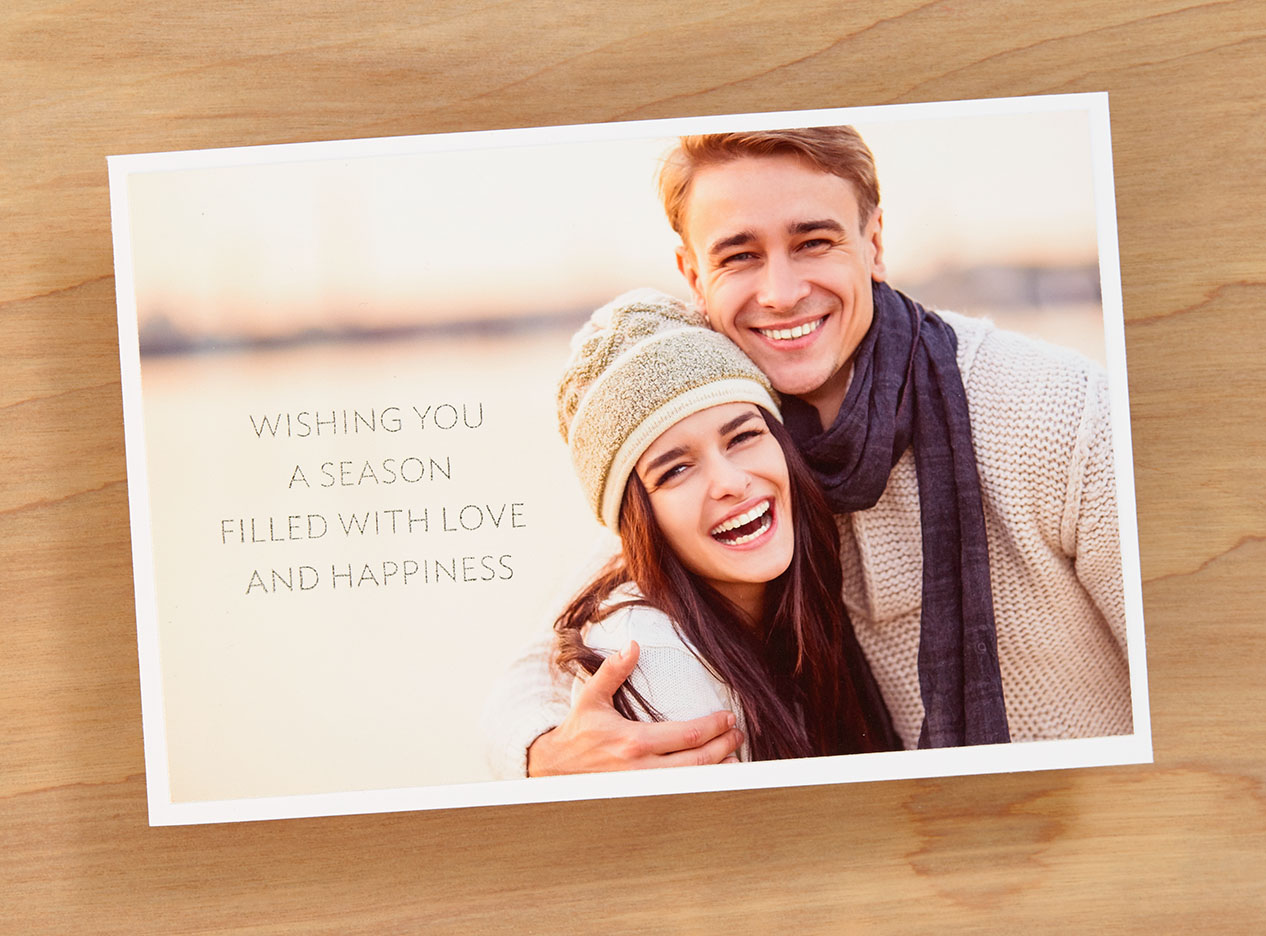
DIY Photo Card #ctmh #closetomyheart #season #love #happiness #Christmas #Holiday #photo #card
To stamp a holiday message directly on your photo, choose one that has lots of negative space, like the photo above. Negative space is all of the area surrounding the subject of your photo. Using a photo with plenty of negative space gives you a place to stamp your holiday message without covering the subject—like the face of one of your family members!
Tip #2: Matte photo paper works the best with any ink.
Printing your photos on matte photo paper is the best option for using them as photo Christmas cards. Matte paper works well with any ink. If you like the raised look and feel of embossing, matte photo paper is also the best option. You can use the VersaMark™ Ink Pad and your choice of embossing powder. (For even more color options, try our mini pigment pads with clear embossing powder!)
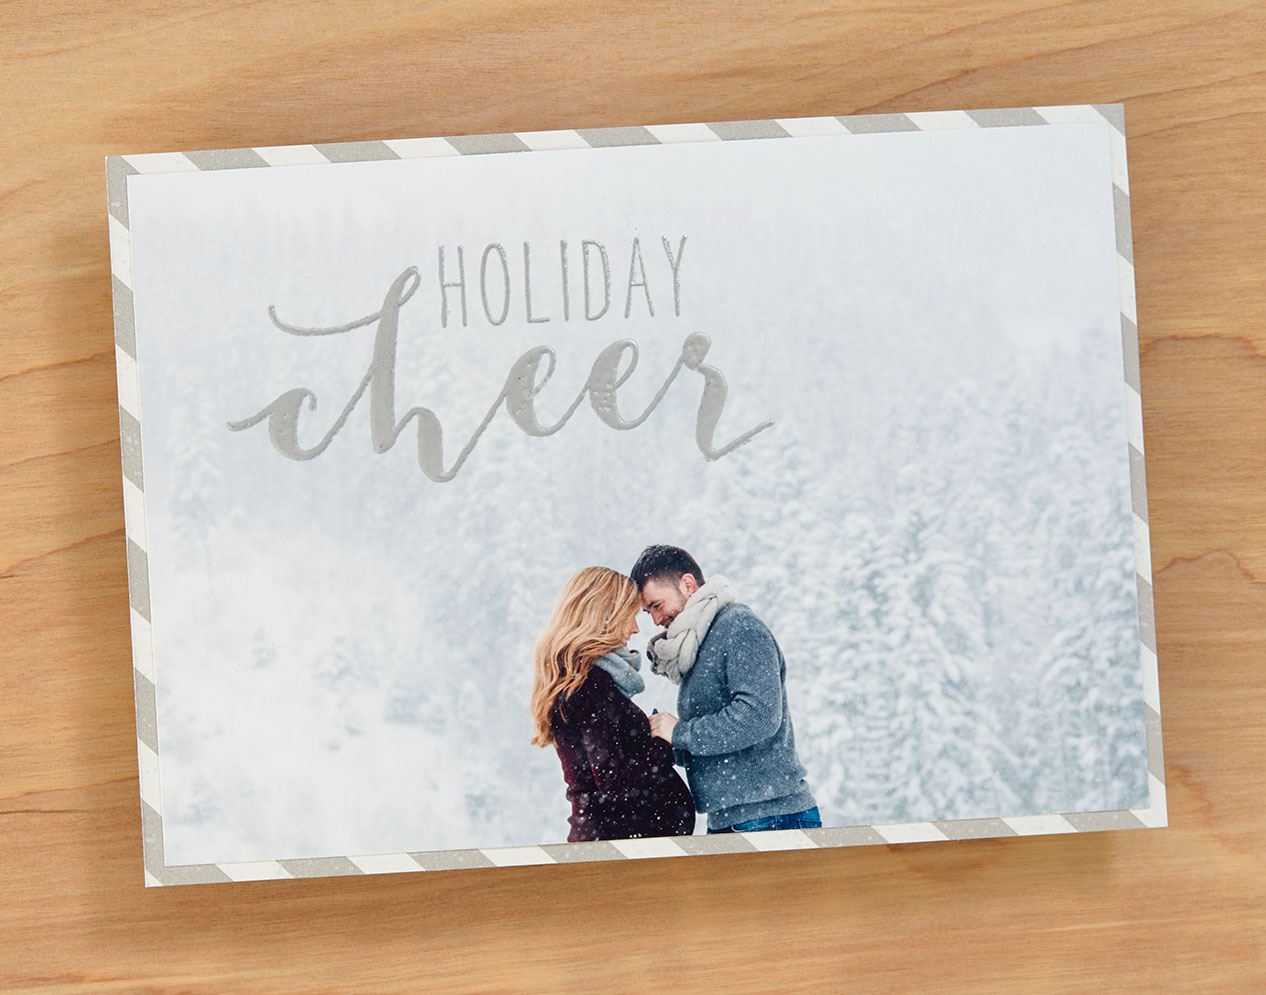
DIY Photo Cards #ctmh #closetomyheart #diy #photo #card #holiday #Christmas #cheer #snow
Keep in mind that VersaMark™ ink will absorb quickly into the matte photo paper. If you are going to stamp and heat emboss multiple images, emboss between stamping each image to make sure the embossing powder sticks to the ink.
Tip #3: Glossy photo paper requires StazOn™ Ink.
If you prefer the finish of glossy photo paper, you can still stamp on it! Just use the StazOn™ Ink Pad. This ink is especially meant to work on smooth, nonporous surfaces, and it will adhere to your photo much better. Other inks will smear on glossy photo paper.
Tip #4: Use a strip of cardstock over your photo for the stamped image.
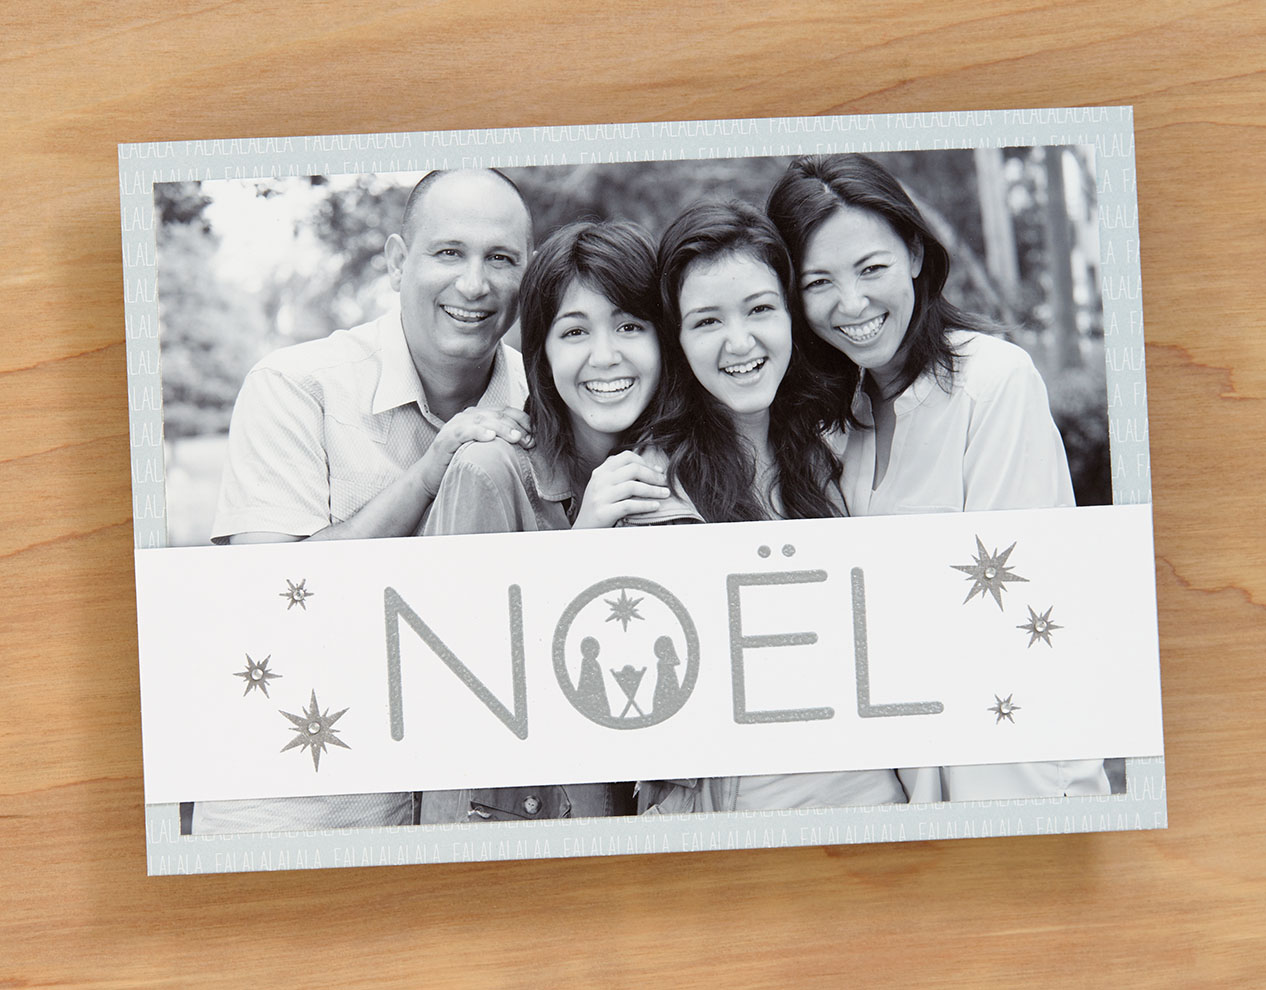
What if you aren’t sure about stamping on a photo? Or maybe your photo doesn’t have space for a sentiment? That’s ok. You can stamp or emboss your message on a piece of cardstock to adhere on top of your photo like you see in the image below.
DIY Photo Cards #ctmh #closetomyheart #diy #photo #card #noel #holiday #Christmas
Tip #5: Make your photo card a different shape.
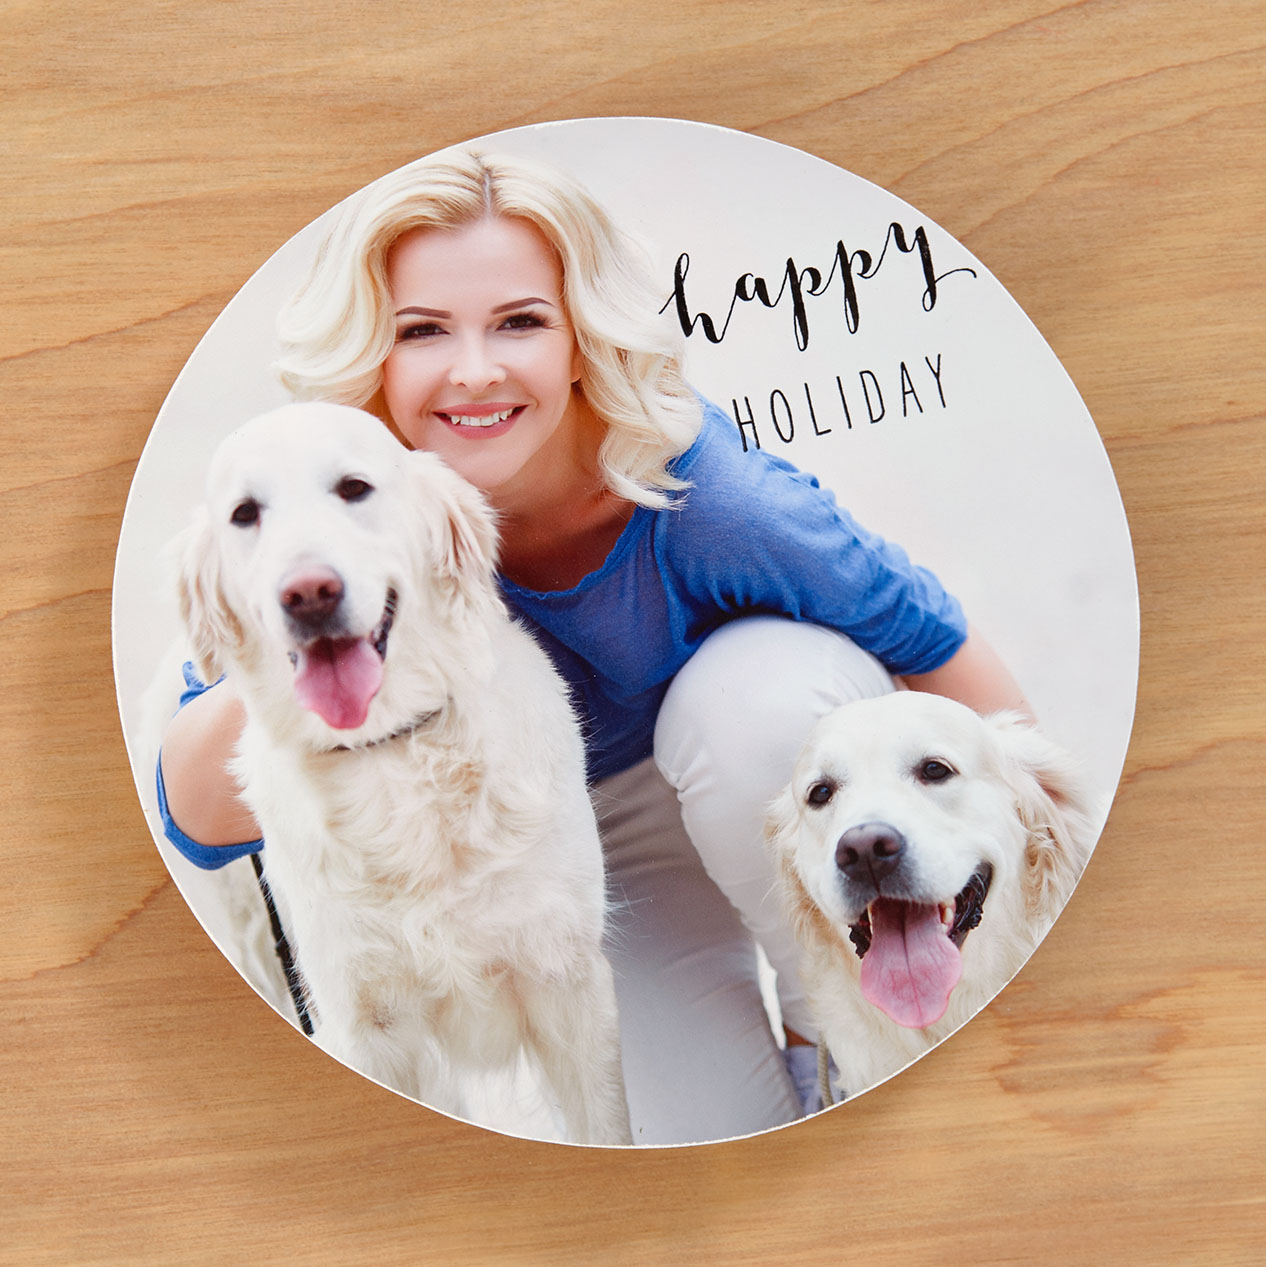
Tired of sending rectangle cards? Shake things up this year by making your photo card a square or even a circle. (Get creative and maybe even use a Cricut® shape!)
DIY Photo Cards #ctmh #closetomyheart #diy #photo #card #holiday #Christmas #cheer #goldDIY Photo Cards #ctmh #closetomyheart #diy #holiday #Christmas #card #happy #furbabies #dogs
To create the circle card above, print a 5″ x 7″ photo. Then, trace a 5″ circle over your photo and cut it out. Finish by distressing the edges of your photo to hide any pen or pencil lines.
Tip #6: Don’t forget your envelopes.
When creating your photo cards, be sure to size your cards to fit in standard size envelopes.
Here are some examples that we used. These are common envelope sizes that you can find at your local craft store or online.
Card Size                    Envelope Type
3″ x 5″                        4BAR
4″ x 6″                        A6
5″ x 7″                        A7
5″ x 5″                        5¾” Square
6″ x 6″                        6½” Square
The photo card size refers to the dimensions of the entire card. If you like the look of having a mat behind your photo, trim your photo and then attach it to the cardstock or paper mat of your choice.
DIY Photo Cards #ctmh #closetomyheart #diy #photo #cards #holiday #Christmas #season #happiness #happiest
The photo card above measures 4″ x 6″, including the photo mat. The envelope type that will fit this size is A6. You’ll notice that this card also has great negative space for stamping the holiday message.
One of the great things about making your own holiday cards is that no two cards have to be the same. You can personalize each sentiment and use different photos if you want to.
Our friends at Persnickety Prints are standing by with some great deals going on right now! Check them out to get your photos printed and get started on creating your own personalized Christmas cards this year!

Recipes
Cricut® Shape:
Flower Market
5″ Flower-2 <7> (p. 7, Basic Shapes)