Showing posts with label Artfully Sent. Show all posts

Thursday, January 14, 2021

Sweet Safari Valentine Cards...

Have you seen the ADORABLE Sweet Safari Collection! It's all about the CUTE, ADORABLE BABIES...BUT let me show you an alternative.

I am joining the Creative Design Team this week to share some Sweet DIY Valentine ideas on YouTube. These cards are my contribution.

The cards were made using a few Cricut Collections (Artiste, You Are Here and Artfully Sent) along with the NEW Sweet Safari Cricut Collection and the Sweet Safari Coordinating Cardstock...

---------------------------------------------------
For this first little card, I took several sentiments from the Artfully Sent, Artiste and You Are Here Cricut Collections and created the sentiment. The little tiny hearts are from the Perfect Match Special and I used those on each card, adhered with Liquid Glass...
---------------------------------------------------
This cute little card comes directly from the Sweet Safari Cricut Collection - I just erased the card base and envelope...
------------------------------------------------
This card base is from the Artfully Sent Cricut Collection...isn't that giraffe the CUTEST!!!
-----------------------------------------------------------------
Here's a look at what you get with the Sweet Safari Cricut Collection...two pre-designed cards, a bunch of sweet little animals, a title, a border as well as some other non-baby icons (clouds, palm tree, rainbow)...
-------------------------------------------
Here's a look at the Sweet Safari Paper Packet with Sticker Sheet...ADORABLE, huh?


You can check out the process video below...as well as find links to the rest of the Creative Design Team videos...


Sunday, March 1, 2020

WYD with Artfully Sent...

I had so much FUN joining the CTMH Twisted Sisters YouTube Hop where we show you how to take ordinary products and use them in not-so-ordinary ways!

My project is a 12x12 Layout using the Artfully Sent Circut Collection from CTMH. If you are familiar with the collection, it is ALL CARDS! 

Watch my video to see how it's done as well as how I used some Oh My Heart stickers but NOT for Valentine purposes.


Don't forget to visit all the Twisted Sisters' YouTube channels and check out what they have to share!

Also...you can find the link to my Design Space file in the description of my video. All you need to complete the layout is the Artfully Sent Cricut Collection and your favorite paper!

Saturday, February 28, 2015

Choose Happy Blog Hop...


Welcome to this month's SOTM Blog Hop featuring Choose Happy stamp set...

If you've come from Maureen's Blog, you're on the right track...keep hopping 'till you back to where you started!

I gave up making cards for Lent so you'll only be seeing layouts on my blog 'till Easter!!! I did it to challenge myself to get more scrapbooking done as well as cut down on the number of cards I've been hoarding...lol.

Here's a look at my layout...I used one of the frames that comes in the set to random stamp a piece of cardstock with versa mark then embossed the images and sponges with ink...I used Seaside Paper Packet because I love the colors!!!
--------------------------------------------------
Here's a close up of the embossed frames. the "Me & You" comes from the Artfully Sent Cricut Collection...
---------------------------------------------------------
I also stamped some of the square frames with Cocoa Ink and cut out as an embellishment...the word "memories" comes from one of the zip-strips of the Seaside B&T...

Don't forget...you have until March 31st to get your hands on this HAPPY stamp set...here's a look at it.


Thanks for stopping by!!!

It's now time to hop on over to Stefani's Blog and see what she has to share!

Friday, January 30, 2015

Happy Birthday with CDD...

We're so happy to be back with our January Release! We have 3 new stamp sets that are being released today. All stamps are in the CDD Shop and are now available for purchase.

And now...what you all have been waiting for...the January stamps:


Here are the SVG cut files for each stamp - these are FREE TO YOU to use with your new stamps! This makes it so easy...you just cut out the image with your machine and then stamp on it. The SVG file will be in the CDD Gallery under the file tab and available for you to download!


Here are the release specials for you:

1. Use code: Jan to receive 20% off your ENTIRE ORDER. Sale ends 2/1 at 10pm MST.
2. With a minimum $30 purchase (before tax & shipping), the 2x3 FREEBIE below will be added to your order automatically. Offer ends 2/1.

Here's a look at the 2x3 FREEBIE:


There is a link to this FREE SVG pattern somewhere in today's hop lineup...


As you might have guessed with my JANUARY SNEAK PEEK, I got to play with Celebration Word Art...here's a cute little birthday card made with this stamp set...

--------------------------------------------------
I used the FREE SVG file for Celebration Word Art to cut around the sentiment...I like to fussy cut but why do it when Tara makes it sooooo easy for you! I pop-dotted with Thin 3D-Foam Tape for a little bit of dimension...
-------------------------------------------------------
I used a card from Artfully Sent, modified the cut file so all that would be left was the "Happy Birthday"...layered Black Glitter Cardstock behind...love that little bit of glitter!

----------------------------------------
I used Simply Said for the "WISH BIG" sentiment on the inside...

Now for the important part!!!

GIVEAWAY!!!!

1. Craftin Desert Divas - 1 stamp each day.
2. Too Cute by Jessica - $25 gift card for regularly-priced patterns.

You must follow and comment on each blog to be eligible for the prizes. Winners will be announced on Tuesday!

We have a new lineup and freebie for tomorrow's hop so be sure to check back!

Your next stop on the hop is Saundra...head over there and see what she has to share!

Here's today's line up:
CDD
KIMBERLY
KATHY
NICOLE
TINA
LISA
KATY ---- That's ME
SAUNDRA
SHELLY
MAYRA
TCBJ


Friday, November 28, 2014

Life is Sweeter - In the Woods with SOUS...

This week's Die-Cut Challenge over at Stuck on U Sketches is In the Woods! Of course we want you to interpret this how you want...wait 'till you see my interpretation!


I decided to use a wood-grain overlay for my card to go along with the challenge...paired with Honey Ink and a Honeycomb Border Stamp.

--------------------------------------------
This little dragonfly was a perfect, simple touch to this card...I thought! And...some more of that Thin 3D-Foam Tape added the perfect amount of dimension in popping the sentiment piece off the card-front!
---------------------------------------------
I stamped some strips of Colonial White Cardstock and created a frame so the honeycomb pattern would carry over to the inside...here's a peek!
-------------------------------------------------
This was seal was a later addition...took me a while to figure out what the inside should say.

Here is the overlay I used for the die-cut wood-grain...

Thursday, November 6, 2014

Artfully Sent - Artfully Yours...

Welcome to the Artfully Sent Blog Hop brought to you by most of the SOTM Blog Hop girls!


We're glad you're stopping by!  If you've come from Michele's Blog, you're on the right track...keep hopping around 'till you get back to where you started!  If you're starting here, welcome!!!

I used the CTMH Artfully Sent Cricut Collection for all parts of this card...I just dissected them from their original cards (3 cards in all...)

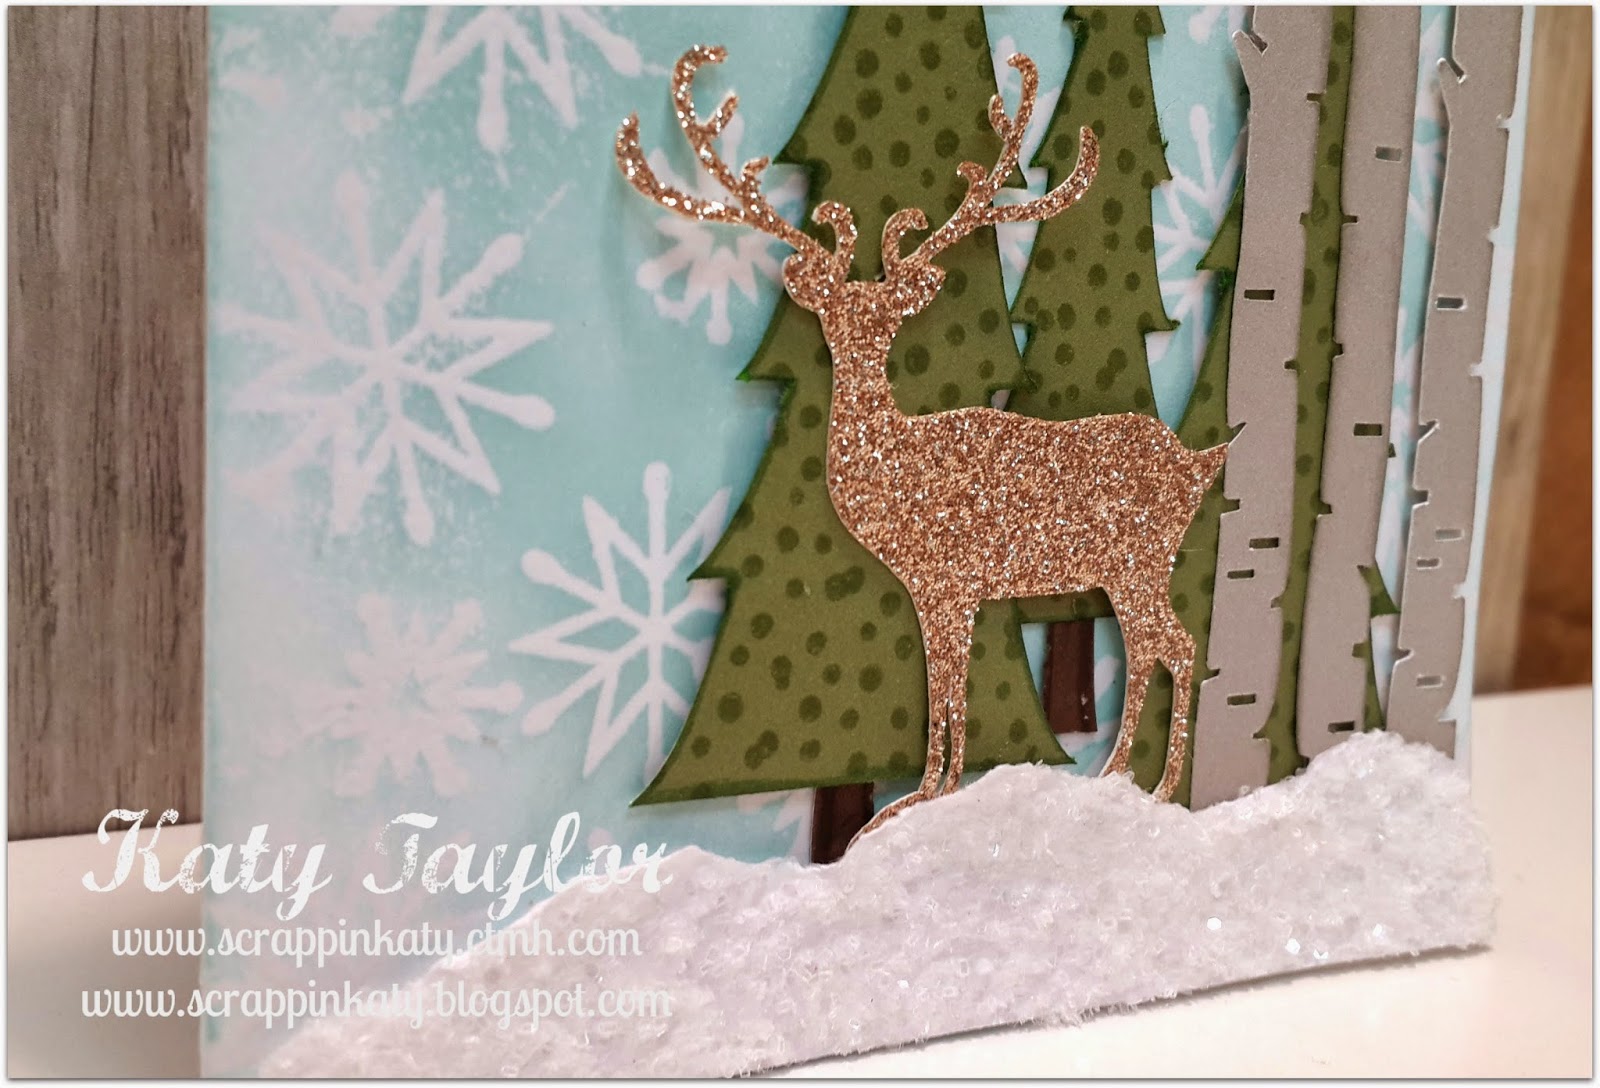
Here are some close-ups....I random-stamped the card base with the snowflake from the Snowhaven WOTG, clear embossed it then sponged Glacier Ink with the heaviest concentration in the center of the card.
----------------------------------------------------
The deer is cut from the gold paper in the Brown & Tan Glitter Paper Pack...those horns are very delicate but my Cricut Explore handled it like a charm!
---------------------------------------------------
The trees are random-stamped with the flower center from this month's SOTM, It's The Little Things...love that little stamp!!!  I also used Thin 3D-Foam Tape for several of the images to add dimension!  The snow is chunky glitter adhered to a torn piece of White Daisy Cardstock.
-----------------------------------------------------
Isn't that little red bird to die for!!!  It actually is attached to the deer horns on the Artfully Sent Cricut Collection but I detached it made it Ruby for a pop of color AND because my MeMe's favorite bird is a Cardinal (she's been gone for 14 years now and this little bird makes me think of her!)
------------------------------------------------------
Here's the inside...I used Glacier Ink again to sponge but this time the concentration is on the outside of the card so there will be plenty of space to write on the inside.  The "Merry Christmas" comes from TWO different images on one of the THREE Stamp Sets that come with the Artfully Sent Cricut Collection! I added some Silver Geometric Washi Tape on the very bottom to bring the Whisper color onto the inside.

Thanks for stopping by...it's now time to hop on over to Lauren's Blog and see what Artfully Sent project she has to share!

Here are the 3 cards I dissected to make this one...


Monday, October 27, 2014

A Very Haunted House - H2H Midnight Challenge...

This week over at H2H Challenges, we are inspiring you with "Midnight" projects!  Now...these don't have to do with Halloween but what FUN it would be to incorporate some spookiness into your projects...

That's what I did...used CTMH Cricut Collections as well as one of the box cards from SVG Cuts to create this spooky Haunted House...


-------------------------------------------------
Here are some close-ups...


-----------------------------------------------------------
This is one of the only ones you can see the night sky behind...
-------------------------------------------------------
I started with a White Daisy piece and sponged several colors. Using my All-Purpose Mat helped a lot!!! Here is how I made it...inspired by a pin on my CARDS BOARD.  I then took a white gel marker and added stars...
-------------------------------------------------------------------
I added some more cut-outs to the side panels...

------------------------------------------------------------
Here's a view looking down...I put 2 tea-lights (the battery operated ones) in for photo-taking purposes but one is enough to keep it lit...

Thanks for stopping by!

Don't forget to visit the H2H Blog and check out what Midnight projects the other DT members came up with...and don't forget to play along!  You'll have 'till Friday to link up your project!

Here's the SVG Cut File...it's the Scalloped Box Card in the Box Cards Kit!


Sunday, October 12, 2014

ColorCrush HELLO...

CTMH has started back with their #ColorCrush challenges on Instagram....and this one is a GORGEOUS color combo! Outdoor Denim, Smoothie, Glacier, Topiary, Whisper & White Daisy...

I used Artfully Sent for the Card...there isn't much embellishment because it's gorgeous all by itself!


------------------------------------------------------
To get the layers, I simply copied the Outdoor Denim card (sized to 5x7), spliced the back of the card off then copy and pasted 2 other layers...changed the colors so that I would have one of each Smoothie, Glacier & Whisper...
-------------------------------------------------
I cut out the flowers I wanted then used liquid glass to adhere to the card front.  I also cut some leaves from a flower image found in Artiste using Topiary Cardstock...
------------------------------------------------------------
I colored all the edges with corresponding color markers...these are my old markers that are retired so I don't have some of the newer colors...no worries, I just used colors that were pretty close!  LOVE that by doing this, I can't see the white-core of the cardstock!  Look ABOVE the see how much better each flower works AND it kinda looks like ink distressing which you all know I LOVE!!!
-------------------------------------------------
Here's the inside using the HELLO from one of the 3 stamp sets you get with the Artfully Sent Cricut Collection AND with the "innards" of one of the Glacier flowers...
----------------------------------------------
Here's the easiest way I have found, not only to use the innards, but also to store them...

Take a picture of the innards while it's still on your mat (please excuse my much-loved mat...my Explore only cuts on "Poster Board" or "Fabric"...can't seem to get Cricut to help me out there!)
 
Take a snack size ziploc bag and staple compartments (It's VERY IMPORTANT that you go all the way to the bottom with the staples!)...then as you pull off the innards from your mat, put them in the compartments...that way each flower's parts stays with that size flower!

Thanks for stopping by!!!  

If you want to check out my #ColorCrush card on Instagram, hop on over there and become a follower!!!