Showing posts with label Artistry. Show all posts

Wednesday, December 23, 2020

12 Days of Christmas Memories - Day 12: New Years Eve...

Today is the LAST DAY of my 12 Days of Christmas Memories series and I'm not gonna lie...I'm probably going to go thru withdrawals...lol. I have SOOOO ENJOYED making these layouts with prompts in place to make it easier. Don't we all need EASY during this "most wonderful time of the year"!

Today's layout is all about NEW YEARS EVE and I am sharing a 1-page layout featuring a grid of photos from New Years Eve a couple of years ago.

Don't forget that this is also the LAST DAY of my 12 Days of Christmas Goodies AND the base page for today's layout is a sheet from the Mix-In collection which I'm GIVING AWAY to anyone who orders $25 from my website (TODAY - DECEMBER 23, 2020 - ONLY). You can read all about my 12 Days of Christmas Goodies {{{HERE}}}.

Let's take a look at my layout! I played on the iridescence of the New Years hat by pulling in some Holographic Paper.

----------------------------------------------
Don't you just LOVE that Holographic Paper for the title. It is part of the Artistry Cricut Collection so if you own it, you can grab the DS File from my YouTube video description and make your own! Also...you can see the tiny open polka-dot pattern of the Mix-In Collection I used...perfect for this layout, if you ask me...
------------------------------------------------------
I decided to do a basic shape circle in Design Space to mimic Champagne bubbles...the color also played well with our pickle shots photo. The tiny vellum/gold hearts are from my stash...another great addition... 

Thank you so much for following along with this series...it was SUPER FUN and now I have 12 Layouts of Christmas Memories (past and present) to add to my Albums!

Here's the video link...don't forget to grab the DS link in the video description on YouTube.


Sunday, April 5, 2020

Create Your Own Stencils with the Creative Design Team...

I am joining the Creative Design Team again to bring you some artwork featuring CTMH's stencil paper.

Please head over to my YouTube Channel to check out this video, grab the FREE Design Space file as well as see all the other girls' artwork!


Wednesday, April 1, 2020

O-Fish-Ally AWESOME SOTM Blog Hop...

HAPPY APRIL, everyone! I truly hope each and every one of you are staying safe & healthy...and enjoying what little bit of extra time at home you may have!

I am in an area of the US that hasn't been hit that hard...yet...but still have a couple of days off during the week to help kiddos adjust to their new learning environment. I have found time to balance school-work AND being crafty! And...I am SO EXCITED to bring you some artwork using this month's SOTM, O-Fish-Ally Awesome stamp set!


I am joining 21 other CTMH Consultants in bringing you a one-stop-hop featuring this CUTE stamp set! If you've come from Kathy's Blog, you're on the right track...keep hopping around until you get back to where you started! If you're starting here, WELCOME! And, if you get lost along the way, head on over to Melinda's Blog for a complete list of hoppers!


I made a FUN, very dimensional card using this stamp set...here's a look!

--------------------------------------------
Here are some closeups of the layers (all made in Design Space using basic shapes and a DONUT from the CTMH Artistry Cricut Collection). All the fish were colored using our Tri-Blend Markers and I added shimmer using a couple of the Shimmer Brushes...
---------------------------------------------------
For the inside, I used some of the 'bubbles' that were left over from the face of the card as well as one of the sentiments and some non-colored fish...

Thanks for stopping by! I hope you'll hop on over to Kim's Blog and see what she has to share!

Here is a short video showing you how I did it AND there is a link to my Design Space file in the description...TFL!


Wednesday, April 3, 2019

Bring Back my Pack - Zoe...

Zoe Is Back and Better Than Ever!

Zoe-Workshop-Bring-Back-My-Pack-hero
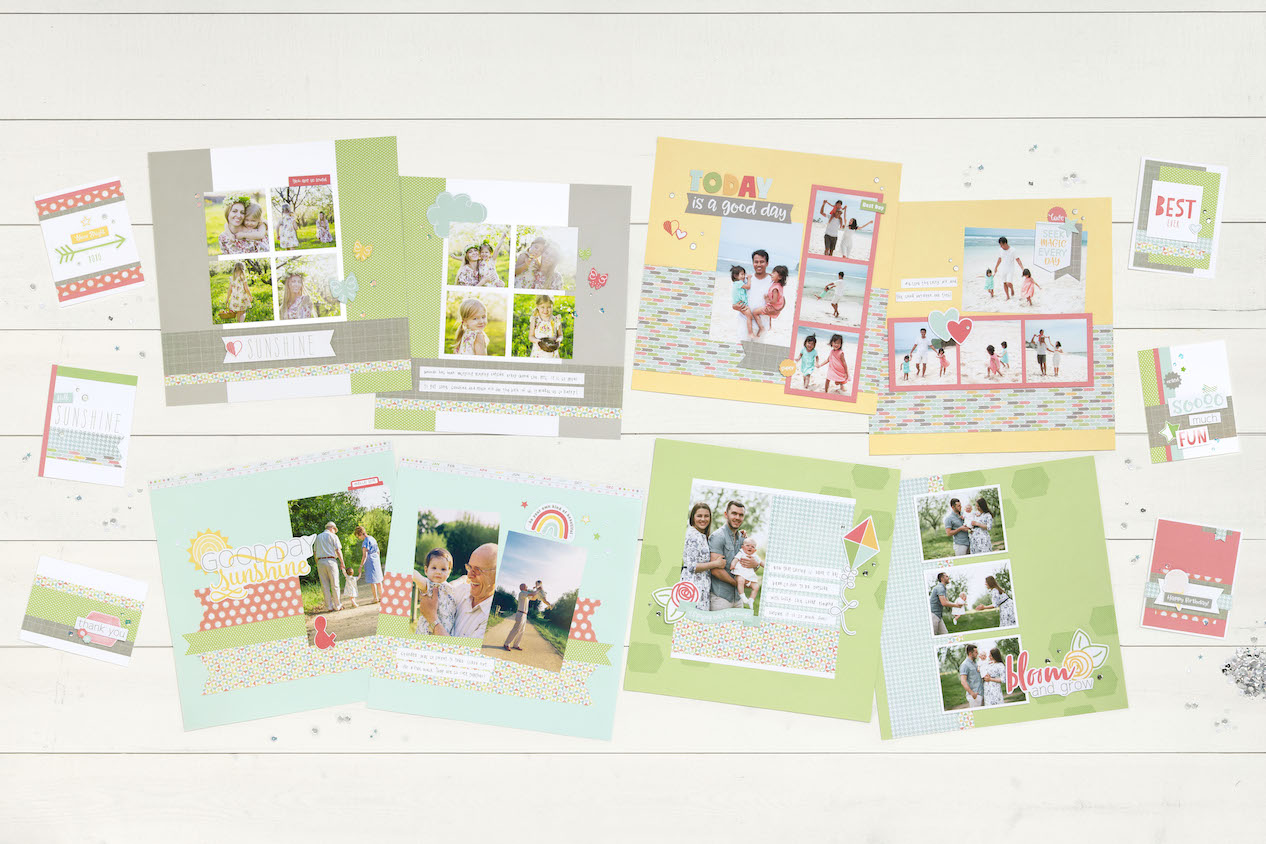
We did it again, friends! One of our favorite retired paper collections, Zoe, has received a modest makeover, getting updated colors, a new 12″ × 12″ coordinating sticker sheet, and a new workshop. The updated Zoe collection is available through the end of May. With its sunny disposition, this collection is sure to brighten anyone’s day and any scrapbook album!

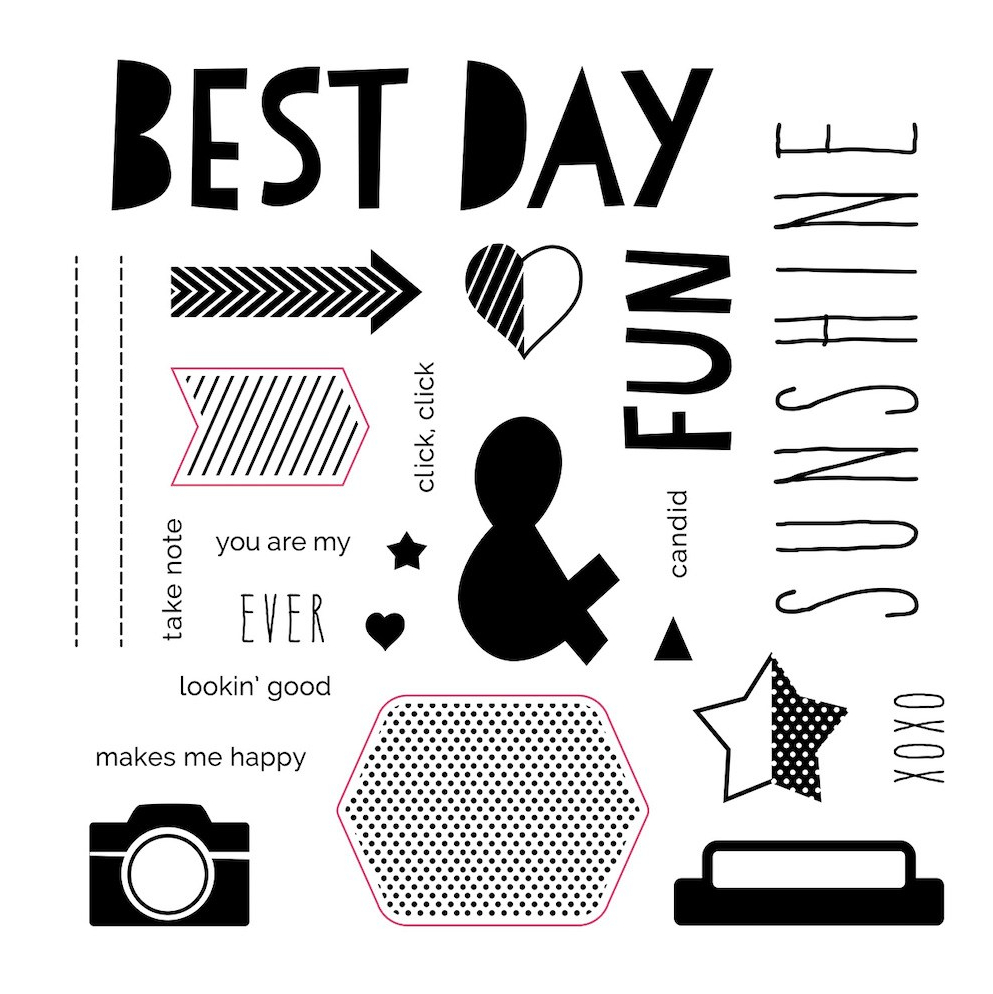
1.  My Acrylix® Zoe Stamp Set

Zoe-Stamp-Set-CC4197
As if this stamp set isn’t perfect enough for all those sunny moments you wish to hold onto, the shapes outlined in red coordinate with our Cricut® Artistry collection—making it that much easier to create unique, custom cards and layouts! You’ll find sizing instructions for cutting the coordinating shapes on the packaging of the stamp set.

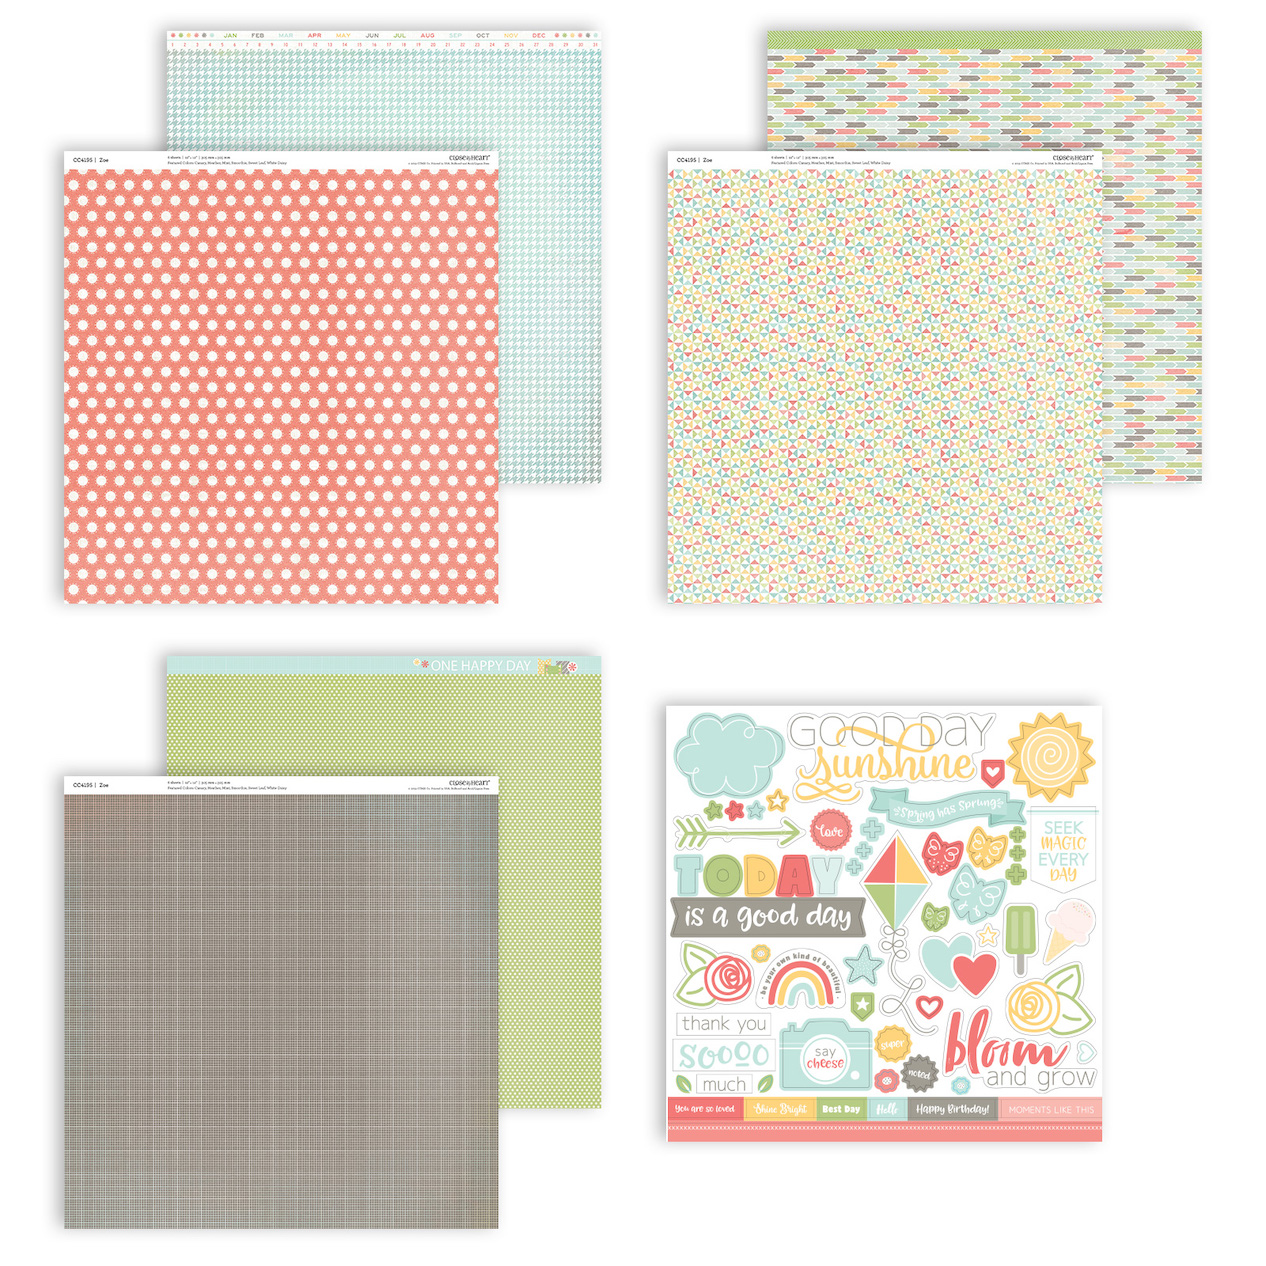
2. Zoe Paper Packet

Zoe-Paper-Packet-CC4195
Here it is! Featuring our exclusive colors, Canary, Heather, Mint, Smoothie, Sweet Leaf, and White Daisy, this paper packet comes with 6 refreshed patterned paper sheets, 2 each of 3 double-sided designs, and 1 new coordinating sticker sheet! The zip strips are also new! Click on the image to take a closer look!

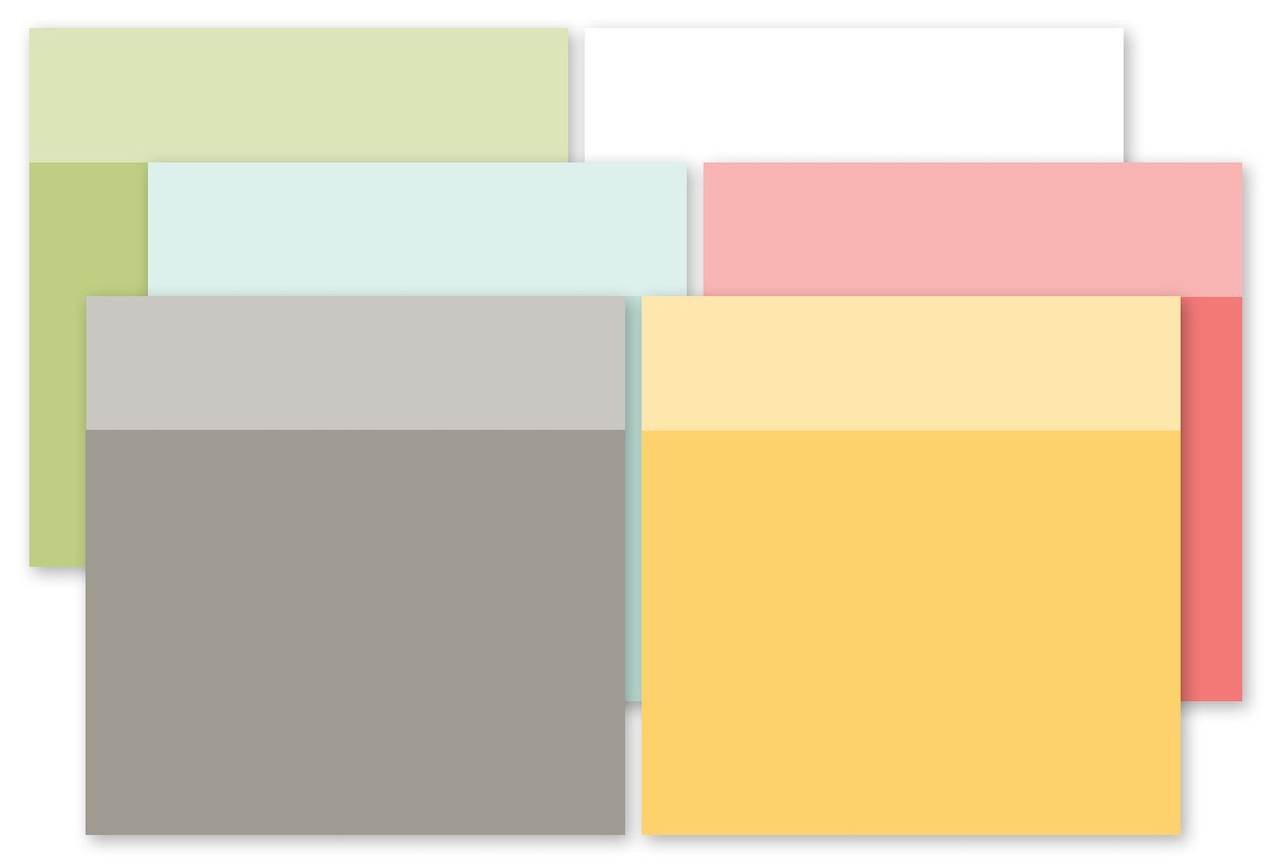
3. Zoe Coordinating Cardstock

Zoe-Coordinating-Cardstock-CC4196
These cardstock colors coordinate perfectly with those in the Zoe Paper Packet. Each Zoe Coordinating Cardstock pack comes with 12 sheets, 2 each of Sweet Leaf, Smoothie, Mint, Canary, Heather, and White Daisy; all 12″ × 12″.

4. Zoe Workshop Kit

Use the materials in this kit and the online instructions found below to create four coordinating layouts and six cards!
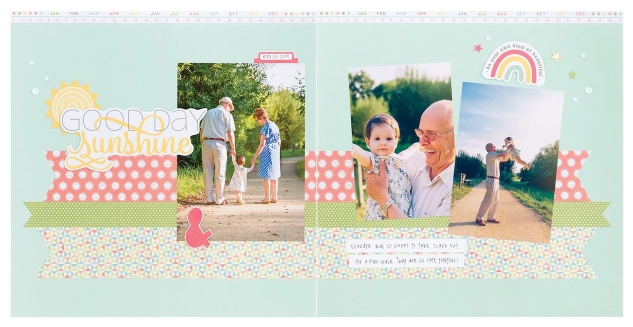
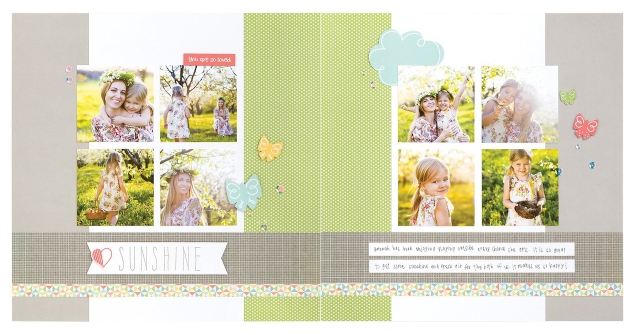
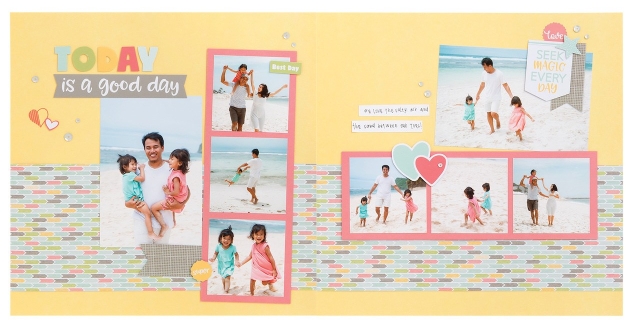
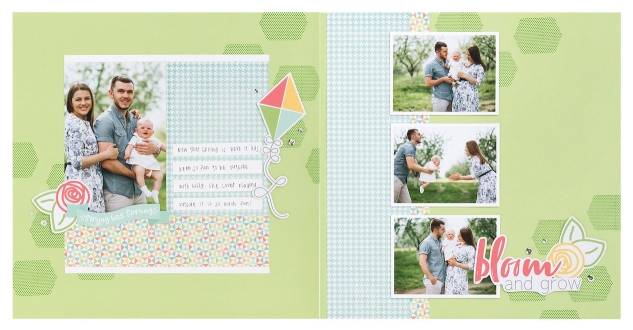
Good-Day-Sunshine-layout-CC41910Sunshine-layout-CC41910Today-Is-a-Good-Day-layout-CC41910Bloom-and-Grow-layout-CC41910


(Click on the individual image for a closer look at any of these projects.)
Download workshop instructions, here!
Zoe is only back for a limited time and only while supplies last! Act fast, and get your favorites from this collection before they run out and it goes away for good!

Thursday, February 28, 2019

DREAM BIG - Back to Basics with Cricut Design Space


SHARED FROM THE CTMH BLOG...

Back to the Basics with Cricut Design Space™


No matter your comfort level with Cricut Design Space™, it’s good for everyone to revisit the basics. Today, and in a few more blog posts in the upcoming months, we’re going to explain some of the basic tools in Design Space and then illustrate how to use these tools with images from each Close To My Heart Cricut® collection. Making sure you have the basics down will only increase your confidence as a Design Space user, unlocking so many creative options for your crafting!
Cricut Basics #ctmh #closetomyheart #cricutbasics #cricut #scrapbooking #scrapbook #cardmaking #papercrafting #papercrafts #dreambig #memorykeeping
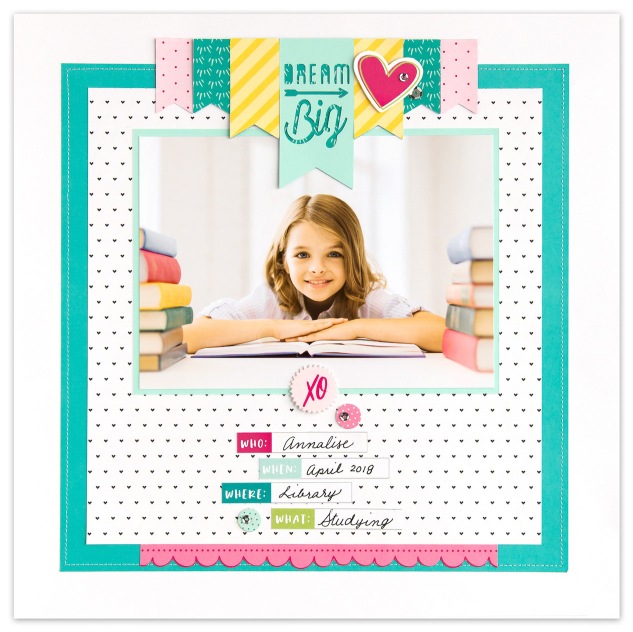
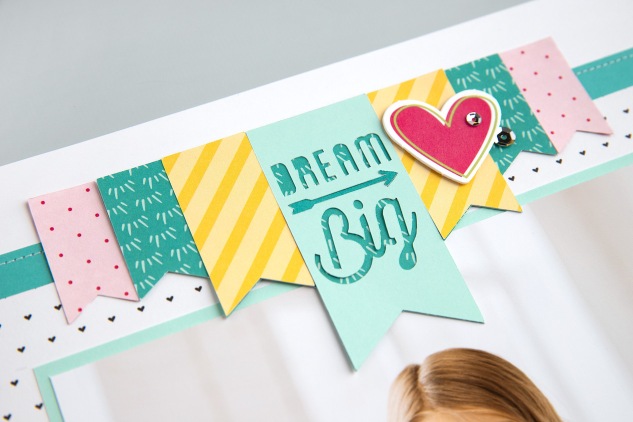
On the page above, we’ve used a banner from the Artistry Cricut® collection to create the title piece. Artistry has a wide variety of words and shapes including titles, sentiments, backgrounds, borders, and banners that you can use for any project theme. Whether you are celebrating a birthday or holiday, or scrapbooking everyday moments, you have lots of choices with this collection, and even more when using the tools in Design Space.
As you read along, remember that the steps below show you how to work in Design Space from a desktop or laptop computer. If you use the app on a mobile device, the buttons and tools will be located in slightly different places on your screen, but the same features are available on any device. Let’s get started by taking a look at the project canvas.
Your Canvas
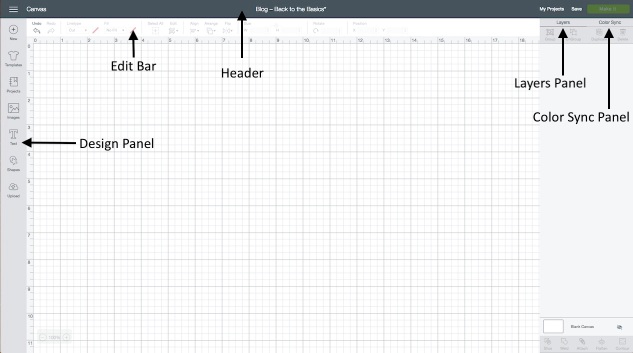
 Whether you are new to Design Space or a seasoned pro, it’s useful to identify the different parts of the canvas and where to find particular functions and tools.
Cricut Basics #ctmh #closetomyheart #cricutbasics #cricut #designspace #scrapbooking #scrapbook #cardmaking #papercrafting #papercrafts #dreambig #memorykeeping
  • Design Panel: This panel, on the left side of the canvas, is where you add new elements to your project like basic shapes, images, text, and more.
  • Header: The Header is just the fancy title for the dark gray strip across the top of the canvas. This is where you can click to view the menu and see your project name. The Header is also where you’ll find a few more VERY useful things, like Save and Make It in the top right corner. ðŸ™‚
  • Edit Bar: Below the Header, you’ll see the Edit bar. This section of the canvas houses many of the tools you’ll need to manipulate specific shapes and text. Here you can find tools like LinetypeSize, and Rotate. There are also options to Align and Arrange shapes, and most importantly, the top left corner is where you’ll find Undo and Redo, just in case you make a mistake. When you are working with text, more tools for adjusting the text will appear in the Edit bar.
  • Layers Panel: The Layers panel holds tools that you might need when working with multiple images together. Tools like GroupUnGroup, and Duplicate are at the top of this panel. These tools let you copy, combine, or separate images. The SliceWeldAttach, and Contourfeatures are at the bottom of the Layers panel.
  • Color Sync Panel: The Color Sync panel and the Layers panel share the same space on the canvas. To see this panel, click Color Sync, instead of Layers. This allows you to match colors used in your project’s shapes. Grouping them together by color makes it easy for you to cut shapes from the same paper.
Searching for Specific Shapes
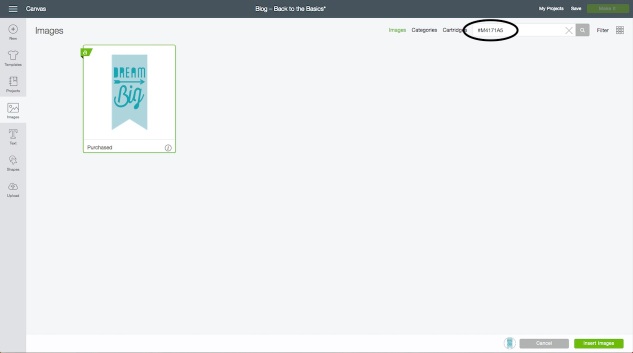
#M4171A5
Have you ever wondered what this number means? You might see a number like this one in instructions or recipes we provide for artwork that use Cricut® shapes. This number is the image number in Design Space. When inserting an image on your canvas, you can search for a specific image by entering the entire number in the search box. Make sure to include the “#” symbol when you search.
Cricut Basics #ctmh #closetomyheart #cricutbasics #cricut #designspace #scrapbooking #scrapbook #cardmaking #papercrafting #papercrafts #dreambig #memorykeeping
To search for a specific image, click Images on the left side of your canvas. Then enter the image number in the search box in the top right corner, just like we did to find a the banner used in this project.
Changing the Size of Shapes
Cricut Basics #ctmh #closetomyheart #cricutbasics #cricut #designspace #scrapbooking #scrapbook #cardmaking #papercrafting #papercrafts #dreambig #memorykeeping
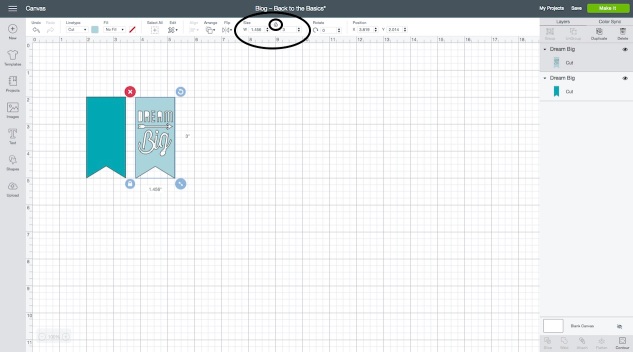
A simple tool you’ll use over and over again is Size. In the Edit bar, you’ll see Size and then the width and height of a selected image. You’ll also notice a lock symbol. When the lock is closed, if you adjust the width of the shape, for example, Design Space will automatically change the height to match the proportions. If you want to change both, simply click on the lock. It will unlock, allowing you to manipulate either one as desired.
Grouping and Ungrouping Shapes
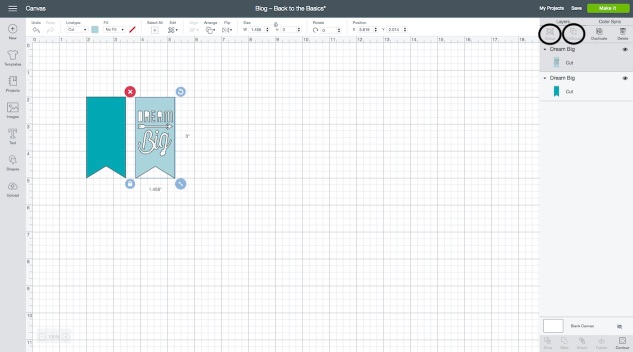
Some images in Design Space have multiple layers. When you insert the image on the canvas, the layers will be grouped together. To manipulate each one individually, you have to use UnGroup. Simply select the image and click on UnGroup.
Cricut Basics #ctmh #closetomyheart #cricutbasics #cricut #designspace #scrapbooking #scrapbook #cardmaking #papercrafting #papercrafts #dreambig #memorykeeping
You can see that this banner image has two layers, one solid base layer and one overlay with the words “DREAM Big.” To make changes to each one individually, we ungrouped the image.
 Duplicating Shapes
Cricut Basics #ctmh #closetomyheart #cricutbasics #cricut #designspace #scrapbooking #scrapbook #cardmaking #papercrafting #papercrafts #dreambig #memorykeeping
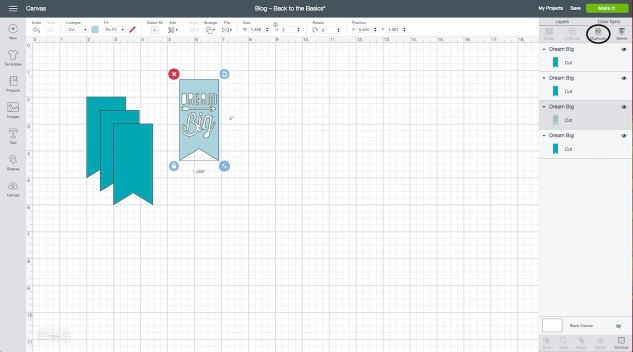
Another frequently used tool in Design Space is Duplicate. This lets you make a copy of any shape or shapes you have selected. Just click on the shape and click Duplicate at the top of the Layers panel.
Welding Shapes
Cricut Basics #ctmh #closetomyheart #cricutbasics #cricut #designspace #scrapbooking #scrapbook #cardmaking #papercrafting #papercrafts #dreambig #memorykeeping
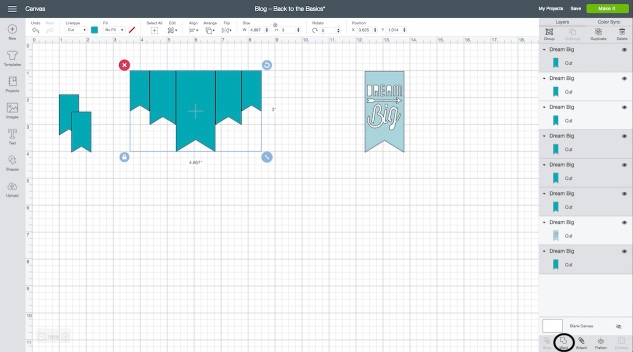
The word weld basically means to unite. While it often refers to metals, in Design Space, when you use this tool, you can combine, or “unite,” multiple shapes into one image, removing extra cut lines. Simply arrange the images as desired. Select all of them at the same time and click Weld. Now, instead of many separate images, they will be combined together as one single shape. This is how we created the solid base piece for our title.
Putting It Together (Search, Size, Duplicate, and Weld)
Cricut Basics #ctmh #closetomyheart #cricutbasics #cricut #scrapbooking #scrapbook #cardmaking #papercrafting #papercrafts #dreambig #memorykeeping
The title at the top of this page is made using the tools we’ve reviewed today to manipulate one image in Design Space.  Follow the steps below to put it all together and make your own!
  1. First, search for the image, #M4171A5, and insert it on your canvas.
  2. Ungroup the image.
  3. Resize the solid banner to a height of 3″, leaving the width locked. Then, duplicate and resize to have six additional banners, two 2″ and four 1.5″.
  4. Arrange the banners like you see on the page with the solid 3″ banner in the center and one 2″ and 1.5″ banner on either side. Click and drag your cursor over all the images to select them all. Then, click Weld. This gives you the solid piece to go behind the remaining banners.
  5. We, then, went ahead and colored the additional 2″ banners light yellow, and the additional 1.5″ banners pink. This just helps you cut the right color of paper or cardstock.
  6. Select Make It in the top right corner and cut your project pieces. Then, assemble your title like you see on the page.
Keep in mind, to use the same image we did, you must own the Artistry Cricut® collection. You will also need a Cricut® machine that is Design Space compatible (any of the Explore or the new Maker machines).

Monday, January 21, 2019

Anything but Standard with H2H...

This week's H2H Challenge is to make a creative card (or any card that is NOT a standard-size card)!

I've always loved this little typewriter from the Artistry Cricut Collection...and by duplicating, ungrouping and welding the base image, I was able to make this cute little card!

I chose to use the Heart Happy Kit (paper & the EXCLUSIVE stamp set) together with the I Heart Us paper packet. I added some shimmer to the little heart usig the Red Shimmer Brush... 


and the inside is finished off with a sentiment from January's SOTM - Card Captions....