
shared from ctmh's blog...
Easter Treat Bags
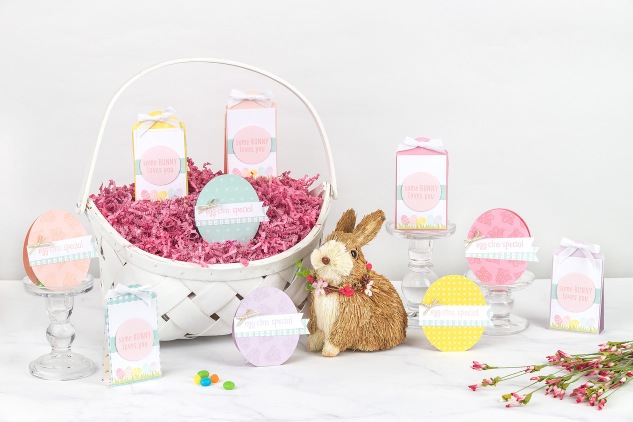 With Easter just around the corner, we came up with a couple of really cute treat bags for you to make and share with all of those people you love to celebrate with!
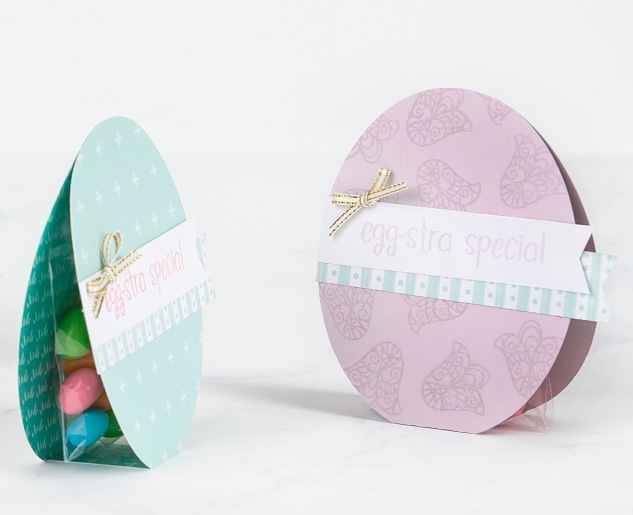
Take a look at how easy this egg-stra special treat comes together:
STEP 1. CUTTING YOUR PAPER
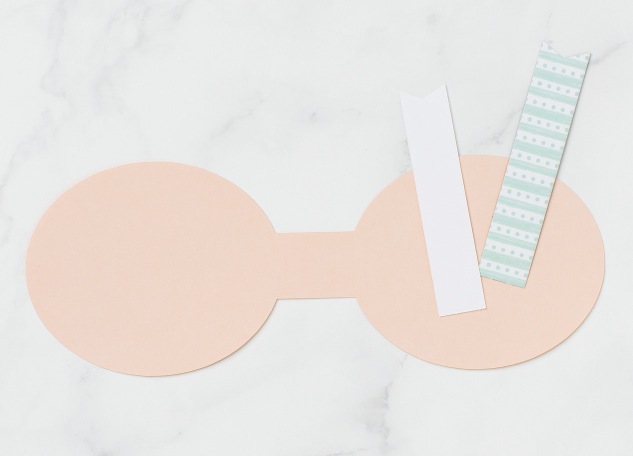
This project uses a simple base shape that folds up into the treat bag shown above. To help you easily replicate this shape, we created a Cricut Design Space™ file, https://design.cricut.com/#/design/139208505. If you do not have access to Design Space, these little eggs are still doable with a little bit of ingenuity and scissors!  The oval shapes forming the eggs are 3½” tall and 3¼” wide and are connected by a 1″ x 1¼” rectangle. We also recommend cutting out a few small strips of paper to add sentiments and decoration to your finished treat. The strips we cut are ¾” x 3¾” and ¾” x 3½”.
The oval shapes forming the eggs are 3½” tall and 3¼” wide and are connected by a 1″ x 1¼” rectangle. We also recommend cutting out a few small strips of paper to add sentiments and decoration to your finished treat. The strips we cut are ¾” x 3¾” and ¾” x 3½”.
STEP 2. SCORING AND STAMPING


With a Bone Folder, score the short sides of the connecting rectangle to create the base for your egg to stand on. Then, flip the cardstock over and stamp on the top oval. Using a tone-on-tone stamping technique will create a subtle and delicate pattern.
STEP 3. PUTTING IT TOGETHER


Attach a treat to the inside of the wrapper. Fold your egg and attach the top of the two ovals where they meet with adhesive. Lastly, embellish the front as much or as little as you wish. We added the two small strips of paper that we had you cut in step 1, after stamping one with a sentiment, and attached a small ribbon bow with a glue dot.
Pretty simple, quick, and adorable!
Want to try your hands on one that’s got a little more technique to it? Show some BUNNY just how much you love them with one of these:
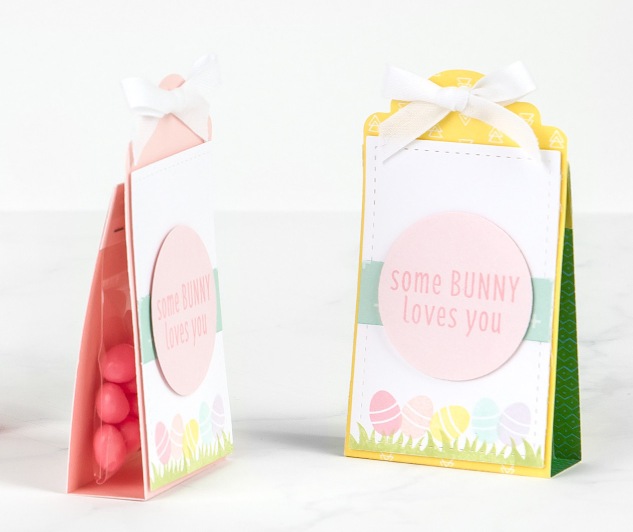
STEP 1. PAPER PIECESFor this second treat bag, you will start out with a 3″ x 10½” piece of paper for your base. (We made each one of our bases a little differently, some with patterned papers and some with cardstock.) You will also need a White Daisy 2½” x 3¾” rectangle, a 2½” x ¾” strip cut from patterned paper, and a 2″ light colored cardstock circle. (If you’d like that extra bit of detail that you see around the edges of our White Daisy rectangle piece, cut your shape with a Stitched Rectangle Frames die.)
STEP 2. CUTTING THE BASE.In order to achieve that fancy top that you see at the top of our bags, we used one of our Fancy Tags Thin Cuts and partially cut into our paper.
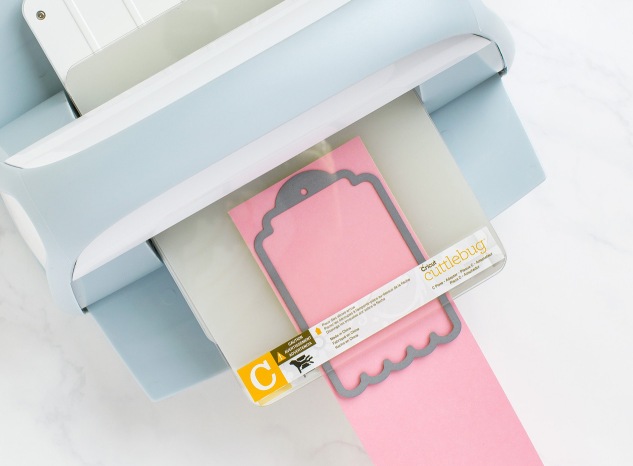
You do not want to cut out the entire shape of the tag. (Otherwise all you’ll have is a tag.) Line up your die as close to the top of the base paper, parallel to the edges. Place the top plate of your die-cutting machine only over the portion of the die that you wish to cut. In this case, place the plate over as much of the tag as you like, without including the bottom. Once you run it through your machine, you should have a cut piece of paper like the one you see here.


Use a paper trimmer (or scissors) to continue the side cuts all the way down to the bottom of the base paper.
STEP 3. SCORING THE BASE


Using the pattern above as a guide, score the three dashed lines.
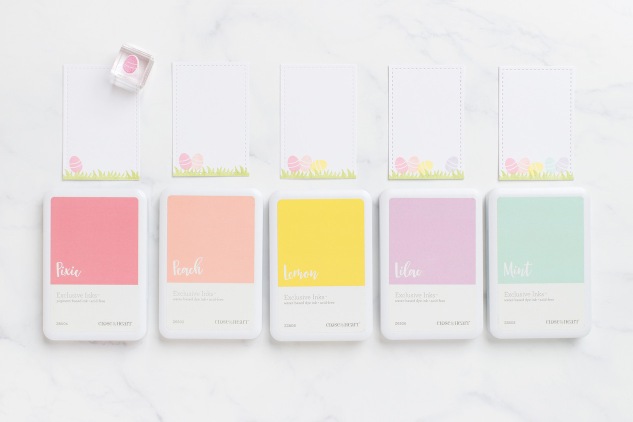
STEP 4. STAMPING
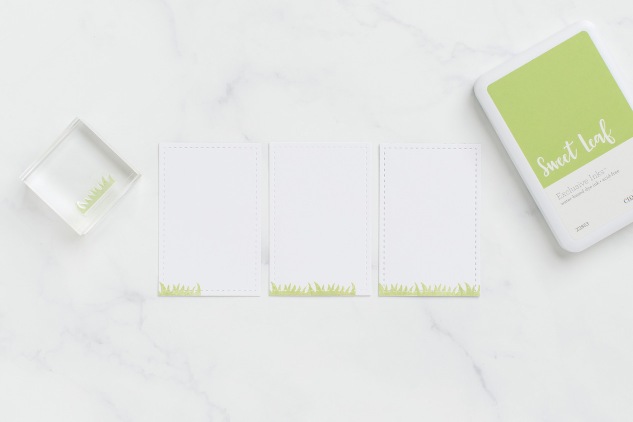
On your White Daisy cardstock piece, start by stamping the grass along the bottom. Once your grass is set, move on to stamping the Easter eggs.
STEP 5. PUTTING IT ALL TOGETHER


Attach all of the pieces to the base, as shown, and embellish with a ribbon bow. Lastly, add a treat to the inside and then fold the base around it at the score lines. Close it off with adhesive where the top of the front and back meet, and you’re done!
Happy Easter!
No comments:
Post a Comment
Thanks for showing some {{{love}}}....