Thursday, May 30, 2019

FREE Scrapbooking Patterns from CTMH...

shared from ctmh's blog...

Where to Find Free Scrapbooking Patterns (and More!)
Scrapbook Patterns #ctmh #closetomyheart #scrapbooking #album #pattern #theworldisyours #sweetgirl
We pride ourselves on our “Let Me Show You How” philosophy. That is one of the reasons we love providing free, downloadable patterns, whether that is right here on this blog, or on Closetomyheart.com.
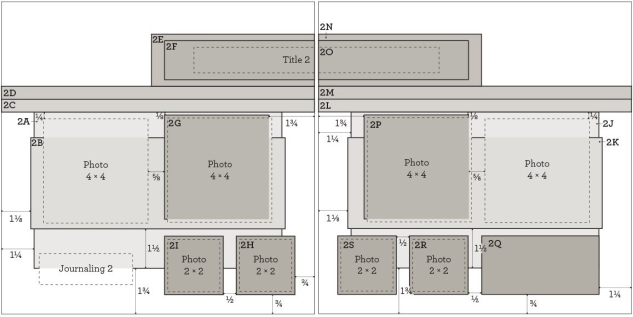
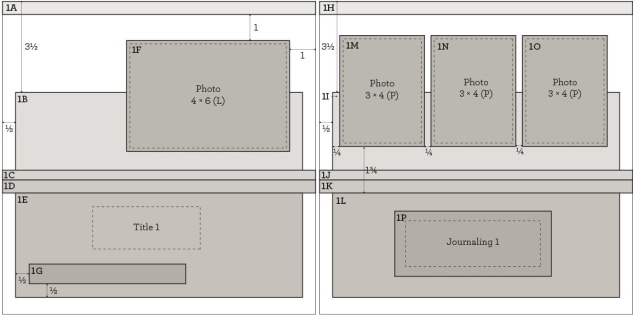
Whenever we offer a workshop kit for sale, the instructions are available as a free downloadable PDF file right on our website. These instructions come fully equipped with additional materials needed lists, cutting guides, featured techniques, step-by-step assembly instructions, project photos, tips, AND patterns. Without any obligations or commitments, you can visit our site, find these workshops, download the files, and use the patterns in them at your discretion.
Even though these timeless patterns are designed with specific products in mind, we stand behind their versatility and encourage you to use them time and time again. With different papers, embellishments, and subjects matters, the finished results will always be unique.
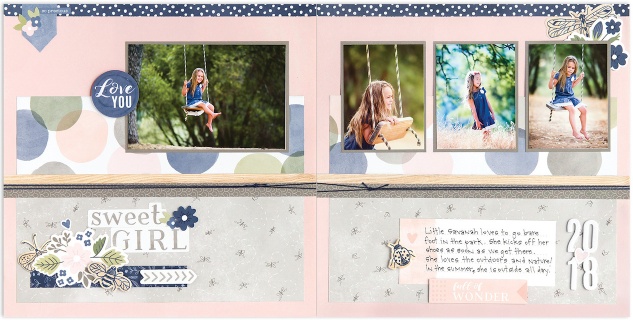
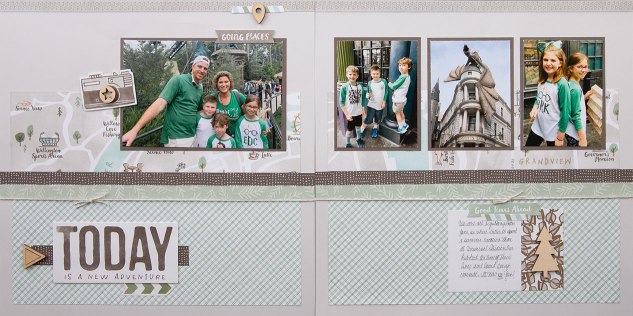
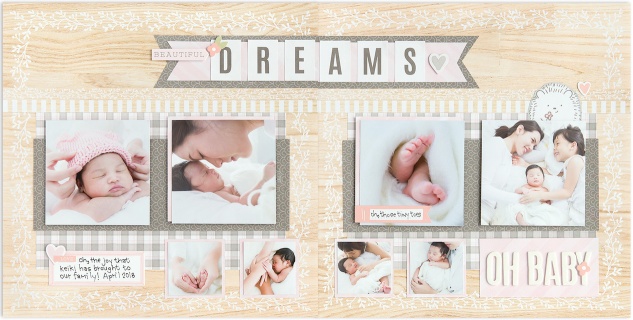
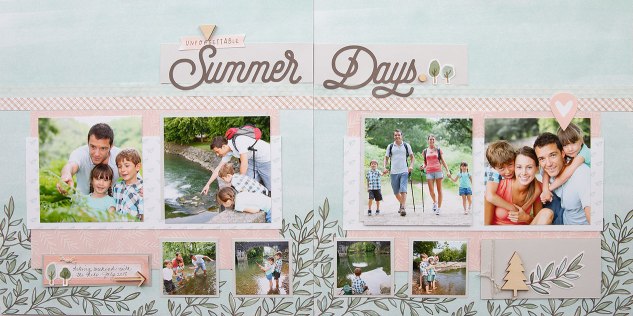
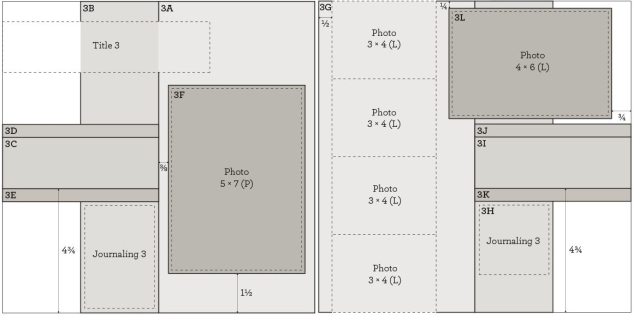
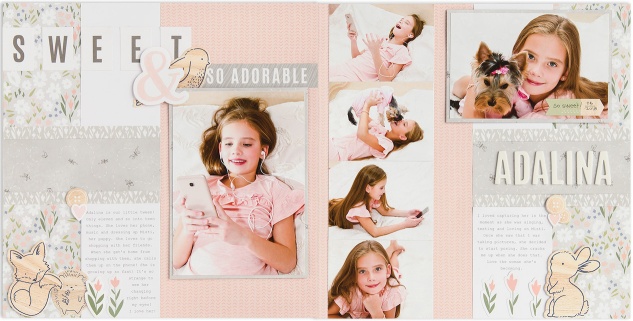
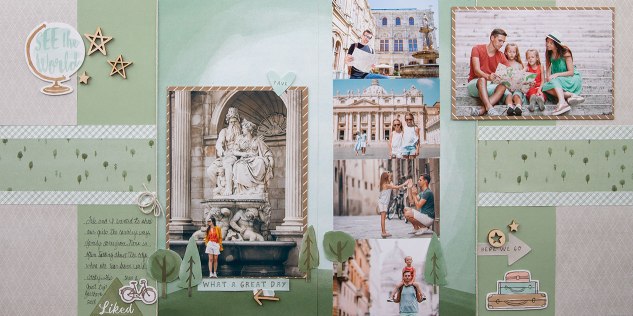
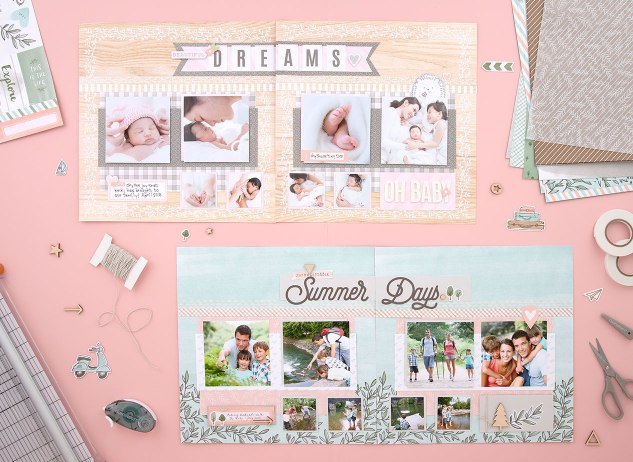
Since this month is all about scrapbooking, we took the three scrapbook layout patterns from the Workshops Your Way® Sweet Girl Scrapbooking Kit and made new pages using The World Is Yours collection.
PATTERN 1:Scrapbook Patterns #ctmh #closetomyheart #scrapbooking #album #pattern #theworldisyours #sweetgirl
SWEET GIRL:Scrapbook Patterns #ctmh #closetomyheart #scrapbooking #album #pattern #sweetgirl #girl
THE WORLD IS YOURS:Scrapbook Patterns #ctmh #closetomyheart #scrapbooking #album #pattern #theworldisyours #adventure
PATTERN 2:Scrapbook Patterns #ctmh #closetomyheart #scrapbooking #album #pattern #theworldisyours #sweetgirl
SWEET GIRL:Scrapbook Patterns #ctmh #closetomyheart #scrapbooking #album #pattern #sweetgirl #baby #girl
THE WORLD IS YOURS:Scrapbook Patterns #ctmh #closetomyheart #scrapbooking #album #pattern #theworldisyours #summerdays
PATTERN 3:Scrapbook Patterns #ctmh #closetomyheart #scrapbooking #album #pattern #theworldisyours #sweetgirl
SWEET GIRL:Scrapbook Patterns #ctmh #closetomyheart #scrapbooking #album #pattern #sweetgirl #girl
THE WORLD IS YOURS:Scrapbook Patterns #ctmh #closetomyheart #scrapbooking #album #pattern #theworldisyours #seetheworld(You can download the instructions and patterns for these layouts here, or on our website here.)
In each of our seasonal catalogs, you will find one scrapbooking and one cardmaking workshop for every paper collection offered. The scrapbooking workshops walk you through creating three coordinating 2-page layouts while the cardmaking workshops come with several card designs and patterns to make anywhere between 12 and 16 cards. Outside the catalogs, we also have regular monthly specials. Often, these promotions will include a workshop—this is where you will find instructions and patterns for other things as well, like mini albums and the occasional papercrafting project.
If you’re ever looking for a pattern, revisit some of your old workshops or come and visit us here or on our website. Remember, the patterns on our site are only available while the workshop kits they are featured in are, so make sure to grab them while you can!

Monday, May 27, 2019

Besties with H2H...

ONLY ONE MORE WEEK in the month of May and we are celebrating BESTIES over at the H2H Challenge Blog...PERFECT timing since the May 2019 SOTM is TO MY BESTIE!

I chose to use the SOTM to make this card using the NEW Mix-Ins which has beautiful patterns in Black, Ballerina & Gray.

Here's my card...I used various sizes of the Thin Cuts - Fancy Tags...

--------------------------
Check out that twine...it's part of the Adventure Ribbon Pack which is on CLEARANCE over on my website...


Don't forget to check out the other DT Members and see what they have made to inspire you. And, don't forget to play along with us at the H2H Challenge Blog!


Wednesday, May 22, 2019

How to Make a Shaker Window Layout...

shared from ctmh's blog...

How To Make a Shaker Window Page!

We are loving National Scrapbooking Month so far, and we hope you are, too! To continue the celebration, we’re going to really shake things up today and show you how to make a shaker window the size of a scrapbook page!
The-World-Is-Yours-May-scrabooking-collateral-single-layout
STEP 1.  The very first thing you’re going to do is determine the size of window you’d like on your project. For it to fit a traditional 12″ x 12″ scrapbook page, you’ll need to keep your window no bigger than 11½” x 11½”. Next, decide if you’d like the base of the window (the paper that shows through under the sequins) to be the same as your base page or if you’d rather have a different pattern or color show through. If you’re keeping it the same as the base page, skip the rest of this step and move on to number 2. If you’d like the base to be something different, cut a circle* from the patterned paper or cardstock you’d prefer instead. The size and shape you cut here will determine the size and shape of your window. The window on our page is a 10″ circle, so our base is also 10″
*One of the great things about this big window idea is that you’re not limited to a circle shape. Make a square, a rectangle, a heart, a star—your window can be any shape you can cut out from a 12″ x 12″ Memory Protector™. (See step 2.)
STEP 2.  Carefully trim the edges from a 12″ x 12″ Memory Protector™; this should leave you with two clear plastic sheets. Take one of these pieces and cut another circle (or the shape you chose for your window) from it. Make sure this second shape is the same size as your base piece, if you have one.
IMG_8225
STEP 3.  The last thing you will need to cut to create your large window is an overlay. When you cut your overlay, make sure that it is the same size as your other two pieces so they will all match up later when you stack them to assemble your window. On our page, we created an overlay that frames our shape and also has a world map in the center (making our complete project look like a globe). Your overlay doesn’t have to be this complicated. Decide how much of the inside window you really need or want to see. Also take into consideration where you will be putting other elements of your scrapbook page, like photos and journaling.
FullSizeRender 118
STEP 4.  When you’ve got all your pieces cut, gently rub the base and the clear plastic window in circular motions with an anti-static pouch. This will help reduce static cling and allow the sequins move freely when you shake or turn the completed page.
STEP 5.  Carefully place small pieces of 3-D foam tape around the perimeter of your base piece. Keeping your base flat, add a handful of loose sequins inside the frame you just created.
IMG_1833
STEP 6.  Lay the clear plastic shape on top of the 3-D foam tape and press firmly around the edges.
IMG_1856
If you don’t have a separate base piece and are using your base page as the back of your window, add the 3-D foam tape to the perimeter of the plastic shape instead. Then, fill the center of your framed plastic shape with sequins and lay the base page on top of it to attach. Flip the page over to see your window.
STEP 7.  The last step in assembling this large window is to hide the foam frame by layering the overlay on top of it. (An adhesive runner should do the trick!)
FullSizeRender 121
Now that your window is complete, all that is left to do is to attach it to your project along with all of those extra elements that make a scrapbook page truly yours.
IMG_1821
The page we used as our example today comes from The World Is Yours Scrapbooking Workshop Kit. If you’d like to recreate it, be sure to check out the instructions, HERE.
What projects have you added windows to? Do you have any fun ideas, tips or tricks to share? Let us know in the comments below, and happy crafting!

Monday, May 20, 2019

Seasonal Expression 2 Blog Hop...

Welcome to the Seasonal Expression 2 Blog Hop featuring ALL NEW PRODUCTS from Close To My Heart!


We have 20 CTMH Consultants hopping tonight and it will be packed full of FABULOUS NEW PRODUCT!

If you came from Melinda's Blog, you're on the right track...keep on hopping 'till you get back to where you started. If you're starting here, WELCOME!!!

Now let's see what I made...I decided to use the SWEET GIRL line and it is soooo pretty! In fact I'm currently contemplating redoing the few pages I've completed of my daughter's album to this line (yes...I'm a scrapbooker and I only have a few pages done in her baby album and, YES, she is over 5 years old...lol)


Check out the SWEET GIRL line and find out it's not just for babies...like the card on top - it could go to one of your girlfriends...in fact, I'm thinking about redoing it and putting the saying "hey, girl, hey"...what do y'all think?

Now hop on over to Michelle's Blog and see what she has to share!

Wednesday, May 15, 2019

Make the Cut Technique Blog Hop...

How can it be the middle of May already...sheeesh!

Well, at least that means we get to bring you another FUN Blog Hop featuring CTMH Consultants showing you different "techniques". This month's blog hop is all about the CUTS...and CTMH has so many options for you!

We only have 10 Consultants participating this month so it won't take you long to get TONS of inspiration!

If you've come from Melissa's Blog, you're on the right track...keep on hopping 'till you get back to where you started! If you're starting here, WELCOME!

I decided to use one of the May 2019 Specials called BRING BACK MY PACK - ZOE which when Zoe was first released several years ago, it was ONE OF MY FAVES!!!! I am SO EXCITED to be able to order it and play with it again...especially with the 12x12 sticker sheet! Anywho...I wanted to make a layout featuring my daughter's new dog...here's the layout!

 -----------------------------------------------------------
I was inspired by the technique "make the cut" to use several of my Thin Cuts (all circles in various sizes) to diecut a piece of 5x12 White Daisy Cardstock then trim down a 6x12 flipflap to house all those GORGEOUS Rose Gold Loose Sequins.
---------------------------------------------------
The title is made using these FABULOUS White Alphabet Foam Stickers...they are truly divine!!! I penciled in some journaling lines where I'll add my journaling after I post to the internets...lol 

-----------------------------------------------------------
Here's a look at all the Thin Cuts laid out on my diecut mat. I used only the largest circle from the Shaker Window & Confetti Thin Cuts then all 4 circles from the Stitched Circles and Basic Circles Thin Cuts....

Thanks for stopping by! I hope you'll continue to hop on over to Valerie's Blog and see what she has to share!