
shared from ctmh's blog:
National Stamping Month: Stamping Basics

It is officially National Stamping Month! Is anyone else as pumped about this time of year as we are? A little bit of history, for our friends who haven’t been with us for very long, Close To My Heart was originally called D.O.T.S. (Dozens of Terrific Stamps). Our first love was, and continues to be, stamps! We’ve come a long way since 1984 and wood mounted rubber stamp sets, and yet there are still some things that will never change.
Today we are going back to the basics of stamping, showing a few different ways we can use stamps in our projects. If you are new to stamping, this is a great place to start and learn just how versatile these creative tools can be. If you are a “pro,” then follow along anyway and remind yourself why you, too, love stamping and the versatility behind each design.
First, let’s talk about stamping on photos.

This is such an easy way to create personalized cards or add some additional touches to your scrapbook pages.
Stamping directly on a photo might seem a little scary at first, but we promise, it will be okay! For this project, we used the Archival Black Exclusive Inks™ stamp pad to stamp our sentiment. We opted for this ink choice because we used a matte photo. If you’re stamping on a glossy photo, consider using Black StazOn™ ink. StazOn™ ink is specifically formulated for use on non-porous surfaces, allowing you to confidently stamp on any photo.
Next, let’s revisit an oldie, but a goodie, technique—generational stamping. Generational stamping is a fairly simple stamping technique. Think of it as the “double-dip” action (or in this case, the “triple-dip”) of the stamping world. With generational stamping, you don’t re-ink your stamp before stamping the image or sentiment again. This leaves you with a slightly faded image that is otherwise identical to the first one.

For this example, we used the Candy Apple Exclusive Inks™ stamp pad to create a fun generational stamping effect. First, you thoroughly saturate your stamp with ink, and then press down firmly to transfer the image onto your paper. Then, without re-inking the stamp, press it to the paper again to create a second-generation stamped image or, like in this case, sentiment. In this example, we went a step farther and created a third-generation sentiment, which was accomplished the same way.
You can clearly see the second and third generational stamps. This effect, combined with the fun patterns in the Every Little Thing paper packet, makes for a beautiful card with a unique flair.
Another fun way to use your stamps is to fussy cut! Fussy cutting simply means that you cut out your stamped image by hand rather than using a metal die or a paper cutting machine. This lets you cut right down to the edges of the image for a crisp, clean cut. When you don’t have just the right sticker or are looking for a quick way to add dimension, fussy cut your stamped image or sentiment and attach it with some foam tape!
In our next example, we’ve got several different ideas that neatly come together in one beautiful 6″ x 8″ layout.
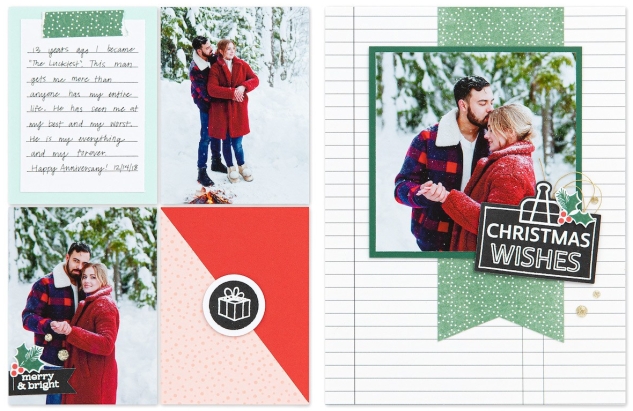
First, take a close look at the peach portion of the layout, in the lower right-hand corner of the left page. That’s not pattern paper—the pattern you see is achieved by continuous, random stamping. Stamps give you the ability to create your own unique patterns, adding a personal element to all of your projects.
Next, let’s talk about how to stamp white on black. For this, we’ll be breaking out our heat tool and embossing powder!

As you can see, this particular element has a dimensional appearance. Well, that’s thanks to the use of embossing powder!
The images in this example are stamped with VersaMark™ ink and heat embossed with white embossing powder. Stamp with VersaMark™ ink, add embossing powder, melt and seal together with a heat tool.
Did you know that you can also heat emboss with our pigment inks of our exclusive colors? All you need is the pigment ink in the color of your choice and clear embossing powder. Heat and seal like you would with the VersaMark™ ink, and that’s it!
If you want to heat emboss on vellum, there are a few small tricks to consider.
For this technique, allow your heat tool to heat up before you use it. Once it’s hot, blow on the ink intermittently from behind the paper (which means you would need to do this step before attaching a piece like this to your project). If you blow directly onto the ink and vellum without pulling the heater away, the ink will move and the paper will warp. Another approach, if from behind is too difficult, is to move the heat tool in slow circles over the stamped area.
The last three examples of artwork we have showcase how to add color to your stamped images.
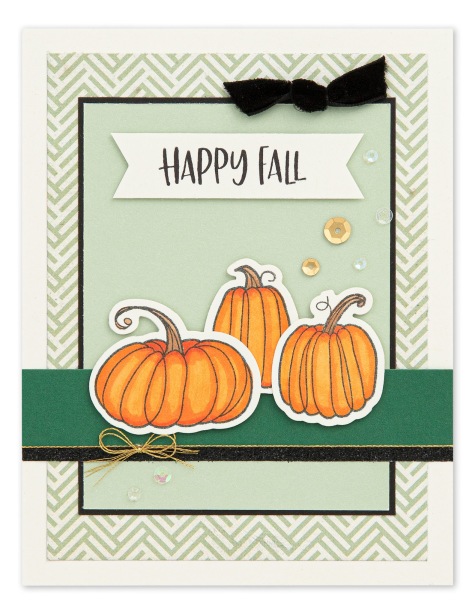
In a recent blog post, we discussed different types of black ink and which ones work best with certain types of projects. For this card, we used the Intense Black Exclusive Inks™ Stamp Pad to stamp the pumpkins so that we could add color with our new TriBlend™ markers.
Once you’ve got your image stamped, take your TriBlend™ Marker and color around the outer edges of the stamped image using one of the darker shades. Then, color in the center with one of the lighter shades.
Using TriBlend™ Markers to color in your stamped images allows you to color with confidence, since the shades are already matched for you, and as you can see, they deliver beautiful results!
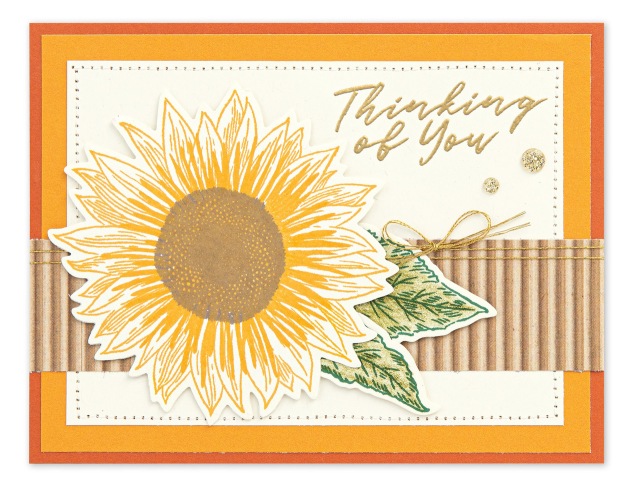
For this card, you’ll want to grab your watercolor pencils. To avoid getting harsh lines in your project, move your pencil in gentle, circular strokes, or use a lighter hand as you color; think of it as light shading as opposed to coloring in your stamp.
Once you’ve got your stamped image colored in, you can leave it as is for a slightly more rustic, rough feel, like in our example, or blend with a waterbrush.
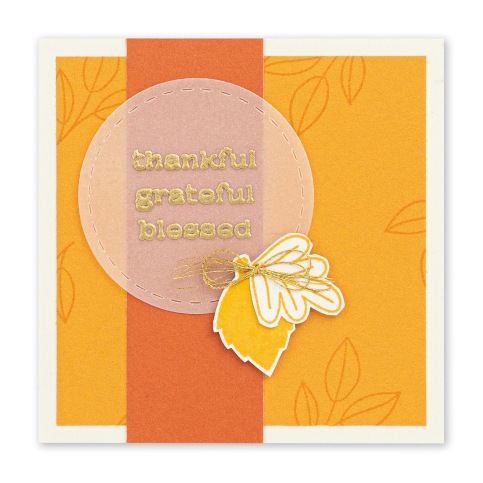
Our last example is a bit deceptive, and it looks a bit more complicated than it actually is. 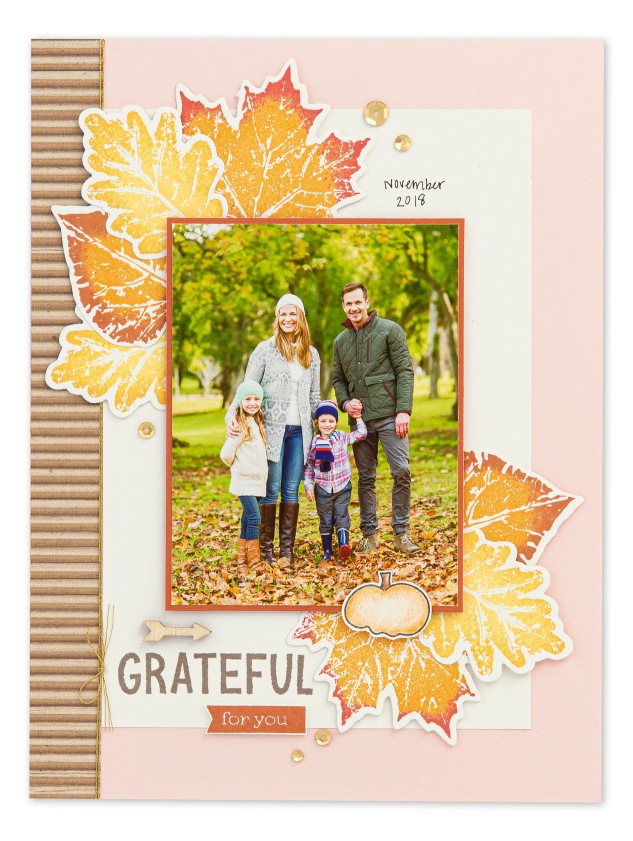
To create the beautiful, multicolored effect happening in the leaves of this page, we used a technique is called rock & roll.
First, you thoroughly ink your stamp in the base color of your choice. Then, gently rock and roll the edges of your stamp in your secondary color. It’s that easy. Your stamp is ready to leave a gorgeous impression!
No matter how you use them, you can’t go wrong with great stamps! Happy stamping!
Thanks for the refresher! It's been a while since I stamped but ready to get back into it!
ReplyDelete