Friday, August 13, 2010

Extravaganza Artwork....Countdown

I cannot believe that we're to the middle of August already!!!!  That means that in a couple of short weeks, you'll be able to see the NEW Autumn/Winter Idea Book (available September 1st).

Over the next couple of weeks, I'm going to start sharing the artwork I created for Convention using some of the NEW products....I was going to wait but since most blogs are already "leaking" peaks at this awesome product, I thought I'd start enticing you to contact your consultant or ask ME how to get your hands on this NEW Idea Book!

This first mouth-watering sample comes from my board using color pallets of four or more colors....here were my board notes:

  • When you want to use four or more colors, it's important to let one color be the dominant color.

  • Choose your colors in a square or rectangular pattern on the color wheel, making sure there is a balance between your cool (greens, blues and purples) and warm (reds, oranges and yellows) colors.

  • If I'm using four or more colors, I tend to use less cardstock/B&T colors and break out the Mini-Medley's, ribbon and accents to bring the colors into play.

  • Don't be afraid to sew on our Clear Cards!!! I did mine by hand and it was simple to do and makes a perfect pocket card!
Now on to the artwork....Colors: Black, White, Tulip, Baby Pink, Twilight & Garden Green

-------------------------
Layout of my baby blowing dandelions...
------------------------
Close up of the "flowers" with Tulip B&T (many patterns), Baby Pink Buttons (Spring Craft Buttons - on the "retired list" so get them NOW!!!) and the clear card (NEW styles and sizes come September 1st) inked with Black StazOn Ink and a Sponge Dauber..."wish" is Color-Ready Alphabet Hodge Podge
--------------------
Another NEW style and size of our Clear Cards...punched 1-1/4" circles out of Cardstock and B&T, used a whole LOT of embellishments (ALL CTMH) from various packages.
-------------------
You can see the card open here and see that the bottom right Baby Pink circle is actually adhered to the inside of the card and the NEW Baby Pink Sparkles are adhered to the outside...just that extra little something that makes Clear Cards so FUN to work with!!!
-----------------
Another Clear Card...this time sewn as a pocket to a postcard-type card that has a gift card in the back....
---------------------
Card slid out of pocket....as you can see, the Tulip Buttons (Tulip Mini-Medley Accents) are sewn to the clear card (before I sewed it shut)
--------------------
Backside view of the card with the Target gift card inserted into the back pocket....
---------------
Backside view of the card slid out...since you could see the thread of the Tulip Buttons that were sewn on the front, I covered the stitching with some Tulip B&T (it just makes for a tidier card...I think).

Thursday, August 12, 2010

H2H Sketch Challenge....

This week over at the H2H Blog, they're challenging everyone with a sketch!!!

Here's the sketch....


Here's my take on it...


My niece is having a birthday next month and my sister wants me to make the invites...my sister wanted it to be Mary Engelbreit themed since this is probably the last year that my sister will be able to decide since my niece is getting to the age where she has "demands"....lol

The flowers were done with punches...even the yellow flower...I punched an 1-1/4" circle then I cut little triangles out leaving the "petals"...I created the shading with our CTMH Blending Pen and White Daisy Ink...the gingham pattern is Black Cardstock cut into tiny 1/2" squares (really wished I stocked up on Black Gingham B&T before we retired it...)...all the centers of the flowers are Dimensional Elements - On Target covered with Cardstock.

The "sentiment" is from one of the NEW stamp sets coming out September 1st....the "to a" is handwritten with a My Legacy Writer (LOVE these things).

Don't forget to go over to the H2H Blog and play along!!!

Sunday, August 8, 2010

Tag....you're it!!!!

This is my first week participating in the H2H Challenge as a non-DT member!!!  The challenge is to use a tag on a card, layout or just as a tag...

I chose to do it as a tag and a gift bag using Zippidee Paper Packet (LOVE this paper because I have all boys and it's so bright and CUTE)...


-------------------------------
The bracket under the "good times" sign is a dimensional element bracket from the Irresistibles Pizzazz, sponged with Cranberry Ink and cut so that it will be a little longer (don't worry, the sign hides the cut part)...
------------------------
The shaker-box is made using a lid from one of CTMH's Craft Jars...
Step 1: Lay down your items you want to "shake"...

 
-----------------------
Step 2: put Liquid Glass all around the edge of the Craft Jar lid....

----------------------
Step 3: Lay down lid and gently press down to create a bond...be careful not to get it on any of the items so they don't end up sticking to the paper.
 

Saturday, July 31, 2010

Something Splendid Blog Hop....

Welcome to another SOTM Blog Hop...this month, we have over 60 Consultants participating which means you get to see over 60 DIFFERENT takes on the August SOTM, Something Splendid.

If you came from Laurie's Blog, you're on the right track....if you get lost along the way, head on over to Helen's Blog and she has a complete list of hoppers.

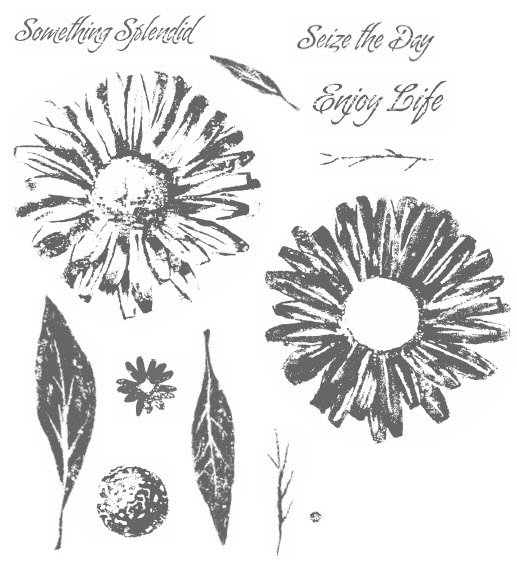
Here's the ADORABLE set we're working with....


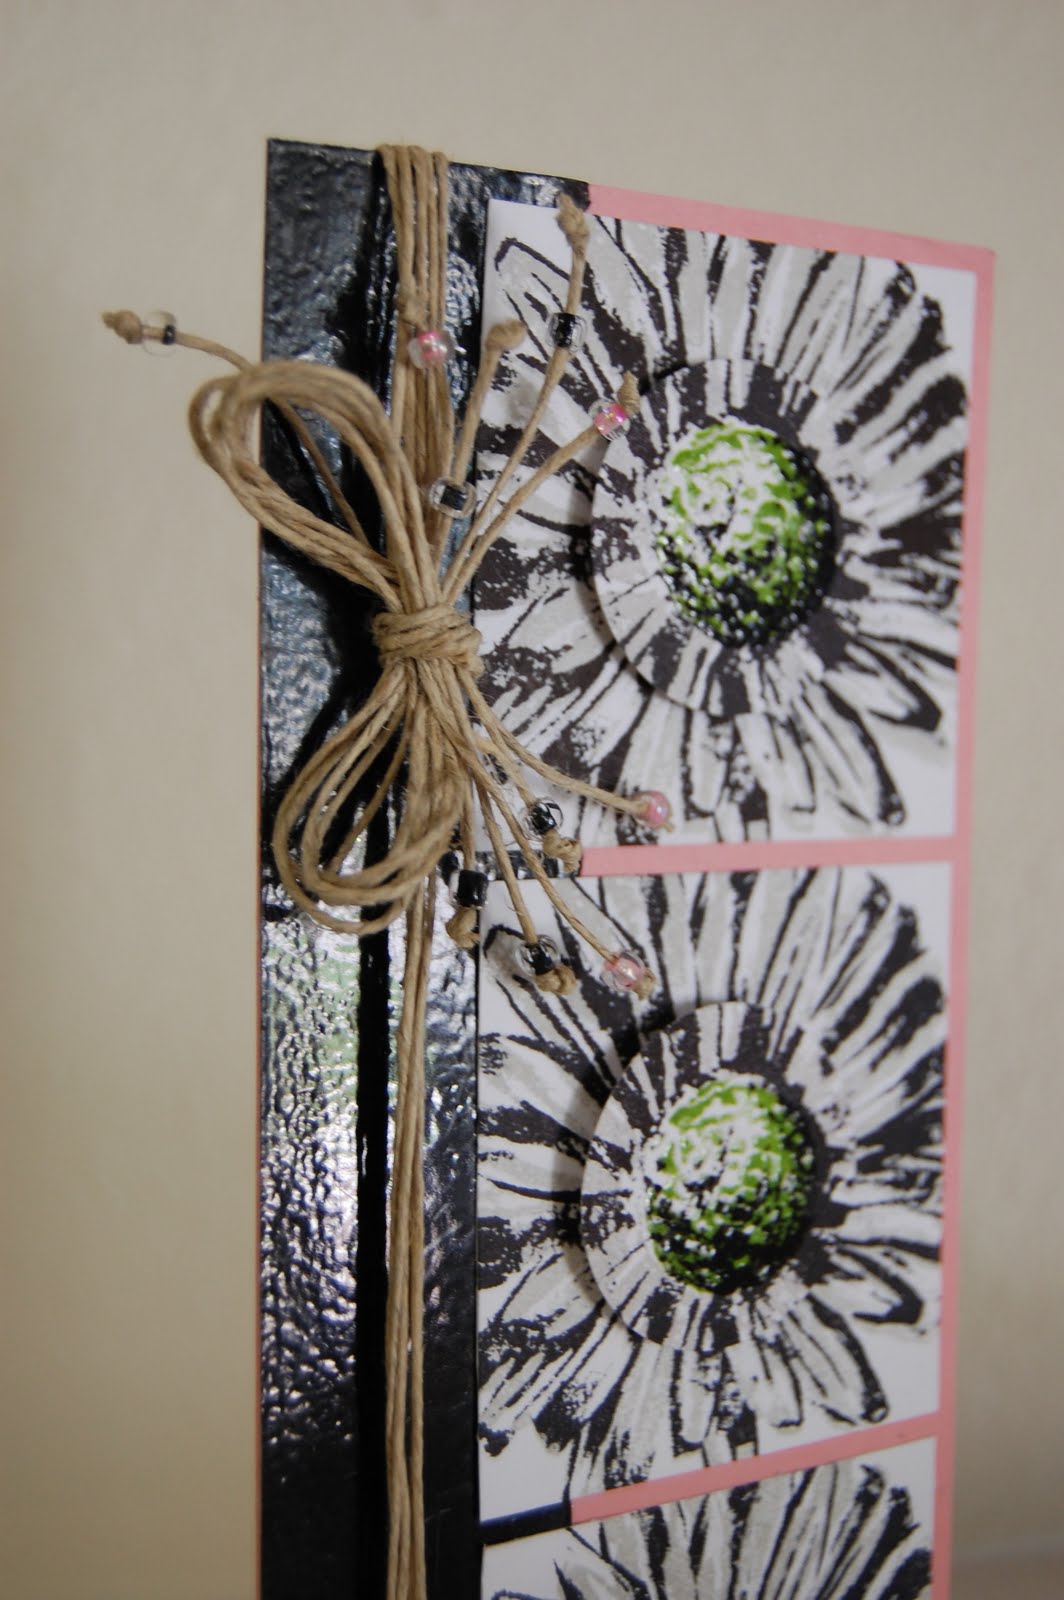
Here's what I did with it....8" x 3-1/2" card using Black, Blush, White Daisy and a sneak peek at something NEW!!!

------------------
I used some of CTMH's retired beads from the Baby Pink and Black My Accents...tied them on the Natural Hemp (LOVE this stuff)....
----------------
I used my Versamark Ink Pad and Clear Embossing Powder to emboss the strip of Black Cardstock on the left...

------------------------
Here's a view to try and show the pop-dotted, embossed centers of the flowers....
----------------------
Inside of the card...
---------------
Closeup of the flower...clear embossed on Black Cardstock...

Don't forget to hop on over to Michelle's Blog and see what she's done with the SUPER CUTE stamp set.

If you can't live without this stamp set (like me) then contact your Consultant before the month of August is over and tell her to hook a girl up...if you don't have a Consultant, leave me a comment and I'll tell you how to get this set at a super bargain and maybe even FREE!!!

Thursday, July 29, 2010

S'MORES box for my sister...

My sister's family LOVES camping...she, not so much, but she does love that my BIL does all the cooking by campfire and my niece and nephew LOVE S'Mores!!! 

They are going on their last camping trip of the Summer so I made them this cute box using Rustic Trail (retired but one of my favorite "outdoorsy" paper packets!!!)...I got the inspiration here but didn't have an extra tin so I decided to use this....a to-go box from McAlisters (they catered our NSD All-Day Crop and I saved my box)....you'll notice that my top is already decorated...it was an after-thought that I might need to take a picture of the "original" first...lol


----------------------
Here's the finished product....I free-handed the twig and cut out of Cocoa Cardstock and sanded...the marshmallow is a 1" x 1-1/4" piece of White Daisy Cardstock....I just rounded the edges with my scissors and ink distressed with Cocoa Ink and a Sponge Dauber


------------------------
I just had to decorate a clothes-pin for my sister to use just in case they don't eat all the marshmallows....