
***KEEP ON READING TO TAKE ADVANTAGE OF MY OFFER***
A Christmas Advent Calendar to Make Now
It’s not too early to begin planning for the holidays! To get your Christmas season off to a delightful start, we’ve created an advent calendar papercrafting project using images from our new Cricut®collection, Season of Joy.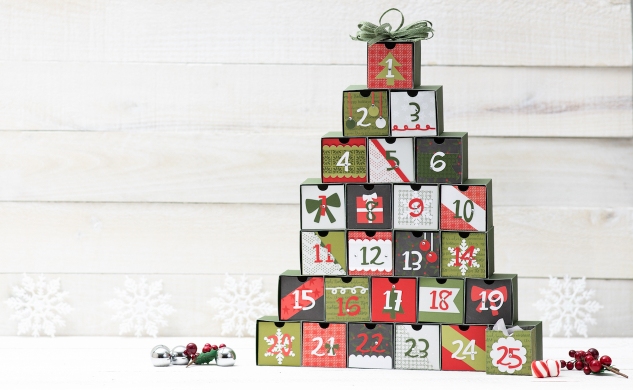 Make an advent calendar just like this one for your home, office, or wherever your crafting takes you, using this advent calendar workshop guide and our Cricut Design Space™ project files included right in the instructions! In this guide, we walk you through each step of the process to make sure you successfully complete this beautiful project just in time for the holidays.
Make an advent calendar just like this one for your home, office, or wherever your crafting takes you, using this advent calendar workshop guide and our Cricut Design Space™ project files included right in the instructions! In this guide, we walk you through each step of the process to make sure you successfully complete this beautiful project just in time for the holidays.
First, you cut all of the pieces on your Cricut® machine using the Design Space project files provided. Then, you assemble the outer and inner boxes. This part is pretty repetitive with lots of folding and gluing for all 25 outer boxes and 25 inner boxes. That means during this step you can break out some Christmas music or a favorite holiday movie to have in the background as you work. Next, you stamp the paper embellishments using the My Acrylix® Snug Backgrounds stamp set, for a little extra color and texture. Then, attach your paper embellishments to each box. Finish off the project with some clear sparkles and a New England Ivy burlap ribbon bow on top. And there you have it! A calendar counting down to one of the most celebrated times of the year, measuring 16½” tall (not including the bow) with a 14″ wide base.
There are a few places where you will need to pay closer attention, especially when you’re using Design Space to cut and score your paper and cardstock. These tips are noted in the instructions, but we wanted to point them out again so you can keep them in mind as you’re creating your calendar.
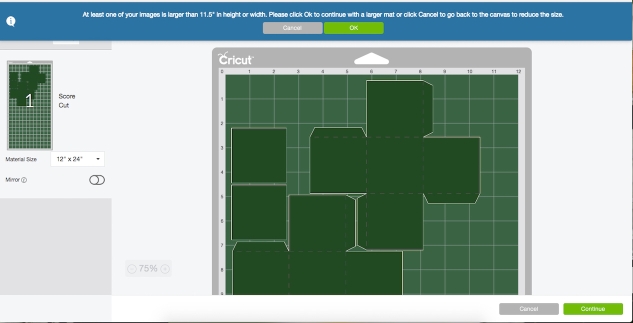
- We’ve made one project file to cut the outer boxes in New England Ivy cardsock. Design Space will display an alert that the project is larger than 11.5″ in height and requires a larger mat, like you see below. Click “OK” and cut the outer boxes using the cardstock on your 12″ x 12″ mat. It will cut close to the edges of your paper, but this way you only use 12 sheets of cardstock with two boxes on each sheet.
- You might wonder why the Outer Boxes project file only cuts 24 boxes. It is not a mistake! You will still end up cutting 25 outer boxes, promise. The 25th box, however, is cut from the Advent Calendar – Boxes and Embellishments (New England Ivy) project file. This way just saves you some paper.

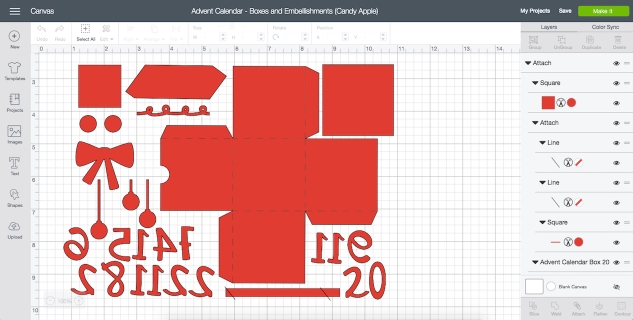
- There are individual project files to cut the paper embellishments for the box fronts and the last few inner boxes. They look something like this one below that uses the Candy Apple cardstock. Notice that some of the numbers are backwards. This lets you cut with the light side of the cardstock facing up, and then you flip the numbers over to use the dark side of the cardstock on the box fronts.
Cut all your paper, put everything together, and add some embellishments, and you’ll have a lovely home décor piece to accent your holiday. After you’ve finished your own advent calendar, all you need to do is fill each box with a special treat for every day leading up to Christmas. There are many, many ways you can fill the boxes. Here are just a few ideas:
- Candy or chocolate (of-course!)
- Activity ideas (like going to see Christmas lights, making hot chocolate, or reading a Christmas book)
- Christmas ornaments
- Little girl “pretties” (hair accessories, nail polish, lip balm)
- Small toys (Lego® figures, cars, marbles)
- Ideas for random acts of kindness
- Scripture verses
So, what do you think? Are you ready to make your own advent calendar? To keep things easy, we put together a bundle of all the paper and cardstock you will need to cut this project (click here). You will also need a few additional items, including the Cricut® Season of Joy collection and the My Acrylix® Snug Backgrounds stamp set. For a complete list of additional required and optionalproducts needed, as well as step-by-step instructions, make sure you download or print the Advent Calendar Workshop guide, here.
Do you know how you will be filling your advent calendar this year? Let’s share ideas in the comments below!
*****IF YOU WANT EVERYTHING PRE-CUT, order using the link below and I will pre-cut everything for you and mail to you for assembly*****
Orders have to be submitted by November 15th in order to get back to you before December 1st!
*IF YOU'RE LOCAL - DM me for payment instructions and cost is only $30
Orders have to be submitted by November 15th in order to get back to you before December 1st!
*IF YOU'RE LOCAL - DM me for payment instructions and cost is only $30
No comments:
Post a Comment
Thanks for showing some {{{love}}}....