Saturday, January 26, 2019

Stitched Heart Happy...

Several NEW products came together for this card...and I might add - they did so BEAUTIFULLY!

I started by pulling out the Thin Cuts I wanted to use...the NEW Stitched Rectangles and Stitched Hearts, along with the HEART HAPPY Kit and then I pulled out my trusty Make It From Your Heart Vol. 4 and turned to page 28...the rest was easy peasy! 

Here's the outcome...AND check out my YouTube how-to video to see the process!

----------------------
Look at all the DETAILS of the stitched frames and hearts!!! The "miss you" comes from the January SOTM - Card Captions...it's only available until the end of the month so hurry and get yours!

---------------------------------
The colors of the HEART HAPPY KIT are pinks, reds and a couple of blues...so I decided to take advantage of the RASPBERRY BAKER'S TWINE which is in "limited quantity" status right now on my website (so hurry and pick that up too!)...
----------------------------------------------
I kept the inside of the card SUPER SIMPLE by using the scraps of Heart Happy B&T used to cut some Stitched mini-Hearts, stamped the polka dot pattern from the A Piece of my Heart stamp set and then stamped the XOXO from the January SOTM... 


Thursday, January 24, 2019

12x12 Photos in your Scrapbook...

taken from ctmh's blog...
Using a 12″ x 12″ Photo in Your Scrapbook

Using 12
We’re so glad you’re stopping by, today, because we’re putting a spin on the classic scrapbook page and you don’t want to miss it!
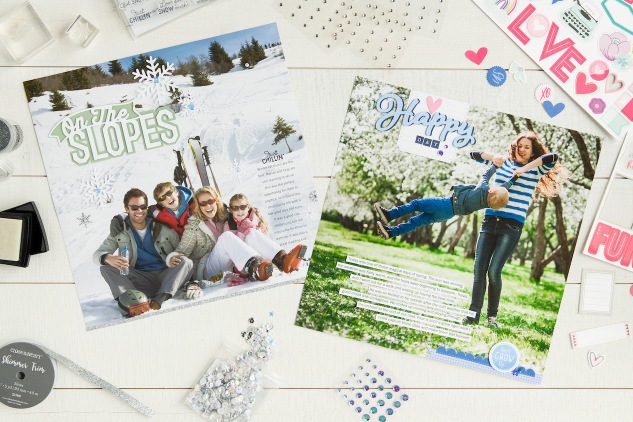
The idea is simple, yet ingenious! Rather than using paper as a base for all of your album pages, try mixing it up every once in a while, and use a photo! That’s right—a large, 12″ x 12″ photo!
Using 12
Getting one of these pages done could be is as easy as attaching a few complements and some journaling strips. Choose a photo that can be cropped to a square, if it isn’t already, and that has some open space for a few additions. The key is to use embellishments to support the story behind your photo, not to cover it up. Enhance your photo pages with Complements, titles, and accessories in colors and motifs already in your photos.
Using 12
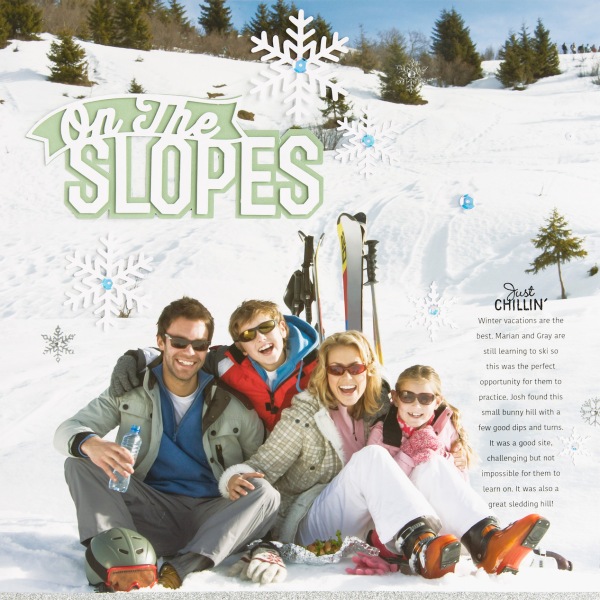
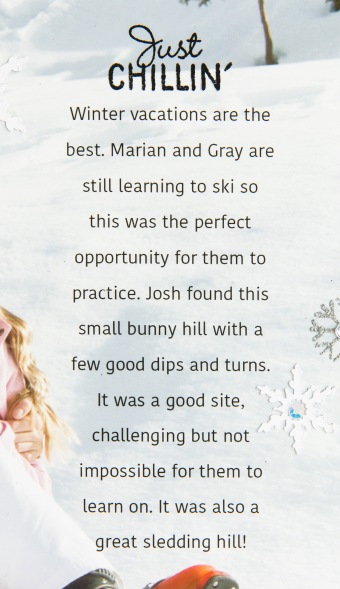
For this, “On The Slopes,” page, we used our Cricut® machine to create the color coordinating title and several unique snowflakes. We even heat embossed a few additional snowflakes right on the photo! (To avoid damaging your photo if you’re heat embossing, remember to apply heat intermittently as you’re setting the image.) And if heat embossing is possible, then you can be certain that stamping with our Exclusive Inks™ on a photo is, too! “Just Chillin’” was stamped with our non-smearing and fast-drying Intense Black ink, just above the journaling. Whether you’re planning on heat embossing or stamping on your photos, a photo with a matte finish is your safest bet to get the best results. Even though a glossy photo could also work, the matte finish allows the ink to set easier, without possible sliding or pooling before it dries.
The last idea we want to talk about is journaling. Every good scrapbook page includes at least some journaling—from small details of who, what, where, and when, to a full and lengthy narrative of the events surrounding the image(s) on the page, and everything in between. These 12″ x 12″ photo-based scrapbook pages are no exception!
Using 12
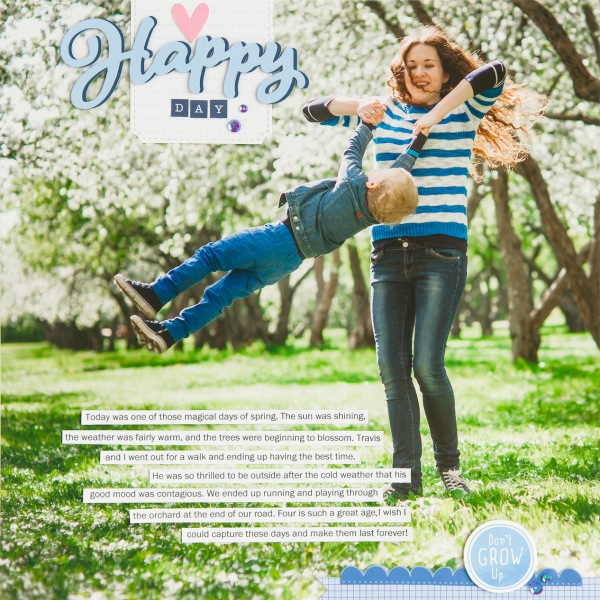
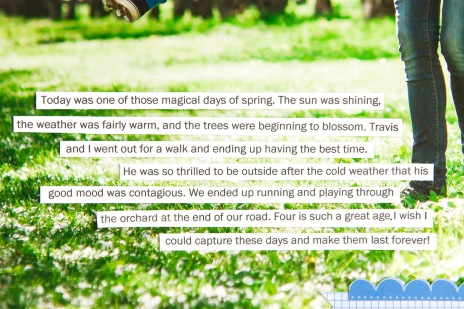
You’ll notice that on our “Happy Day” page we used strips of paper for the journaling. You can do this typed, like in our example, or in your own handwriting. If you are hand writing your journaling, we suggest writing everything out first, then cutting it up into strips, and adhering your strips to the photo page last. (We all have to practice, sometimes! ðŸ™‚ )
Using 12
In our second example we have the words typed on the photo. There are several ways to accomplish this look. The easiest way is to add the type right in the photo with a photo editing program, like Photoshop®, before you print it. If you do not have a photo editing program but do have access to a printer with the capacity to print 12″ x 12″, you could create a file on a word processor program, like Microsoft® Word, and then print your journaling right onto your photo. Another option, if you don’t have a large-format printer, is to ask whomever prints your photos to add the type for you.
For those of you not sure where to print a photo this size, our friends at Persnickety Prints can help! Not only will they provide you with a high-quality photo, they are ready to do so at a discount, now and through the end of the month! 
Use the code CTMH2 when checking out and get 20% off your 12″ x 12″ prints (matte or gloss). (Visit Persnickety Prints, here.)
If you haven’t done so already, give this type of scrapbook page a try! 

Wednesday, January 23, 2019

Heart Happy with a 1945 "Selfie"...

If you're a follower of me over on the "gram" (sometimes I like to act cool to impress my kids...hehehehehe), you might've seen a sneak peek of this layout.

This right here is one of the MAJOR REASONS I scrapbook!!!

The story of my Grandparents' love is one for the movies and this picture, found after they both passed, is one of them on their Honeymoon back in 1945. From what we can tell, it's the FIRST SELFIE in the history of forever (that's my story at least...lol...can we get a story NBC, CBS, Good Morning America...lol). It's a terrible quality photo but it's one...the only one...from that HAPPY MOMENT in their life...a day or so after they committed their lives to each other and started a family, one that led to ME and MY FAMILY!!!

------------------------------------------------
There are a few tiny images that come with the Heart Happy Stamp Set that I used for the "splatter" look. First I took my Red Shimmer Brush and splattered SHIMMERY GOODNESS all over the layout. Then I took the little square of polka dots and inked it up in Ballerina Ink (a very subtle pink) and random stamped here and there. Then I took the tiniest little heart (it comes with 3 little ones) and inked it up in Raspberry Ink and randomly stamped it in between the 'splatter'...
-----------------------------------------------
To create a visual triangle of the Sapphire color, I took the "always & forever" images from the Heart Happy Stamp Set and generational stamped the sentiment...these two LOVED each other fiercely until the day they died so the sentiment is fitting! Side note...if this were a color photo, my Grandmamma's lipstick would've matched the CANDY APPLE color in this Heart Happy Kit perfectly!!!


Thanks for stopping by and REMEMBER that this Heart Happy Kit is only available thru the end of February so get yours ordered so you can start making those CUTE GAL-ENTINES gifties (yes, there's even an image for all THE SINGLE LADIES) or preserving your VALENTINE'S DAY memories or heck, any day for that matter!

Here's what the Heart Happy line looks like...


Tuesday, January 22, 2019

Lucky Friendship...

Have you ever experienced a FRIENDSHIP so true that you just feel LUCKY...like you won the pot at the end of the RAINBOW!

Well, I have a handful of those friendships and when I see this card kit, I think of my FRIENDS...those ride-or-die chicks that I can call to laugh with, to cry with, or even just sit still and listen to each other breath...lol.

This LUCKY FRIENDSHIP card kit is so affordable and the stamp set is ADORABLE!!! Here are the cards, MADE AS INTENDED with using a little of the scraps to decorate the insides and the stamps to decorate the envelopes!

---------------------------------------
Not only does the kit show you all the cuts needs but it gives you tips...like how to get the rainbow inked up in different colors...GENIUS tip and one that you can use on other projects, not just this one!
------------------------------------
I kept the inside simple by stamping the rainbow and clouds in Mink Ink...
-----------------------------------------
Here's a look at the envelope I stamped using the crayon image...

Here's the 2nd card...with this Kit, you'll be able to make 6 each of the 2 designs shown here in this post...
----------------------------------
Look at the sparkle of that Black Glitter Paper (INCLUDED in the Kit)...
-----------------------------------------
Here's a look at the inside...these extra pieces can be cut with the leftovers AFTER ALL 12 CARDS are made...how FABULOUS is that!!!
----------------------------------------------
Here's a look at the front of the envelope...just a simple stamped 4-leaf clover...the back of the envelope is below this photo...


Here's a look at the LUCKY FRIENDSHIP CARD KIT and what all you get...ONLY $17.95 (plus shipping & tax)....the stamp set alone is well-worth that amount!

You can check out my other artwork using this stamp set {{{here}}} and the paper {{{here}}}.


Monday, January 21, 2019

Anything but Standard with H2H...

This week's H2H Challenge is to make a creative card (or any card that is NOT a standard-size card)!

I've always loved this little typewriter from the Artistry Cricut Collection...and by duplicating, ungrouping and welding the base image, I was able to make this cute little card!

I chose to use the Heart Happy Kit (paper & the EXCLUSIVE stamp set) together with the I Heart Us paper packet. I added some shimmer to the little heart usig the Red Shimmer Brush... 


and the inside is finished off with a sentiment from January's SOTM - Card Captions....


Wednesday, January 16, 2019

Stories I Love GIVEAWAY...

taken from ctmh's blog...

Stories I Love Giveaway from Stacy Julian!

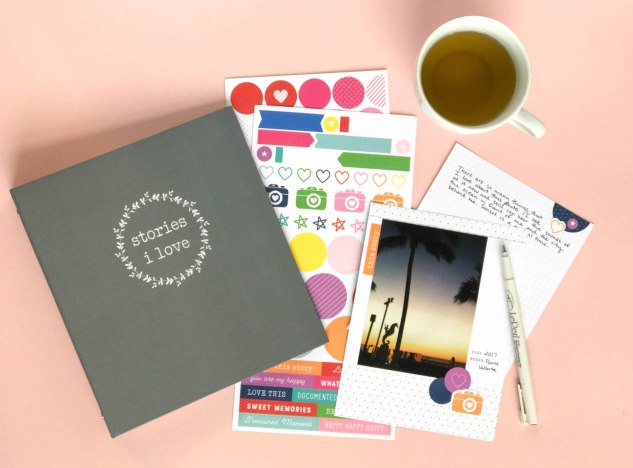
We all have photos that hold a special place in our hearts. They remind us of something or someone, and they often have detailed, personal stories that go with them. Stories I Love, the newest program from Story by Stacy™, gives you permission to bring your most treasured photos together in one album and teaches you how to write the unique stories that go along with them.
image 1
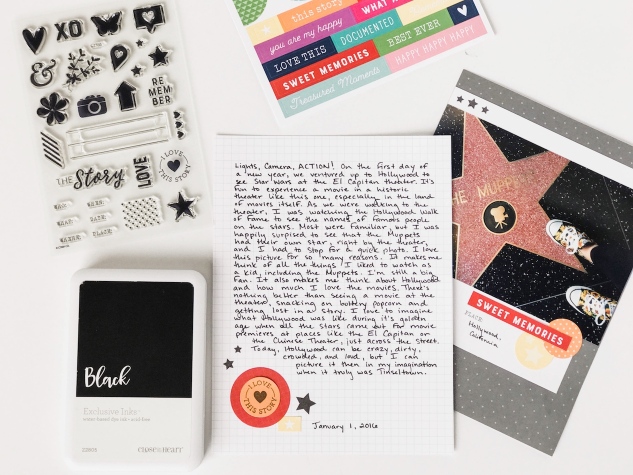
Your favorite photos may not be the ones that are the most pretty. They may not have the best lighting. They could be candid or staged. They could be from a special occasion or from everyday life. What makes them important are the memories they represent and what you feel when you look at them. That’s what Stories I Love is all about. Each Stories I Love workshop kit comes with a 6″ x 8″ album, ten 6″ x 8″ Memory Protectors™, one title page, one closing page, story pages, base pages, and two sticker sheets. The workbook included in the kit walks you through the steps of exploring the story behind one photo, writing that story, and then creating a 6″ x 8″ layout with just that story and photo.
image 2
Are you ready to make your own Stories I Love album? Watch the video below to hear directly from Stacy about this new program and to find out how you can win your very own Stories I Love workshop kit!
You have until 11 a.m. (MST) Thursday, January 17, to enter in the giveaway. Winners will be notified by email on Thursday.
The memories behind the photos you cherish are stories only YOU can tell. Recording your thoughts and feelings transforms every layout you make into a treasured keepsake. We can’t wait to see what you create with Stories I Love!

Craft with Heart Subscription Special...


Our Craft with Heart subscription special is underway now! Everyone who signs up for a new 12-month Craft with Heart™ subscription between now and the end of January will receive a FREE Family Ties Cut Above® Layout Kit in their first shipment. Visit the Specials page in Online Office to learn more.

These are the four kits that will be sent with new 12-month subscription orders:


And here is the Family Ties Cut Above kit that new 12-month subscribers will receive FREE when they sign up before the end of January (WHILE SUPPLIES LAST SO HURRY):


Saturday, January 12, 2019

Seasonal Expressions I Blog Hop...

Welcome to the SEASONAL EXPRESSIONS I BLOG HOP...we're so glad you're joining us to see JUST SOME of the wonderful NEW STUFF that is now available from CTMH!

This is a small hop with only 17 CTMH Consultants participating so you should be able breeze through, LEAVE SOME LOVE and be inspired along the way!

If you've come from Lauren's Blog, you're on the right track...keep on hopping along 'till you get back to where you started! If you're starting here, WELCOME and thanks for joining us!

Now...on to my creation...I used the WYW Lucky Friendship Cardmaking Kit because I fell in LOVE with the EXCLUSIVE Stamp Set...here's a look.


 Heres a closeup of the little rainbow...I used ShinHan markers and just made tiny dots so I could fit more colors into the 4 arches...

And I finished off the inside by using the inking tip provided in the WYW Kit...ink the in tire sentiment in THISTLE ink then ink up the word "MY" in RASPBERRY then the "LD" in LAGOON ink...then stamp on the paper...


Thanks for stopping by...be sure to hop on over to Brenda's Blog and see what she has to share!


Remember...you can shop for all the products you see here (and even more FABULOUS NEW PRODUCTS) on my website ----> NEW PRODUCTS!