Wednesday, January 22, 2020

Urban DIY Decor with CTMH...

shared from ctmh's blog...

DIY Décor to Make Over Your Boy’s Room

DIY Boy's Room Decor #ctmh #closetomyheart #ctmhurban #frameitup #urbanframes #diydecor #boysroom #skater #skateboarding #rustic #epic #guitar #chipboard #monogram #visionboard #papercrafting #npm #nationalpapercraftingmonth
We’re at it again! Last week we shared a fun way to dress up a girl’s room using beautiful large paper flowers, and, as promised, today we’ve got some inspiration on how to use papercrafting to decorate a more boyish space. (It can be done!)
The Urban paper collection is one of our absolute all-time favorites. We love it so much, in fact, that we brought it back for a second time around! Whether you missed it when it made its debut, or you love the designs just as much as we do, now is your chance to stock up!
We paired these classic Urban patterns with a few of our other go-to products and came up with some really fun, trendy, and even purposeful, décor pieces. Take a closer look.
DIY Boy's Room Decor #ctmh #closetomyheart #ctmhurban #frameitup #urbanframes #diydecor #boysroom #skater #skateboarding #rustic #epic #guitar #chipboard #monogram #visionboard #papercrafting #npm #nationalpapercraftingmonth
DIY Boy's Room Decor #ctmh #closetomyheart #ctmhurban #frameitup #urbanframes #diydecor #boysroom #skater #skateboarding #rustic #epic #guitar #papercrafting #npm #nationalpapercraftingmonth #chipboard #monogram #visionboard
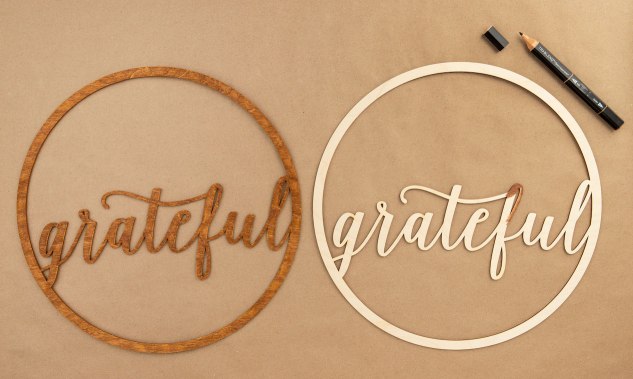
Our chipboard frames and monograms are a great way to showcase personality in any given space. The patterns found in the Urban papers and stickers provide just the right amount of warmth, edge, and attitude to do just that!
DIY Boy's Room Decor #ctmh #closetomyheart #ctmhurban #frameitup #urbanframes #diydecor #boysroom #skater #skateboarding #rustic #epic #guitar #chipboard #monogram #visionboard #papercrafting #npm #nationalpapercraftingmonth
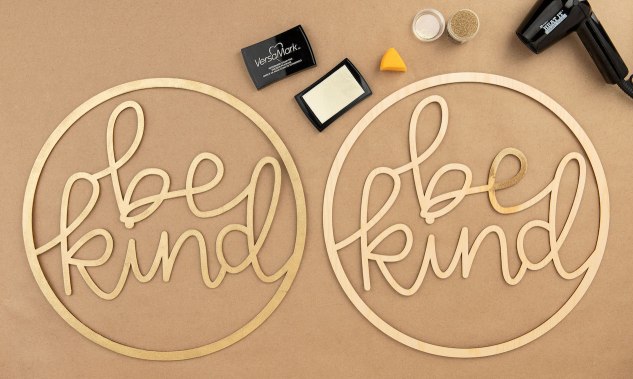
We backed this third frame with some cork board to effortlessly add or move photos, notes, and other mementos around. With a little bit of personal thought and inspiration, you could easily turn one of these framed pieces into a vision board!
As a reminder, the Urban collection is here for a limited time! That includes the paper packetcoordinating cardstock, and the My Acrylix® Urban Flair stamp set. Make sure to get yours before it is gone for good!
DIY Boy's Room Decor #ctmh #closetomyheart #ctmhurban #frameitup #urbanframes #diydecor #boysroom #skater #skateboarding #rustic #epic #guitar #chipboard #monogram #visionboard #urbanflair
My Acrylix® Urban Flair Stamp Set
For those of you who, like us, also love all things scrapbooking and cardmaking. We put together a workshop that uses these designs to create this stunning artwork:
DIY Boy's Room Decor #ctmh #closetomyheart #ctmhurban #frameitup #urbanframes #diydecor #boysroom #skater #skateboarding #rustic #epic #guitar #chipboard #monogram #visionboard #scrapbooking #cardmaking #scrapbookingworkshop #cardmakingworkshop #papercrafting #npm #nationalpapercraftingmonth
Download the free instructions, here.
We love National Papercrafting Month, and we absolutely love with our Urban collection. Don’t forget, you only have until January 31st, while supplies last, to get your hands on this go-to classic!

Tuesday, January 21, 2020

Oh My Heart Candy bag...

Each year I go back and forth on whether or not to create handmade Valentine goodies for my kids' classes or just buy the ones at the local big-box store.

Well, THIS YEAR, I might've come up with a GREAT way to give handmade goodies without a lot of hassle.

I'm calling it a "candy bag" but you can just call it EASY (and CUTE)...

----------------------------------
Here's a look at it with the candy inside...you could also do this project as a "tear bag" where you put the candy inside the bag (without the clear bag) and seal up the 4th side then the recipient will tear the paper to open.
--------------------------------------
Here's a look at the Oh My Heart Kit options:

Oh My Heart Paper Packet plus Sticker Sheet

Oh My Heart Kit


Oh My Heart Kit without Stamp Set


Here's a look at the process video...don't forget to SUBSCRIBE, LIKE and sign up for notifications so you don't miss any future process videos!

Monday, January 20, 2020

All Spruced Up with H2H...

HAPPY MONDAY (and Martin Luther King Jr Day) guys! I hope your weekend has been GREAT...I have a 3-day weekend so I'm enjoying my day off (or maybe my sleeping-in if you're reading this in the wee hours of the morning)! 

This week, H2H Challenges is bringing you a wonderful challenge FULL of interpretation! I took the challenge literally, using the NEW Spruced Up Collection from CTMH but I know where a couple of Design Team Members are using it to document "gettin' fancy."


Here's my take on the challenge...in Texas we don't get many "snow days" which is what Spruced Up reminds me of BUT we do get COLD mornings and this layout documents my son and I on one of those COLD mornings heading to his football game.

Here's a look...
--------------------------------
Here are some closeups...
-----------------------------------
I used the January 2020 SOTM, Everyday Magic, again for the little splatters and the tiny heart...and the scalloped edge on the right side (see the 1st photo above).

Here's what the Spruced Up Collection looks like...


Thursday, January 16, 2020

All Around Creativity with CTMH...


shared from ctmh's blog...

All Around Creativity: Adding A Splash of Color


adding-color-to-wooden-wreaths-hero
We’re jumping right into the new year and celebrating National Papercrafting Month with the All Around Creativity special, featuring four gorgeous wreath kits that are only available from Close To My Heart through the end of the month. There are so many different ways to embellish  these beautiful wreaths, so we figured we’d have some fun and share with you four simple ways that we’ve added color to the plywood bases.
Adding color to wood doesn’t need to be super messy or take a huge amount of time. It can be quick, easy, and clean. To start off, we’ll take a peek at one of the easiest wood-coloration techniques. This method uses an Exclusive Inks™ stamp pad and will only take you a few minutes from application until it’s completely dry!
adding-color-to-wooden-wreaths-create
Simply select the ink color you’d like to use and gently swipe the stamp pad over the surface of the wood with quick, dabbing motions, going with the grain. Going with the grain helps you to emphasize the natural beauty of the wood, while also protecting your stamp pad from getting scratched up or caught on the wood. As you’ll see in the video below, we left some of the wood grain visible for a more stained look, but you can make it as light or as dark as you’d like.
To achieve a softer, mottled look, try sponging the ink onto the wood.
adding-color-to-wooden-wreaths-stay-awhile
Cut a Round Sponge into quarters. While gripping the point of one quarter with your fingers, gently load your sponge with ink by pouncing it on your stamp pad. Because the sponge absorbs the ink, it may not look like you have a lot on there, but you’ll have more ink than you think!
Once you’ve got your sponge inked and ready to go, use the same pouncing motion you used on the stamp pad to apply the color to the plywood. The ink will dry lighter than it looks while you apply it. For a darker, richer tone, you will have to apply additional layers of ink.
This next technique uses TriBlend™ markers. When using an alcohol-based marker to color wood, you’ll want to go in the direction of the grain and use a steady hand to achieve even color throughout.
adding-color-to-wooden-wreaths-grateful
Because you have greater control over color distribution when you use this method, you also have more control over the appearance of the colored wood. For instance, if you want a softer, lighter look, use a light hand and don’t go over the same spot too many times. For darker and richer tones, add more color layers to really get the pigment into the wood.
If you’re going for a darker color, don’t jam the marker tip into the wood, as this may damage your marker. Instead, go over the same area of the wood multiple times for color layering and try using a lighter shade of your TriBlend™ marker.
The last technique we’re showcasing today adds a bit of sparkle to your art. Heat embossing! (We went there, and it’s beautiful!)
adding-color-to-wooden-wreaths-be-kind
First, place your wreath over a piece of scratch paper so you can catch any excess embossing powder. Then, begin by rubbing the surface of the wreath with an anti-static pouch. Apply VersaMark™ ink to the wreath, a few sections at a time, using the same pouncing motion you saw in our first technique. While the ink is still wet, sprinkle embossing powder over it, shake off any excess powder onto your scratch paper, and heat set with a heat tool. (Use your scratch paper to easily funnel your excess embossing powder back into its container for future use.)
We absolutely love these wreaths and National Papercrafting Month, because it really gets us thinking outside the box! We can’t wait to see all the different ways you choose to add color to your wreaths.
Remember, you can only get these gorgeous wreath kits until January 31, and if you buy four or more you even get a discount! Make sure to take full advantage of the All Around Creativity special while you still can. 

Wednesday, January 15, 2020

New Product Blog Hop - Jan/Feb 2020...

Happy mid-January (btw...how can that be...ugh)!

So happy to be joining you today with a blog hop featuring NEW PRODUCT from 19 CTMH Consultants. If you're come from Michelle's Blog, you're on the right track...keep on hopping until you get back to where you started! If you're starting here, WELCOME! If you happen to get lost along the way, never fear - you can get a complete list of hoppers {{{here}}}.


I have a layout using a few NEW products from the January - February 2020 Catalog. The paper collection I'm using is Spruced Up and while it SEEMS to be all about winter, I set out to do a layout of a couple of photos from this Summer's Vacation...


 -------------------------------------
Here are some closeups...don't you just LOVE those Spruced Up Wood Shapes! And those little splatters of ink are from the January 2020 SOTM...

 ------------------------------------
And...I used the January 2020 SOTM for this layout, Everyday Magic. I just LOVE this particular sentiment for capturing God's beauty!

 ---------------------------------
I used the NEW Stitched Bracket Thin Cuts to create the focal pieces for my layout...CTMH has started making most of our Thin Cuts in-house and you can tell that the quality of these FAVORITE items of mine has stepped up a notch!

Thanks for stopping by! After you visit Alyson's Blog and see what NEW project she has to share, make sure you come back to check out my process video below...AND don't forget to SUBSCRIBE to my YouTube channel so you won't miss a thing!

Don't forget to stop by your CTMH Consultant's website and pick up some of these FABULOUS new products! If you don't have a Consultant, feel free to shop my website for a chance to win some HOSTESS FREEBIES!


Tuesday, January 14, 2020

Paper Flower Unicorn template with CTMH...

shared from ctmh's blog...

Make Your Very Own Paper Flower Unicorn Wall Décor!

Floral Unicorn Wall #ctmh #closetomyheart #nationalpapercraftingmonth #unicorn #diydecor #cricut #flowermarker #paperflower #paperunicorn #girlsroom #youaregorgeous
If you haven’t gotten down and crafty yet this year, now is the perfect time to start. For our second week celebrating National Papercrafting Month, we created this beautiful, large scale, floral wall décor and are giving you our Design Space fileFREE, to recreate this very same project at home!
Floral Unicorn Wall #ctmh #closetomyheart #nationalpapercraftingmonth #unicorn #diydecor #cricut #flowermarker #paperflower #paperunicorn #girlsroom #youaregorgeous
(Click on the individual images for a closer look!)
In order to keep things simple, we manipulated shapes from just one of our Cricut® collections while designing our arrangement. If you don’t own the Cricut® Flower Market Collection, get one HERE.
We don’t want any of our readers to feel left out. For those of you who do not use Cricut®, a few months ago, our very own Jill Broadbent visited Studio5 and shared how to make similar large paper flowers without a cutting machine.
Download the PDF below for a template to make large paper flowers without a cutting machine.
Every little (and grownup) girl deserves to know just how gorgeous she is! Happy crafting!
Make sure to stop by next week to see what we’ve got in store for a boy’s space using our Urban collection!